Enchanted Forest Path
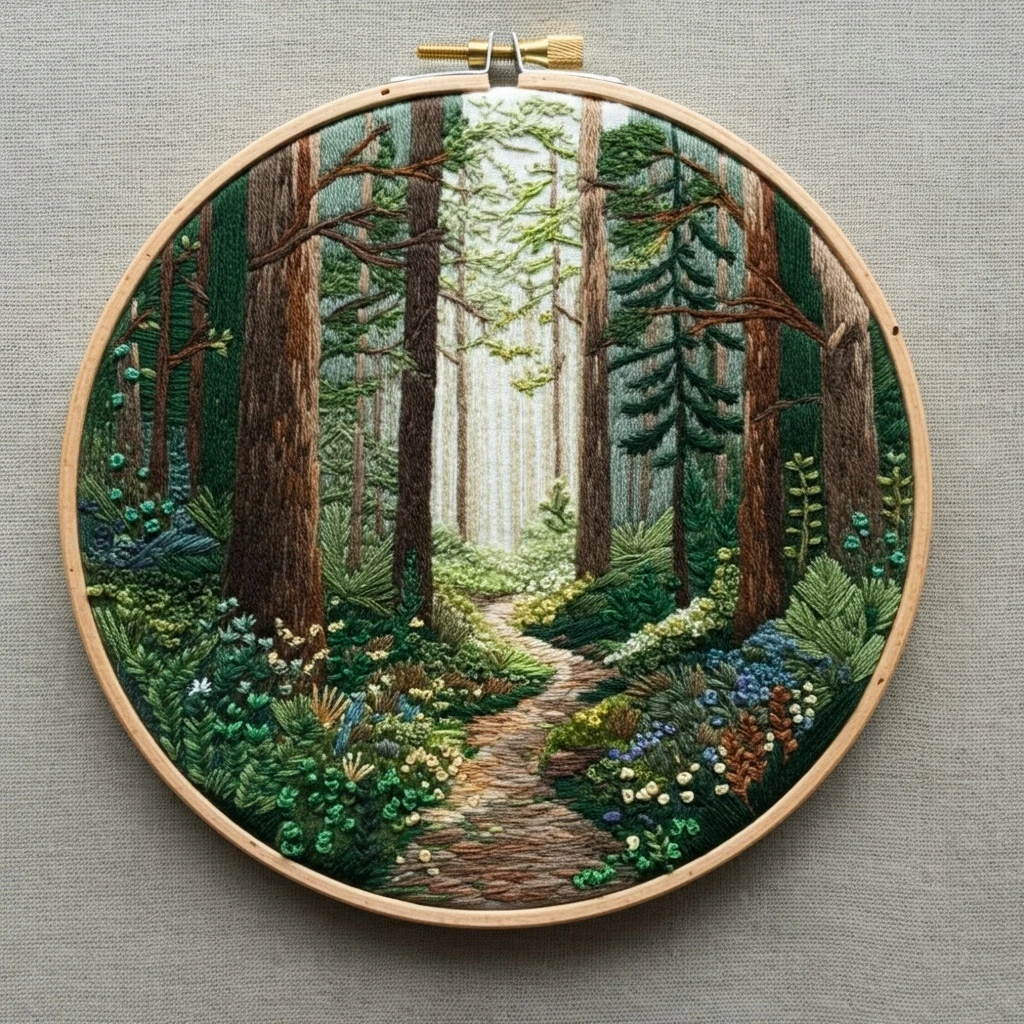
A practical embroidery guide for a magical woodland path: deep forest greens, warm bark, mossy ground texture, a softly lit trail, and small golden accents that guide the eye into the clearing.
Design read
The design is best treated as a layered landscape: a path or clearing leads inward, surrounded by trees, foliage, moss, and little forest details. The strongest effect comes from darker greens framing the sides and lighter cream-gold tones pulling the viewer down the trail.
Stitch the background foliage and tree structure first, then build the path from darker edges toward a lighter center. Save small glow dots, flowers, and final outlines for the last pass.
Likely DMC Color Palette
These DMC colors are chosen for the visible forest-path theme: shadowy tree trunks, layered greens, warm earth, muted path stones, and small enchanted highlights.
Stitching Suggestions
| Element | Stitch Type | Notes |
|---|---|---|
| Forest path | Long-and-short stitch, split stitch, seed stitch | Shade from darker edges in 801/838 toward the lighter center using 738, 644, and tiny touches of 729. |
| Tree trunks and roots | Stem stitch, split stitch, whipped backstitch | Follow the vertical curve of each trunk. Add dark grooves with 3371 after the base bark is complete. |
| Canopy and dense foliage | Fishbone stitch, detached chain, straight stitch | Use 3363 behind, 3364 and 3052 in the middle, then 3051/734 for broken leaf highlights. |
| Ferns and low plants | Fly stitch, feather stitch, straight stitch | Use one strand for fine fern fronds near the path so the details stay delicate. |
| Mossy ground texture | French knots, colonial knots, seed stitch | Cluster knots in 3363 and 3052 along path edges, then add lighter knots on top to make the moss plush. |
| Stones or path pebbles | Satin stitch, split stitch, tiny straight stitch | Use 644 and 738 with darker lower edges. Avoid outlining every stone; selective shadows look more natural. |
| Fireflies, flowers, or glow dots | French knots, seed stitch, single straight stitches | Use 729, 725, and 3865 in tiny amounts. Place them last so the glow remains clean and bright. |
| Fine outlines | One-strand backstitch or split stitch | Outline only where shapes disappear into similar colors. Broken outlines feel more organic than continuous heavy borders. |
Thread Count, Blending & Shading Guidance
Path perspective
Use darker, slightly wider stitches near the front of the path and lighter, shorter stitches toward the distance. This helps the trail recede into the forest.
Green blending
Blend one strand of 3364 with one strand of 3052 for natural foliage. Use 3051 or 734 only on the top edges and tips.
Bark shading
Use 801 as the base, 3371 in crevices, and 975 in tiny ridges. Directional stitching gives trunks shape without needing heavy outlines.
Glow control
Keep 725 and 3865 very limited. A few small bright stitches along the center of the path will feel more magical than a solid yellow trail.
Texture balance
Use smooth stitches on the trail, raised knots in moss, and airy fly stitches for ferns. This contrast makes the path feel walkable and the forest feel alive.
Best strand counts
Use 2 strands for most fills, 3 strands for dense foreground moss if needed, and 1 strand for ferns, distant branches, path stones, and glow specks.
Outlining, Shading & Texture Suggestions
Outlining details
- Use 3371 only on the darkest bark and root edges.
- Use 801 or 838 for softer path outlines.
- Break outlines around leaves so the foliage stays natural.
Shading guidance
- Make the path center the lightest area to pull the eye inward.
- Keep side foliage darker to frame the trail.
- Shade tree trunks with curved stitches rather than straight horizontal bands.
Texture ideas
- French knots create moss, berries, and tiny flowers.
- Feather stitch works well for soft grasses along the trail.
- Seed stitch in muted browns adds pebbled path texture.
Beginner-friendly shortcuts
- Use only three greens if the full palette feels complex.
- Stitch the path with split stitch rows instead of long-and-short shading.
- Add small highlights last after checking the overall balance.
Where to Start
Encouraging finish
This forest path will look most dimensional when the trail stays softly lit and the surrounding greens frame it like a doorway. Work in layers from background to foreground, keep thread lengths short for clean foliage, and press from the back over a towel so raised moss and knot texture remain intact.


