
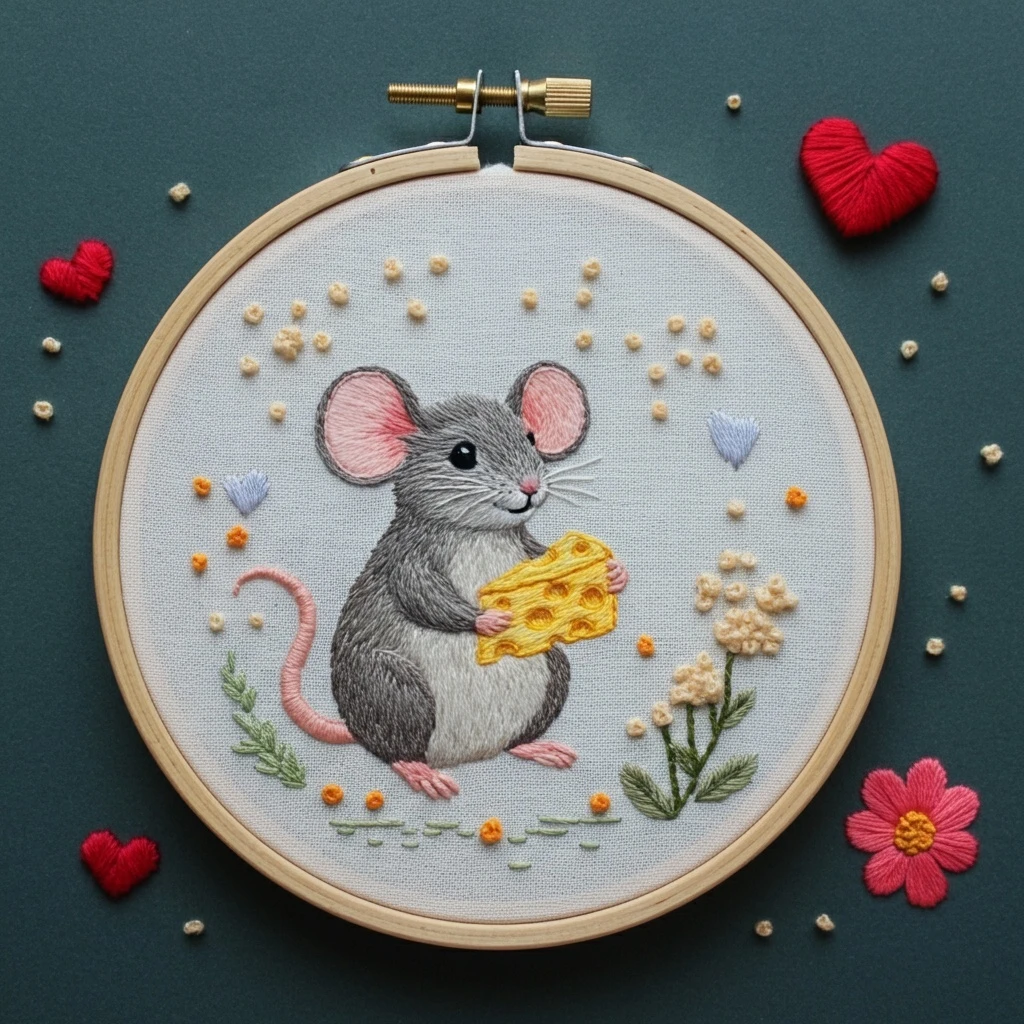
Charming Hand Embroidered Mouse with Cheese
This cozy miniature design pairs a sweet little mouse with a bright wedge of cheese. The best stitched version keeps the mouse soft and delicate, with rounded gray fur, pink ear and nose details, fine whiskers, tiny paws, and a cheerful golden cheese wedge with darker holes and warm shadowing for dimension.
Polished DMC Color Palette
This palette combines soft mouse grays with warm cheese yellows and small pink facial accents. Keep the mouse understated and plush, then use the saturated yellows and golden browns to make the cheese the cheerful focal prop.
Stitch Map by Design Element
Thread Count & Blending Guide
Fine details
Use 1 strand for whiskers, eye, nostril, tiny paws, fur strokes, cheese-hole outlines, and final corrections. One strand is essential for keeping the small mouse charming and delicate.
Main fills
Use 2 strands for the mouse body, ears, tail, cheese wedge, and any larger accent shapes. Two strands give smooth coverage without making the miniature design bulky.
Raised details
Use 2–3 strands for the nose, cheese holes, or tiny crumb knots. Use three strands sparingly so the face and cheese details stay proportional.
Shading, Outlining & Texture Suggestions
Soft mouse shape
- Keep the top of the head, cheek, and back lighter than the belly and paws.
- Follow the curve of the body with stitch direction to make the mouse look rounded.
- Use dark gray sparingly around the face so the expression stays gentle.
- Add fur texture after the base fill, using short broken stitches only.
Cheese dimension
- Treat each side of the cheese wedge as a different plane: bright front, golden side, darker underside.
- Shade cheese holes darker on one edge and lighter on the opposite edge for a recessed look.
- Add a few 746 stitches on the top edge to suggest shine.
- Use warm browns only in small amounts so the cheese remains bright and playful.
Tiny facial details
- Use one strand and very short stitches for eye, nose, mouth, and whiskers.
- Place the cheek blush after the gray fill so it sits softly on top.
- Make whiskers slightly uneven in length for a natural storybook look.
- Step back before adding extra dark stitches; small animals can become overoutlined quickly.
Outlining approach
- Outline after filling so the mouse silhouette and cheese wedge stay crisp.
- Use 414 or 413 for the mouse outline instead of black.
- Use 783 or 977 for cheese outlines so the wedge remains warm.
- Use split stitch for curves and back stitch for small straight cheese edges.
Beginner-Friendly Stitching Order
- Transfer lightly: mark the mouse outline, ears, eye, nose, whisker roots, cheese wedge, cheese holes, and any ground shadow. Keep face markings very fine.
- Stitch the mouse body: fill the main gray shape first, adding shadows and highlights before tiny facial details.
- Add ears, paws, and tail: work pink ear centers and small paw details with one or two strands.
- Stitch the cheese: fill the wedge planes, then add darker holes and bright top highlights.
- Add face details: stitch the eye, nose, cheek blush, and whiskers carefully with one strand.
- Finish with texture: add sparse fur strokes, cheese crumbs, ground shadow, and final outline corrections last.
Practical Tips for a Clean Finish
Fabric & hoop
Warm cream cotton, linen, or cotton-linen suits the cozy mouse-and-cheese palette. Keep the hoop drum-tight so small satin stitches, whiskers, and cheese edges stay neat.
Needle choice
Use a sharp embroidery needle size 7–9 for one- and two-strand work. For tiny knots or padded cheese holes, use a slightly larger needle only if needed.
Keeping the scale cute
Small animals look best with fewer, cleaner details. Choose one tiny eye, a small pink nose, and a few whiskers rather than overworking the face.
Preventing show-through
Do not carry dark gray floss behind pale muzzle or cheese highlight areas. End dark threads cleanly and restart nearby so the light sections remain fresh.


