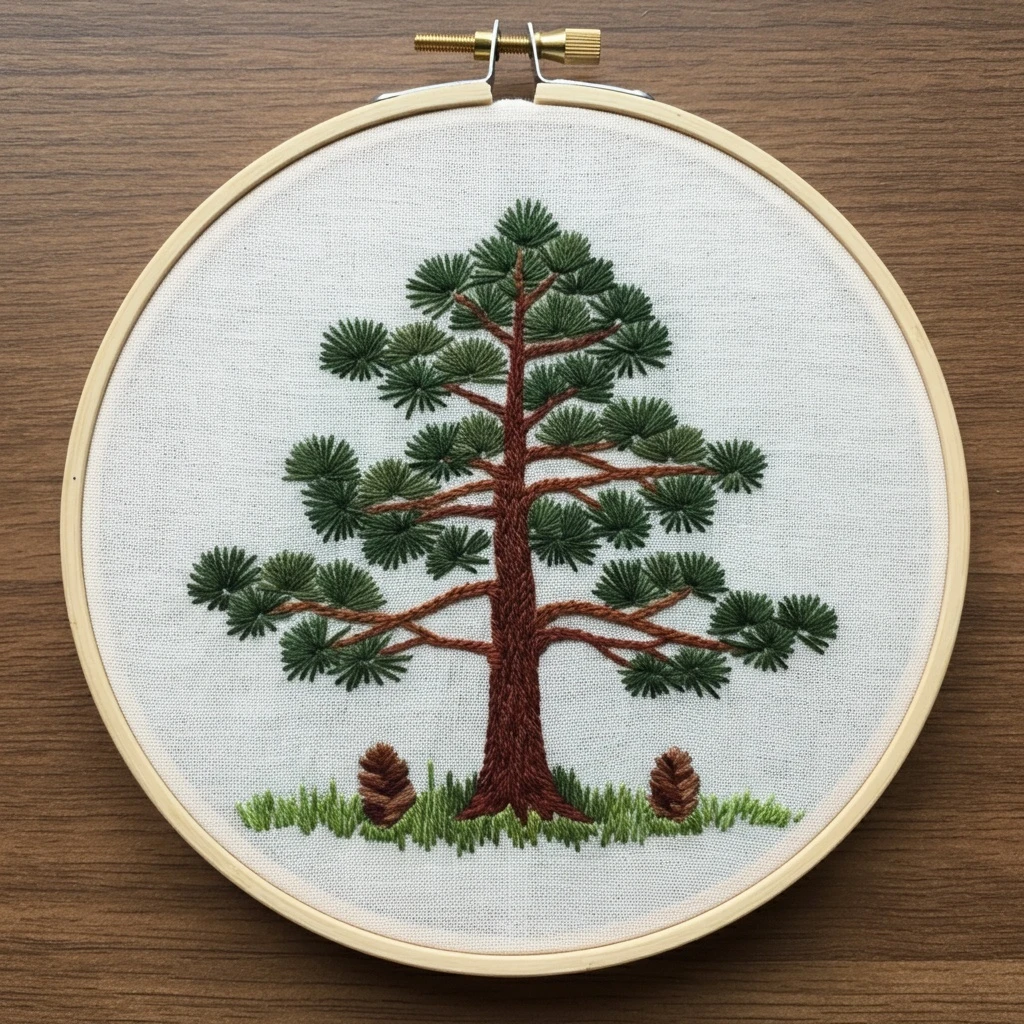
Embroidered Pine Tree And Pinecones
This pine tree and pinecone design is a natural woodland study: layered evergreen needles, sturdy brown cones, muted branch shadows, and small dry highlights. The most polished embroidery comes from directional needle stitches, textured cone scales, and a restrained forest palette that separates deep pine greens from warm bark browns without making the piece look flat.

Project snapshot
Plan the piece as a mix of soft evergreen movement and raised cone texture: branches first, needles second, pinecone scale details last.
Suggested DMC color palette
These DMC choices balance cool evergreen needles, olive shadows, warm pinecone scales, and pale dry highlights.
Recommended stitches by area
- Pine needles: Use long, fine straight stitches radiating from the branch. Vary length and angle to keep the needles natural.
- Needle clusters: Use fly stitch or narrow fishbone stitch for fuller sprays, especially near the ends of branches.
- Branches and stems: Work stem stitch or split stitch in brown-green tones, following the curve of the twig before adding needles over it.
- Pinecone scales: Use detached chain, short satin stitches, or stacked fishbone stitches to create layered scale texture.
- Cone highlights: Add small straight stitches in 435, 739, or 3865 only on the lifted scale tips.
- Deep cone gaps: Use tiny backstitches or short satin shadows in 801, 898, or 3031 to separate scale layers.
Thread-count guidance
- 1 strand: individual pine needles, dry highlights, fine branch lines, and subtle cone cracks.
- 2 strands: most branch outlines, medium needles, and small pinecone scale fills.
- 3 strands: larger cone scale areas, dense needle clumps, and areas that need fuller coverage.
- 4 strands: optional for raised pinecone scale tips or textured knots on a larger pattern.
- Best balance: keep needles thinner than pinecone scales so the tree stays airy while the cones feel solid.
Blending ideas
The design benefits from layered natural color rather than bright contrast. Let the greens shift from deep shadow to dry tip highlights, and let the cones move from dark inner gaps to tan scale edges.
- For pine needles, blend 520 → 3051 → 3362 → 3363 → 3364, placing the lightest green on the outer tips.
- For fresh growth, add small touches of 3347 only at the ends of selected needles.
- For dry or shadowed needles, mix in 3011 and 642 to create a realistic muted woodland tone.
- For pinecones, layer 898 → 801 → 433 → 434 → 435 → 739, keeping dark shades in the inner scale gaps.
- For frosty or wintery versions, add just a few 3865 stitches on the upper cone tips and needle edges.
Outlining and definition
Natural botanical embroidery looks best when outlines are selective. Use dark browns and green-grays instead of harsh black.
- Use 3031 or 898 for the strongest pinecone definition and deep scale separations.
- Use 3051 or 520 for branch and needle shadows so the greens remain natural.
- Outline only the outer edge of pinecones and the deepest scale layers; too many outlines can make the cone look cartoonish.
- Use broken backstitch for twigs and cone edges, leaving tiny gaps to preserve an organic botanical feel.
- For needle sprays, avoid outlining the entire cluster; individual straight stitches create the linework themselves.
Shading and texture guide
| Area | Color handling | Texture suggestion |
|---|---|---|
| Pine needles | Use darker greens near the branch and lighter greens toward the outer tips, with occasional olive touches for dryness. | Long straight stitches in varied lengths keep the needles fine and natural. |
| Branch stems | Use 433 and 3031 for warm bark, then soften with 3051 where needles overlap the twig. | Stem stitch follows curves beautifully and gives sturdy botanical structure. |
| Pinecone body | Start with 898 or 801 in the deepest gaps, build scales with 433 and 434, then touch 435 or 739 on raised tips. | Detached chain or short satin scale shapes create a layered cone surface. |
| Cone tips | Highlight only the upper edges with 435, 739, or a tiny 3865 stitch for frost or light. | Small short stitches are better than long highlights; pinecone tips should feel chipped and uneven. |
| Shadow under cones | Use 520, 3051, and 801 to darken the area behind hanging cones and under dense branches. | Short overlapping stitches help tuck the cones naturally into the branch cluster. |
| Dry botanical accents | Use 3011 and 642 for muted needles, dry stems, or background texture without adding new bright colors. | Use sparse seed stitches or tiny straight stitches for a rustic woodland finish. |
Suggested stitching order
Beginner-friendly practical tips
- Use a sharp needle for the fine pine needles; it helps place each straight stitch accurately.
- Keep needle stitches varied. Perfectly identical green lines can look stiff instead of natural.
- Do not fill every space between needles. Open fabric gaps make the branch feel lighter and more realistic.
- For pinecones, stitch one cone scale row at a time so the overlap direction stays consistent.
- If the pinecone looks flat, deepen the inner gaps with 801 or 898 before adding more highlights.
- Use shorter thread lengths for browns; textured cone work can fray floss quickly.
- Step back often. The pine tree should read as soft evergreen texture, while the cones should read as denser focal details.


