
DMC palette & hand embroidery guide
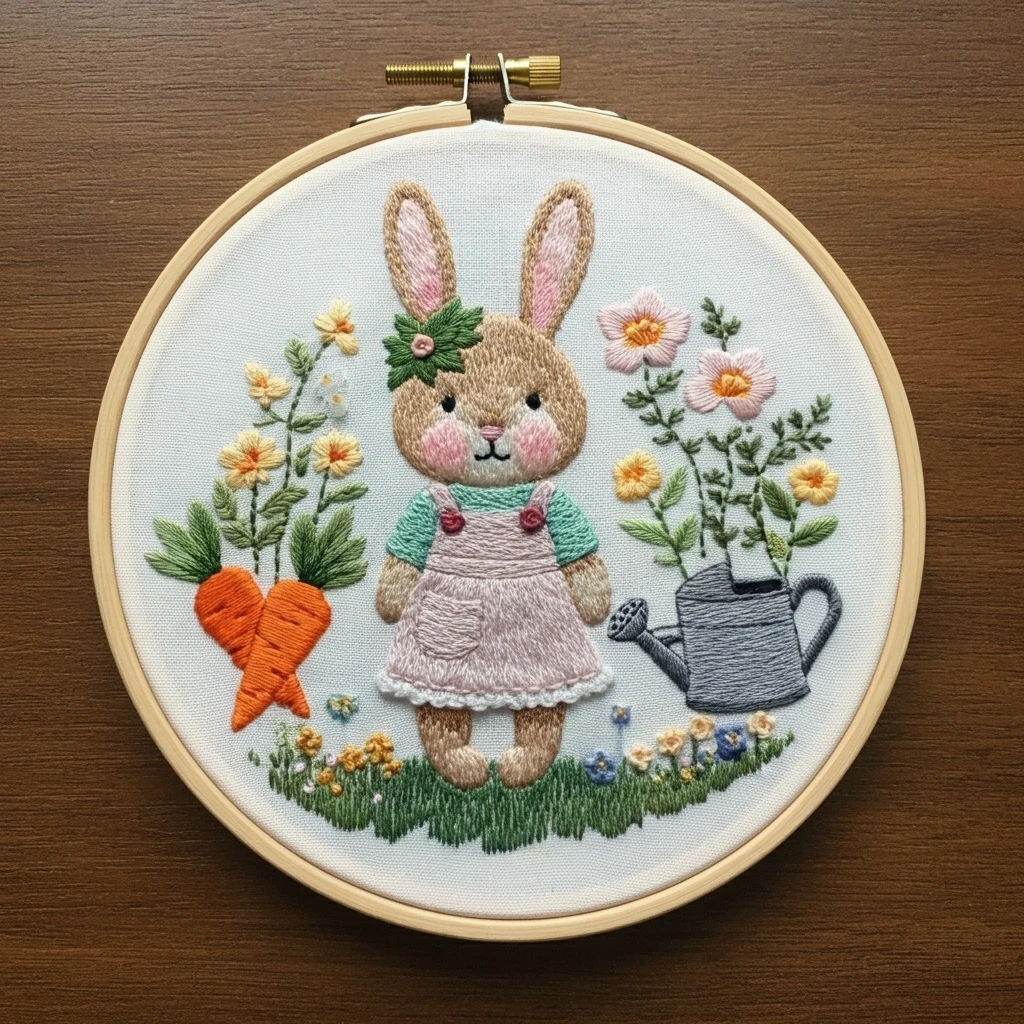
Hand Embroidered Bunny in a Garden Hoop
A soft spring hoop with a plush brown bunny, blush ears and cheeks, minty sweater, pale pinafore, carrot patch, watering can, daisies, pink blossoms, tiny blue flowers, and a grassy stitched base. The palette leans warm and beginner-friendly: gentle browns for fur, clear garden greens, cheerful orange carrots, buttery yellows, and dusty pinks for the sweetest details.
Use the reference as a color and texture guide: stitch the bunny first, then add clothing, garden tools, stems, flowers, carrots, and final outlines.
Suggested DMC Color Palette
The design works best with soft natural contrast rather than harsh outlines. Keep the bunny fluffy with broken directional stitches, let the greens vary by plant type, and reserve the brightest orange and yellow for the carrots and flower centers.
Stitch Map by Design Area
Bunny fur
Use 1–2 strands of 3863, 3864, and 3862 in short-and-long stitch. Keep stitches slightly uneven and directional: vertical on the face, curved along ears, and downward on paws. Add a few single-strand flyaway stitches last for fluff.
Face details
Make eyes with one-strand satin dots or tiny padded satin in DMC 310. Use split stitch for the mouth, then add a small pink satin nose with 225. Cheeks should be softly filled, not heavily outlined.
Clothing
For the mint sweater, use split stitch rows that follow the sleeve direction. Work the pinafore in 818 with 1–2 strands, mixing long-and-short stitch for folds and backstitch for straps and hem seams.
Carrots and tops
Fill carrots with angled satin or fishbone stitch in 740. Add 900 in short curved lines for grooves. Stitch leafy tops with straight stitches and lazy daisy leaves in 895, 3011, and 3012.
Flowers and stems
Use stem stitch for flower stalks, lazy daisy for petals, and French knots for centers. Keep small blooms delicate with one strand so they do not compete with the bunny.
Watering can
Fill with directional satin or split stitch in 414, then add 415 highlight lines across the body, spout, rim, and handle. A few backstitch contour lines make the can read as metal.
Thread Count & Blending Guide
| Area | Suggested strands | Why it works |
|---|---|---|
| Bunny face and body | 2 strands for fill; 1 strand for final fur strokes | Two strands cover smoothly, while single-strand accents create believable soft texture. |
| Inner ears and cheeks | 1 strand 818 + 1 strand 225 blended, or 1 strand alone for pale fabric | Blending keeps the pink gentle and prevents the blush from looking like solid circles. |
| Sweater and pinafore | 2 strands for main fill; 1 strand for seam lines | Gives clothing a slightly raised, cozy feel while keeping edges tidy. |
| Stems, leaf veins, and grass | 1 strand for fine lines; 2 strands for foreground grass clumps | Thin background stems stay airy; thicker base grass grounds the hoop. |
| Carrots | 2–3 strands for saturated fill; 1 strand for grooves | The orange should be bold, but the grooves should remain crisp and controlled. |
| Tiny flowers | 1 strand petals; 2 wraps for French knots | Small flowers stay dainty and proportional to the bunny. |
Outlining, Shading & Texture Tips
Outlining
Use split stitch or whipped backstitch for the bunny outline in 3862, but leave some breaks around cheeks and ears so the fur feels soft. Use one-strand 310 only for facial features.
Shading
Place darker fur under the ears, under the chin, along the side of the body, and at the paws. Place lighter stitches on the forehead, ear tips, and round cheek areas.
Texture
Vary stitch length on fur and grass. Keep clothing more orderly, with rows or gentle diagonal fills, so the viewer can tell fabric, fur, flowers, and metal apart.
Beginner-Friendly Stitching Order
- Transfer the full design lightly; mark only essential facial features and main shapes.
- Stitch the bunny fur first, starting with mid-tone 3863 and adding shadows/highlights while the direction is easy to see.
- Add the face, cheeks, ears, sweater, pinafore, and tiny buttons before surrounding garden details.
- Work large garden elements next: carrots, watering can, and main leaves.
- Finish with tiny flowers, grass tufts, French knots, and one-strand accent lines.
- Press from the back on a towel to protect raised knots and fluffy fur stitches.
Practical Finishing Notes
Fabric choice
A pale linen or cotton-linen blend in ivory, oatmeal, or very light mint makes the bunny and garden colors glow. Avoid dark fabric unless you strengthen the pale pinks and yellows.
Needles and tension
Use a size 7–9 embroidery needle for most work. Keep tension relaxed on satin stitches and fur strokes; tight stitches can pucker the bunny face and distort small flowers.
Hoop handling
Move your hoop if needed rather than stretching across long areas. Re-tighten fabric before satin filling carrots or the watering can so the edges stay smooth.
Optional sparkle
For a delicate garden highlight, add a single strand of light metallic or DMC Diamant to a few flower centers or watering-can highlights—keep it minimal so the soft storybook look remains.


