
DMC Palette & Stitching Notes
Realistic Ripe Peaches and Slice
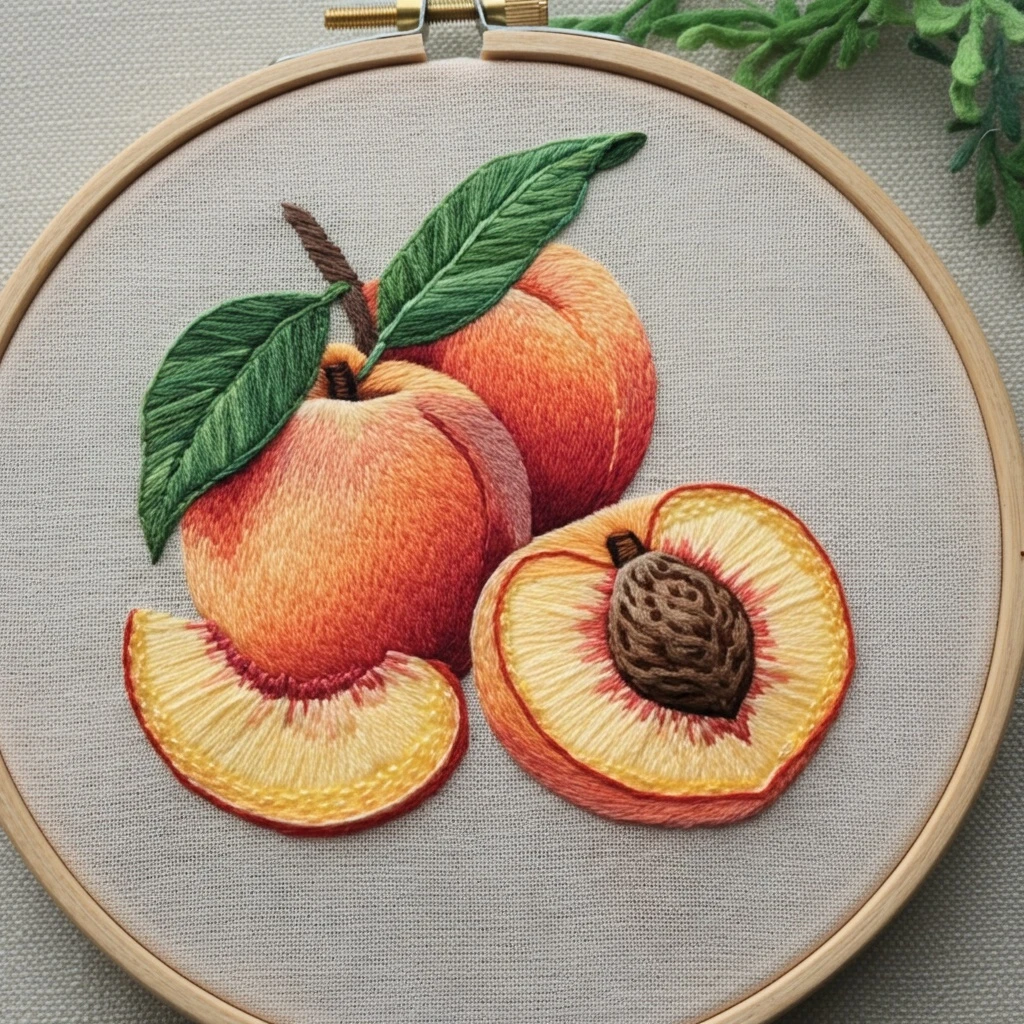
A warm, dimensional fruit study with two whole peaches, a crescent slice, a cut half with textured stone, deep green leaves, and natural linen showing through. The embroidery relies on long directional satin, soft thread painting, narrow red-orange outlines, and careful yellow-to-coral blending to make the peaches look juicy and rounded.
Color read from the design
The reference features ripe peach skin in golden apricot, orange, coral red, and deeper russet shadow. The cut surfaces are pale butter yellow with warm golden rays and pink-red blush near the skin. Leaves are dark forest green with lighter central veins, while the stems and peach stone use layered browns.
Stitch map and technique suggestions
Whole peach skin
Use long-and-short stitch as the main fill. Start with 2 strands for the first color blocking, then refine with 1 strand to feather DMC 945, 742, 3853, 722, 351, and 918 into rounded bands. Follow the fruit curve from the stem area down toward the lower shadow so the threads create volume.
Cut peach flesh
Work narrow satin or long straight stitches radiating from the peel toward the center. Keep DMC 3823 and 743 brightest near the middle, add 742 near the outer flesh, and place small 351/918 red-pink stitches along the pit and peel edges for the real ripe-fruit blush.
Peel outlines
Use split stitch or whipped backstitch with 1 strand of 351, then touch the darkest lower edge with 918 or 814. Avoid a heavy uniform outline; taper the line by switching to lighter coral on the lit upper rim.
Leaves and veins
Fill leaves with fishbone stitch or angled long-and-short. Use 895 on the lower edge, 469 as the body, and 3052 for the central vein. A final single-strand stem stitch vein gives the leaves the crisp, realistic structure seen in the reference.
Stem and pit
For the stem, use short slanted satin or wrapped stem stitch in 898 and 3862. For the stone, build a textured oval with padded satin underneath, then add irregular chain, seed, and couching stitches in 898, 3862, and a few lighter tan stitches.
Background and hoop finish
Leave the linen mostly open. The realistic effect depends on clean negative space, a taut fabric surface, and tidy thread endings. Press from the back over a towel so the raised pit and satin highlights are not flattened.
Thread-count and blending guidance
1 strand
Best for final fur-like peach fuzz, fine highlight strokes, subtle blush feathering, leaf veins, pit cracks, and the thinnest red outline around the slices.
2 strands
Use for most long-and-short fill on fruit skin and leaves. It gives smooth coverage while still letting you blend colors without bulky ridges.
3 strands
Reserve for padded areas only: the central pit, the darkest stem, or a slightly raised peel rim. Too many strands on the peach flesh can hide the delicate direction changes.
Beginner-friendly stitching order
Practical tips for a polished result
- Use a sharp embroidery needle for thread painting. It splits existing stitches cleanly when you feather one color into another.
- Shorten the working thread to about 14–16 inches for pale yellows and peaches; long lengths become fuzzy and dull quickly.
- Keep peach highlights sparse. Let small slivers of light color sit on top of the orange fields instead of covering every area evenly.
- Angle each stitch toward form. Whole fruit curves downward; slice flesh radiates inward; leaf stitches follow the vein. Direction is as important as color.
- Test dark reds on scrap fabric. DMC 814 and 918 are powerful; use single strands and tiny stitches so they read as depth, not black outlines.
- For extra dimension, pad the pit only. A little felt or under-stitching below the stone makes the sliced half dimensional while keeping the fruit skin smooth.


