
Crochet Style Bunny Duo
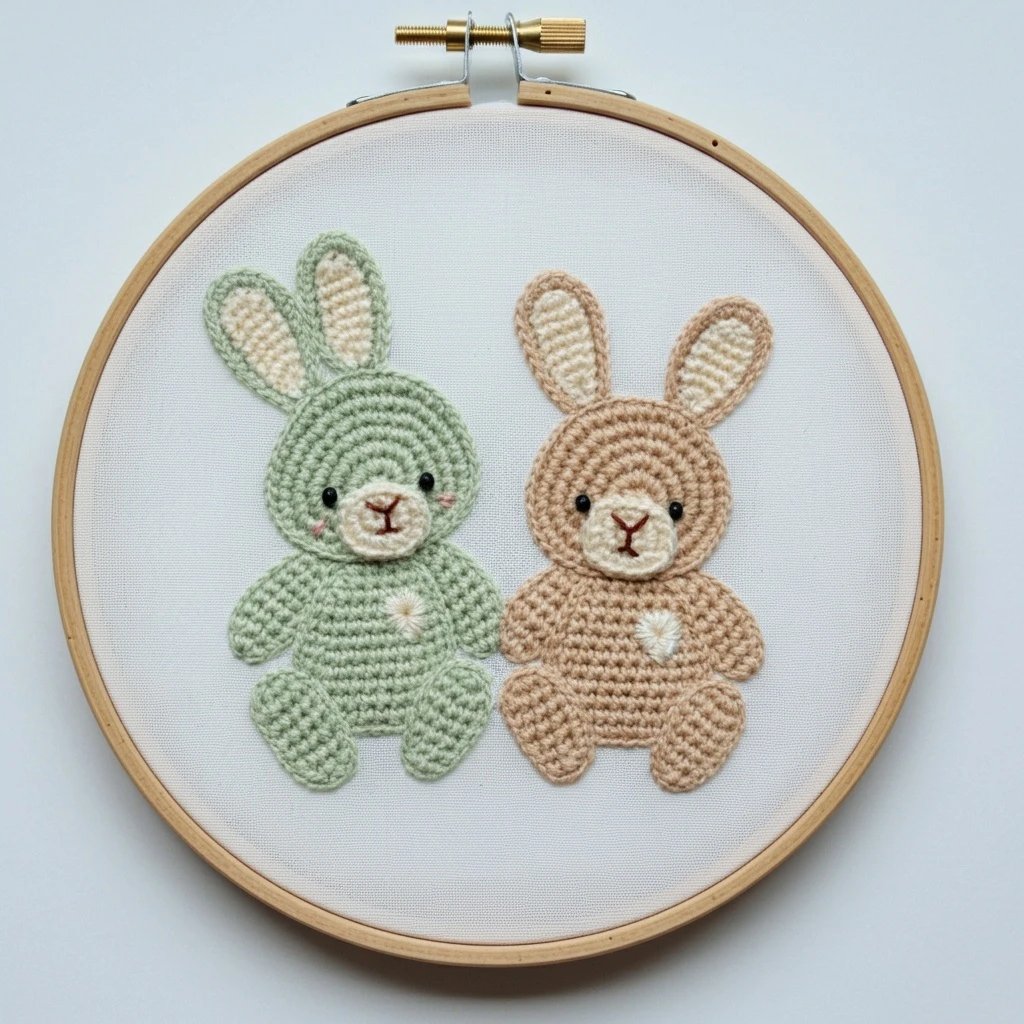
A soft, toy-like embroidery guide for two amigurumi-inspired bunnies: one sage green and one warm beige, with cream inner ears and muzzles, black bead-like eyes, tiny brown facial stitches, pink cheeks, and fluffy cream tails.
Design read
The reference shows a pair of rounded bunny figures stitched inside a wooden hoop on pale fabric. The left bunny is a gentle sage green; the right bunny is a caramel-beige tan. Both have cream inner ears and oval muzzles, glossy black eyes, small brown nose-and-mouth lines, and subtle pink cheek marks. The bodies are built from visible crochet-like ridges, so the embroidery should prioritize rounded texture and repeated curved rows rather than flat satin filling.
Core DMC palette
Stitch map
| Area | Suggested stitches | Thread guidance |
|---|---|---|
| Crochet ridges | Curved chain stitch, reverse chain, stem stitch rows, or whipped backstitch laid in nested arcs. | Use 3 strands for plush ridges; reduce to 2 strands around faces and small paws. |
| Heads and bodies | Work concentric curved rows from the center outward, following the rounded amigurumi shape. | Green bunny: 522 with occasional 524 rows. Tan bunny: 3863 with 3862 on shadow rows. |
| Inner ears | Short chain rows, seed stitch, or padded satin stitch inside the outer ear outline. | Use 2 strands 739; add 3865 only along the center of each inner ear for a soft highlight. |
| Muzzles | Small oval satin stitch or closely packed split stitch, then facial lines over the top. | Use 2 strands 739 for the fill and 1 strand 838 for nose and mouth details. |
| Eyes | French knots, colonial knots, or tiny satin dots. Add a minuscule white stitch for sparkle. | Use 2 strands 310; keep both eyes the same size before adding any highlight. |
| Tails and chest fluff | Turkey work trimmed short, clustered French knots, or loose seed stitches for fluffy texture. | Use 739 mixed with 3865; 3 strands gives the best plush effect. |
| Cheeks | Two or three tiny straight stitches, or one loose satin dash. | Use 1 strand 3713 so the blush stays delicate and childlike. |
Thread-count guidance
- 3 strands: main crochet-style chain rows on the head, body, arms, and feet.
- 2 strands: ear interiors, muzzles, smaller edge rows, and tighter curves near the face.
- 1 strand: facial outlines, mouth branches, cheek dashes, and any final correction lines.
- 4 strands only if needed: for extra raised tails or a bolder amigurumi texture on heavier fabric.
Blending & shading ideas
To keep the bunnies dimensional without losing the crochet look, shade by changing entire rows rather than randomly mixing individual stitches. On the sage bunny, place DMC 524 along the lower curve of the head, under the arms, and around the feet. On the tan bunny, place DMC 3862 under the ears, at the sides of the body, and along the lower paws.
- Blend one strand 522 + one strand 524 for soft transitions on the green bunny’s cheeks and belly.
- Blend one strand 3863 + one strand 3862 for the tan bunny’s outer ear rims and side curves.
- Use 739 + 3865 together on tails for a fluffy cream highlight that still feels warm.
Outlining details
Outline only after the raised fill rows are complete. Use stem stitch or split stitch around the outer ears, paws, and body edges. Keep the outline close in color to the fill rather than using dark brown everywhere: DMC 524 for the sage bunny, DMC 3862 for the tan bunny, and DMC 838 only for the nose and mouth.
For a cleaner toy-like finish, stitch the outer silhouette with the same direction and tension on both bunnies so they read as a matching pair.
Texture suggestions
- Crochet rows: chain stitch gives the closest looped look. Keep each row snug but not tight.
- Plush tails: use turkey work if you enjoy trimming, or French knots for a simpler beginner option.
- Rounded feet: use short curved stem-stitch rows that follow the oval shape rather than straight horizontal bands.
- Ear depth: outline the outer ears first, then fill the cream centers with smaller nested rows.
Beginner-friendly tips
- Draw directional guide lines inside each bunny so the crochet rows stay evenly spaced.
- Start with the larger body shapes before the ears, face, cheeks, and tails.
- Keep facial details tiny; oversized eyes or nose stitches quickly change the expression.
- Use a hoop stand or keep the fabric drum-tight, because raised chain rows can pucker loose fabric.
- When ending threads, weave under the back of similar-colored stitches instead of carrying dark floss behind cream areas.
Suggested stitching order
- Transfer the bunny outlines and add light curved guide marks for the crochet rows.
- Stitch the sage bunny’s body and head with DMC 522, adding 524 shaded rows as you go.
- Stitch the tan bunny’s body and head with DMC 3863, using 3862 for the shaded side rows.
- Fill the arms, feet, and ears, keeping the row direction consistent with each rounded form.
- Add cream inner ears, muzzles, tails, and chest fluff with DMC 739 and 3865.
- Place the black eyes carefully and compare both faces before knotting off.
- Stitch the brown noses and mouths with a single strand for a neat toy expression.
- Add blush last, then steam from the back over a towel without flattening raised texture.


