
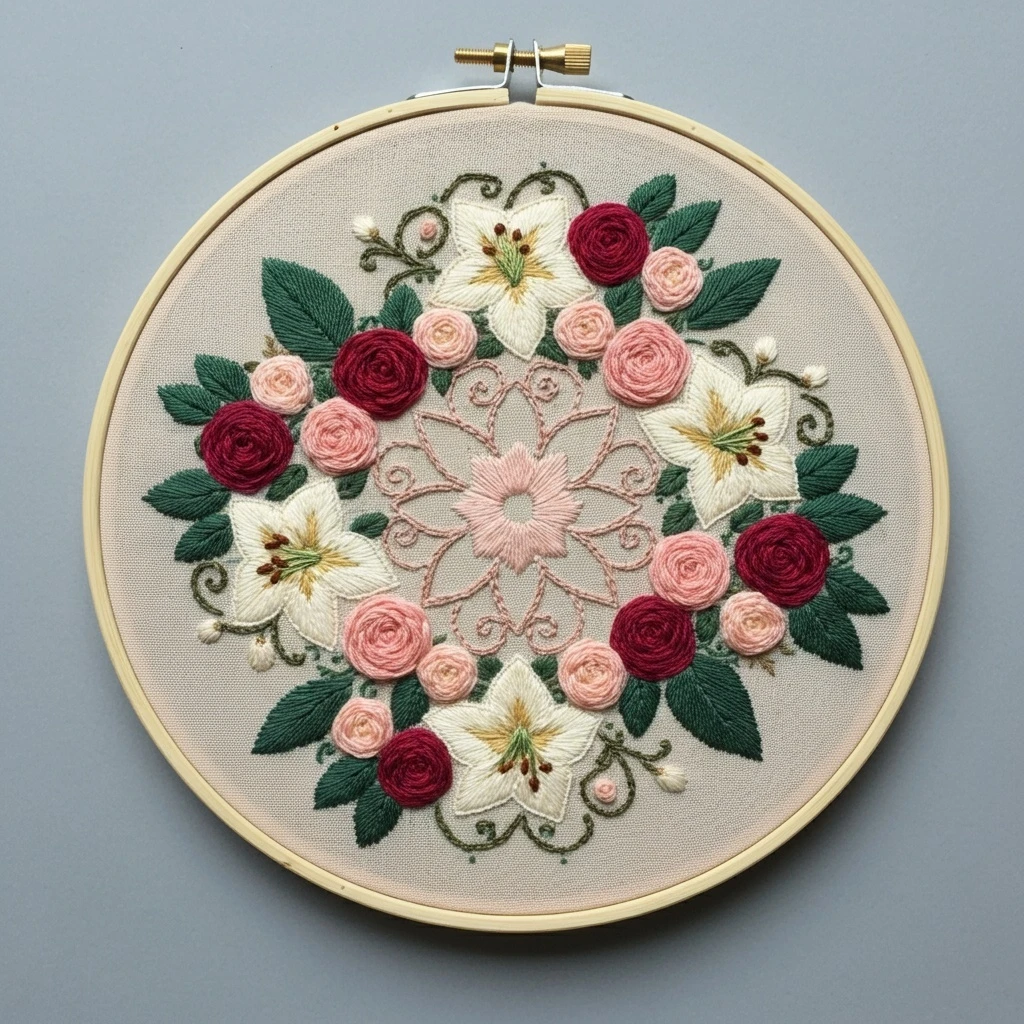
Classic Floral Wreath
This classic floral wreath design is centered on a graceful circular arrangement of traditional blooms, leafy sprigs, buds, and delicate filler flowers. The embroidery should feel balanced and elegant: soft pink and rose flowers, gentle coral accents, warm yellow centers, muted sage greenery, and a clean open center that keeps the wreath airy and polished.
Polished DMC Color Palette
This palette keeps the wreath timeless: blush pinks and rose tones for classic flowers, coral for warmth, yellow-gold for centers, lavender and blue for small accents, and green-gray foliage to hold the circular composition together.
Stitch Map by Design Element
Thread Count & Blending Guide
Fine detail
Use 1 strand for tiny stems, petal veins, filler sprigs, small buds, fine outlines, and final highlight stitches. One strand keeps the circular wreath airy and refined.
Main flowers and leaves
Use 2 strands for focal petals, leaves, main stems, wreath framework, and larger buds. Two strands gives smooth coverage without adding too much bulk.
Raised centers
Use 2–3 strands for flower centers, berry knots, and textured filler dots. Reserve three strands for focal centers only so the wreath remains balanced.
Shading, Outlining & Texture Suggestions
Balanced wreath composition
- Lightly mark the circle before stitching so the wreath stays symmetrical.
- Place larger flowers at balanced intervals, then fill gaps with leaves and small blossoms.
- Keep the center open and clean so the floral circle reads clearly.
- Repeat each main color in at least two places around the wreath.
Classic petal depth
- Use darker shades near flower centers and under overlapping petals.
- Use pale pink, cream, or coral-light stitches on petal tips.
- Stitch petals outward from the center for natural movement.
- Outline only selected petal overlaps, not every petal edge.
Greenery movement
- Angle leaves and stems along the circular flow of the wreath.
- Use darker greens inside and behind flowers; lighter greens on outer sprigs.
- Vary leaf sizes so the greenery looks natural and not patterned.
- Leave small open spaces between clusters to avoid a crowded ring.
Outlining approach
- Use matching darker flower shades for petals and green-gray for leaves.
- Avoid harsh black outlines; classic wreaths look best with soft definition.
- Use split stitch for flower curves and stem stitch for circular stems.
- Add final outlines after fills but before the last knots and white highlights.
Beginner-Friendly Stitching Order
- Mark the circle: lightly draw the wreath guide and place the largest flower groups first. Keep tiny filler dots and buds for freehand placement later.
- Stitch the main stems: follow the circular path with green-gray stem stitch, leaving breaks where blooms will sit.
- Add focal flowers: stitch the largest pink, rose, coral, and cream flowers from darker centers to lighter tips.
- Add leaves: tuck darker leaves behind flowers and add lighter sprigs toward the outside edge.
- Add filler flowers and buds: fill open spaces with tiny lavender, blue, white, and yellow accents.
- Finish with centers and highlights: add French knots, petal glints, tiny berry dots, and final outline corrections last.
Practical Tips for a Clean Finish
Fabric & hoop
Warm cream, natural linen, or pale oatmeal cotton-linen complements a classic floral palette. Keep the hoop drum-tight so circular stems and raised flower centers do not pucker.
Needle choice
Use a sharp embroidery needle size 7–9 for one- and two-strand stitching. For three-strand French knots in larger centers, use a slightly larger needle for easier pull-through.
Keeping the wreath even
Step back often and compare both sides of the circle. If one side feels heavy, balance it with a small leaf cluster or filler flower rather than another large bloom.
Preventing clutter
Stop before every gap is filled. A polished wreath needs breathing room between flowers, leaves, and buds so each stitched detail remains visible.


