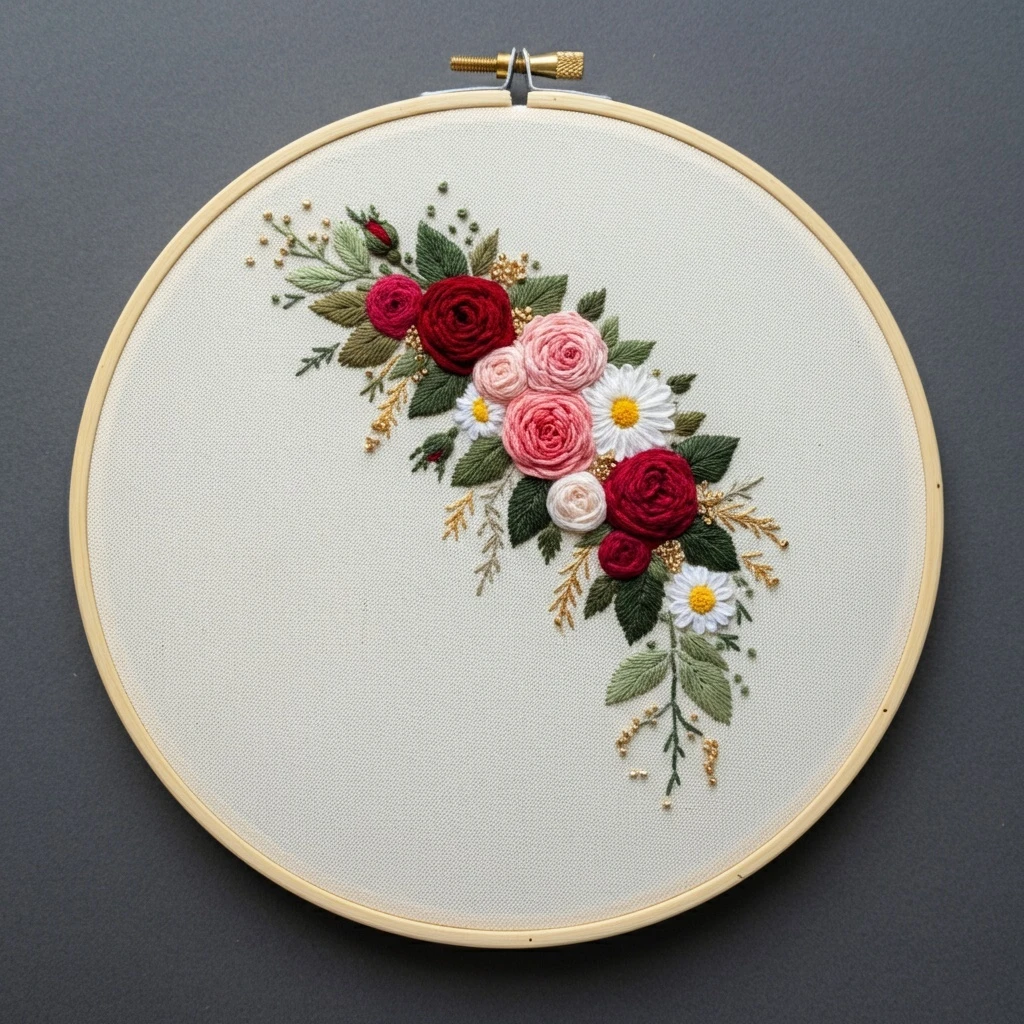

Elegant Rose And Daisy Swag
A refined floral crescent with dimensional red and blush roses, airy white daisies, deep layered greenery, and tiny gold accent sprigs. This guide translates the design into practical DMC choices, stitch direction, thread counts, blending notes, and beginner-friendly finishing tips.
Design read
The composition forms a graceful diagonal swag across the hoop, with the heaviest roses near the center and lower right. The flowers should feel lush and raised, while the leaves and gold filler remain flatter and delicate so the roses stay the focal point.
The key color story is deep garnet red, soft shell pink, crisp white, sunny daisy yellow, muted sage, dark pine green, olive-grey shadows, and antique gold seed details.
Suggested DMC floss palette
Rose stitching plan
Work the roses with a raised, circular rhythm. Start in the center with short curved stitches or a woven wheel, then widen the arcs as the petals open.
- Large red roses: use 3 strands for woven wheel or cast-on petals; add 1-strand backstitch curves in DMC 815/902 inside the darkest spiral.
- Pink roses: blend 1 strand DMC 223 + 1 strand DMC 224 for soft mid petals, then switch to 3722 in the lower turns.
- Small cream rose: use DMC 225 with tiny 224 shadows so it remains light but visible on linen.
Daisy stitching plan
Keep the daisies flatter than the roses for contrast. The white petals should radiate from the center with slight gaps so each petal stays distinct.
- Petals: 2 strands Blanc in lazy daisy, detached chain, or narrow satin stitches, all pointing toward the yellow center.
- Centers: cluster French knots using 2 strands DMC 728 first, then add a few DMC 743 knots on top for sparkle.
- Edge definition: add a few tiny 1-strand straight stitches in DMC 3865 or 762 only if the white disappears on your fabric.
Element-by-element stitch guide
| Area | Best stitches | Thread count | Practical notes |
|---|---|---|---|
| Rose heads | Woven wheel, cast-on stitch, bullion knots, curved satin | 3 strands for raised petals; 1 strand for final shadows | Keep the center tight and darker. Let outer stitches loosen and lighten so the rose looks open. |
| Rose buds | Fishbone, padded satin, tiny fly stitch sepals | 2 strands for bud, 1 strand for sepals | Use garnet at the tip and dark green around the base to make the bud appear tucked into foliage. |
| Daisy petals | Lazy daisy, detached chain, narrow satin | 2 strands | Stitch opposite petals first to keep the round center balanced and avoid crowding. |
| Large leaves | Fishbone stitch, long-and-short, split stitch vein | 2 strands for fill; 1 strand for vein | Change angle down the leaf. Blend dark green at the base into sage at the tip. |
| Fern sprigs | Stem stitch stems, single straight stitches for needles | 1 strand | Use khaki green or old gold; keep these airy so they do not compete with the flowers. |
| Gold filler dots | French knots, colonial knots, seed stitch | 1-2 strands cotton or metallic | Scatter unevenly in groups of three to five. Avoid making a perfect line of dots. |
Blending ideas
For a natural rose gradient, thread the needle with two related colors rather than changing colors every stitch. Useful blends: 815+816 for dark red depth, 816+321 for a brighter petal edge, 223+224 for soft pink petals, and 3052+3012 for sage leaf highlights.
Outlining details
Use one strand for any outline. A fine split stitch in DMC 500 around only the shaded side of leaves gives definition without cartoon-like borders. For flowers, outline only the tucked inner curves, not every petal.
Texture balance
Let roses be the most dimensional, daisies moderately raised, and leaves mostly flat. This hierarchy makes the swag feel elegant and prevents the small design from becoming bulky.
Shading guidance
- Place the darkest reds near the flower centers and where petals overlap.
- Keep pale pink and white highlights on the upper-left edges for a gentle light source.
- For leaves, start with DMC 500 or 3362 at the base and switch to 3052 or 3012 near the tip.
- Add gold knots after the flowers and leaves are complete, so the filler can be positioned around the finished shapes.
Beginner-friendly tips
- Use a 6-inch hoop or keep the fabric drum-tight in a larger hoop to support dimensional rose stitches.
- Separate all six strands first, then recombine the number needed. This makes floss smoother and reduces twisting.
- Work from background to foreground: stems, leaves, daisies, roses, then gold knots last.
- Test one rose on scrap fabric if woven wheels or cast-on stitches are new to you.
Recommended working order
1. Transfer only the main floral shapes and stem lines; avoid over-marking tiny filler dots. 2. Stitch stems and leaf veins with 1 strand, then fill leaves with 2 strands. 3. Complete daisies before the bulky roses so the white petals stay clean. 4. Build roses from dark centers outward, using lighter shades at the edges. 5. Finish with gold French knots and airy fern sprigs to frame the swag.


