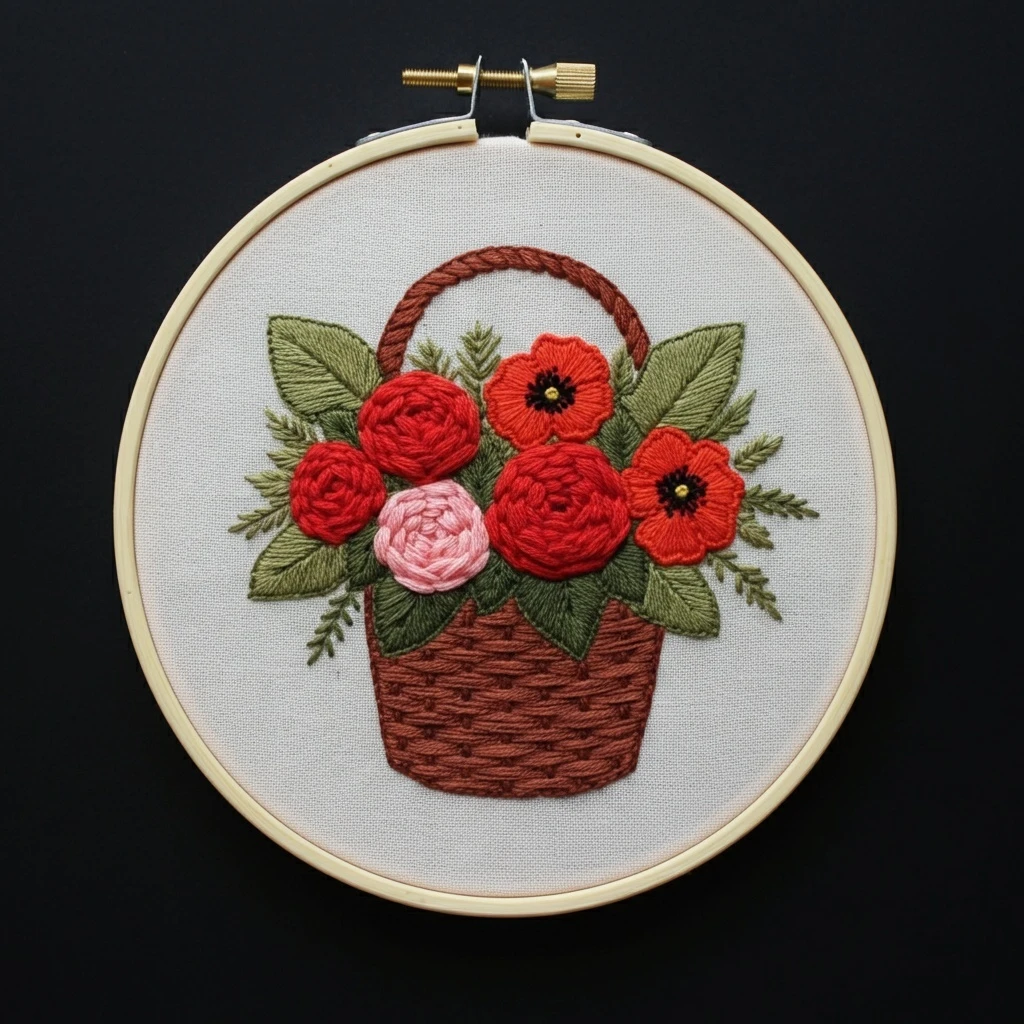

Classic Floral Basket
This classic floral basket design combines a warm woven basket with a generous arrangement of garden flowers, leaves, buds, and small filler blossoms. The embroidery should feel traditional, full, and tidy: a dimensional basket base, arched handle or rim detail, layered blooms in soft pinks and corals, yellow centers, sage greenery, and enough texture in the weave to make the container feel handmade.
Polished DMC Color Palette
This palette pairs warm basket browns with classic bouquet colors. Use darker browns for the basket weave and shadows, lighter browns for raised wicker strands, pink and coral for focal blooms, yellow and cream for centers and highlights, and muted greens for leaves and stems.
Stitch Map by Design Element
Thread Count & Blending Guide
Fine detail
Use 1 strand for woven basket lines, twig-thin stems, petal veins, tiny buds, small outlines, and final highlight stitches. This keeps the classic basket neat.
Main stitching
Use 2 strands for basket fills, handle rows, large petals, leaves, and main stems. Two strands provides solid coverage while staying manageable for layered flowers.
Raised texture
Use 2–3 strands for flower centers, berry-like buds, and selected wicker ridges. Use three strands sparingly so the basket does not become bulky.
Shading, Outlining & Texture Suggestions
Dimensional basket weave
- Stitch the basket before lower flowers so stems can tuck behind the rim.
- Use alternating stitch direction to imitate woven wicker.
- Place darker brown under overlaps and lighter brown on raised strands.
- Keep the basket edges crisp so it supports the softer bouquet above.
Classic bouquet fullness
- Place focal flowers first, then add leaves and smaller blossoms around them.
- Use darker petals near centers and lighter stitches at outer tips.
- Repeat each flower color in at least two areas for balance.
- Leave small open spaces so individual blooms remain readable.
Greenery structure
- Use darker greens behind flowers and lighter greens on outer sprigs.
- Let stems disappear behind the basket rim for a realistic tucked-in look.
- Angle leaves outward from the bouquet center to create a rounded arrangement.
- Use pale green only for a few tips and buds so it stays subtle.
Outlining approach
- Use brown outlines for basket details and matching darker flower shades for petals.
- Avoid heavy black outlines; they can flatten the vintage floral style.
- Use split stitch for curved petals and handle arcs, back stitch for basket edges.
- Add outlines after fills but before final knots and white highlights.
Beginner-Friendly Stitching Order
- Transfer the layout: mark the basket, handle, rim, largest flowers, main stems, leaves, and a few filler flower clusters. Save tiny dots and buds for the end.
- Stitch the basket first: fill the basket body, rim, and handle, then add the woven texture and highlights.
- Add stems and leaves: stitch greenery that rises from the basket, keeping some stems hidden behind the rim.
- Stitch focal flowers: work larger blooms from darker centers to lighter petal tips.
- Add filler flowers and buds: fill spaces with small blossoms, buds, and simple leaf sprigs.
- Finish with texture: add flower centers, basket glints, petal highlights, and final outline corrections last.
Practical Tips for a Clean Finish
Fabric & hoop
Warm cream, natural linen, or oatmeal cotton-linen complements both the basket browns and the floral palette. Keep the fabric drum-tight so woven basket lines and raised flower knots do not pucker.
Needle choice
Use a sharp embroidery needle size 7–9 for one- and two-strand stitching. Use a slightly larger needle only for three-strand knots or dense basket texture.
Keeping the basket readable
Do not cover the entire rim with flowers. A few visible rim sections and handle highlights make the basket structure clear and charming.
Preventing floral clutter
Step back before adding more filler flowers. If one area feels crowded, add greenery or small cream highlights rather than another saturated bloom.


