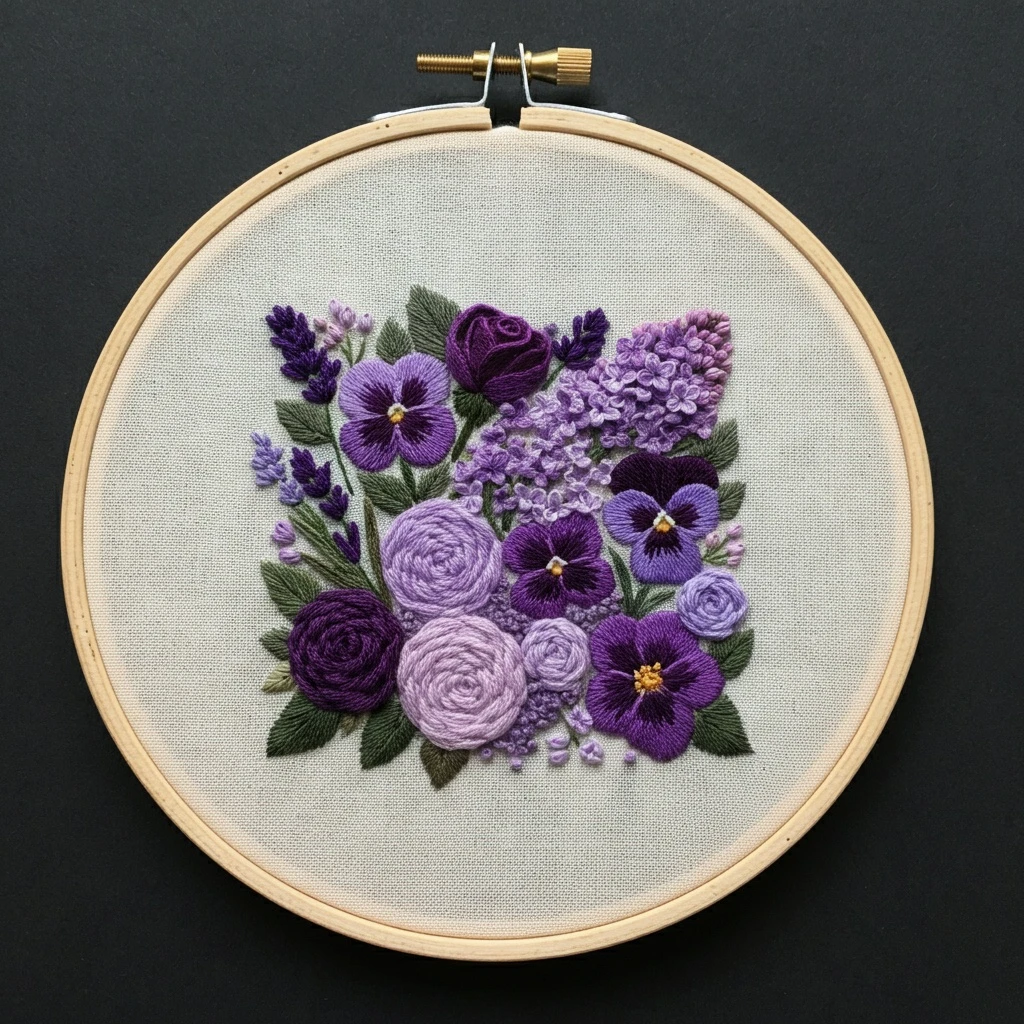
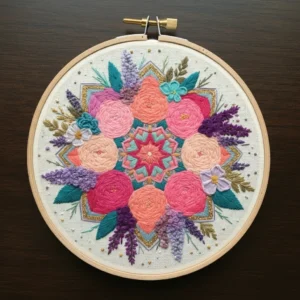
Some designs feel like a pause button for your day. Lavender & Violet Bouquet Embroidery Art is made for that kind of stitching—botanical, satisfying, and easy to personalize.
Stitching roadmap
Materials to grab
Gather your basics and you’re ready:
- Optional: light source for tracing or stabilizer for extra support
- Cotton or linen fabric (tightly woven works well)
- Embroidery needles, scissors, and a transfer method
- Embroidery hoop (3″–8″)
- 6‑strand embroidery floss (DMC or equivalent)
From PDF to fabric
To keep the lines sharp, take a minute for setup:
- Print at 100% (no scaling) and choose your hoop size
- Transfer the lines to fabric using your preferred method
- Hoop the fabric with even tension
- Stitch outlines first, then fills/textures, then tiny details
- Finish the back neatly and display in the hoop or frame
Tools & materials
No complicated setup—just a few embroidery staples:
- Embroidery needles, scissors, and a transfer method
- Optional: light source for tracing or stabilizer for extra support
- Cotton or linen fabric (tightly woven works well)
- Embroidery hoop (3″–8″)
About the design
This pattern leans into floral needlework without feeling rigid. The linework is clear, and your stitch choices can change the whole vibe of the finished hoop.
It’s the kind of design you can stitch over a few evenings and keep on display year-round.
Color experiment tip: change just one accent shade first—small tweaks can feel surprisingly fresh.
Customization ideas
- Mix satin stitch and long-and-short stitch on petals/leaves for a botanical-illustration feel.
- Add a tiny initial or date near the edge to make it giftable.
- Vary strand count: thicker for bold texture, fewer strands for delicate shading.
- Switch the color palette to match your space—pastels, jewel tones, or neutrals all work.
The pattern gives you the roadmap; you decide how Lavender & Violet Bouquet Embroidery Art looks when it’s finished.
Transfer the pattern
A clean transfer makes stitching calmer. Here’s one way to do it:
- Print at 100% (no scaling) and choose your hoop size
- Transfer the lines to fabric using your preferred method
- Hoop the fabric with even tension
- Stitch outlines first, then fills/textures, then tiny details
- Finish the back neatly and display in the hoop or frame
If you like having a clear path from start to finish, this outline keeps you moving:
- Choose a hoop size and print the matching page
- Transfer the outline, then stitch the main shapes first
- Add texture and small details last (it’s the fun part)
- Finish in the hoop or frame it once the fabric is pressed
Your PDF includes
Everything is laid out so you can focus on stitching, not guessing.
- Printable pattern pages you can size for 3″ to 8″ hoops
- A DMC color guide to help you choose floss shades quickly
- Stitch suggestions and placement notes to keep the process smooth
- A beginner-friendly hand embroidery guide (plus a small sample pattern)
- A reference photo of the finished piece so you can compare as you stitch
Design notes
This pattern leans into botanical embroidery without feeling rigid. The linework is clear, and your stitch choices can change the whole vibe of the finished hoop.
It’s the kind of design you can stitch over a few evenings and keep on display year-round.
Where it looks great
- Keep a few hoops ready and rotate designs seasonally
- Stitch it onto a fabric panel for a tote, pillow front, or pouch
- Gift it as a handmade keepsake (add initials or a date)
- Frame it in the hoop and hang it as easy wall decor
About the design
This pattern leans into garden-inspired hoop art without feeling rigid. The linework is clear, and your stitch choices can change the whole vibe of the finished hoop.
It’s the kind of design you can stitch over a few evenings and keep on display year-round.
Color experiment tip: change just one accent shade first—small tweaks can feel surprisingly fresh.
Personalize the finish
- Mix satin stitch and long-and-short stitch on petals/leaves for a botanical-illustration feel.
- Switch the color palette to match your space—pastels, jewel tones, or neutrals all work.
- Try a different fill stitch in one area to practice a technique you’ve been curious about.
- Add a tiny initial or date near the edge to make it giftable.
- Scale it smaller for a quick win, or larger for a longer, slower project.
The pattern gives you the roadmap; you decide how Lavender & Violet Bouquet Embroidery Art looks when it’s finished.
Important note: This listing is for a digital embroidery pattern PDF. Your files are delivered as a download—no physical item will be mailed.
Benefits
- Works beautifully as embroidery hoop wall decor or a handmade gift
- Perfect for petal/leaf shading experiments
- Easy to personalize with color swaps, initials, or small accents
- Hoop-ready pattern pages sized for 3″–8″ frames
- DMC color guidance to speed up floss picking
- Beginner guide included for a smoother first project
- Reference photo to help you check proportion and placement
- Stitch suggestions so you’re not guessing your next step
FAQs
- Is this a physical product?
No. This listing is for a digital PDF embroidery pattern. Nothing is shipped. - Can I resize the design?
Yes. The file includes sizes intended for 3″–8″ hoops. Printing at “actual size” helps keep scaling accurate. - How do I transfer the pattern onto fabric?
Common methods include tracing with a light source, using transfer paper, or marking with a water‑soluble pen. Use the approach you’re most comfortable with. - What’s included in the PDF?
You’ll receive the printable pattern pages, DMC color suggestions, stitch recommendations, a beginner guide with a sample pattern, and a finished reference photo.


Reviews
There are no reviews yet.