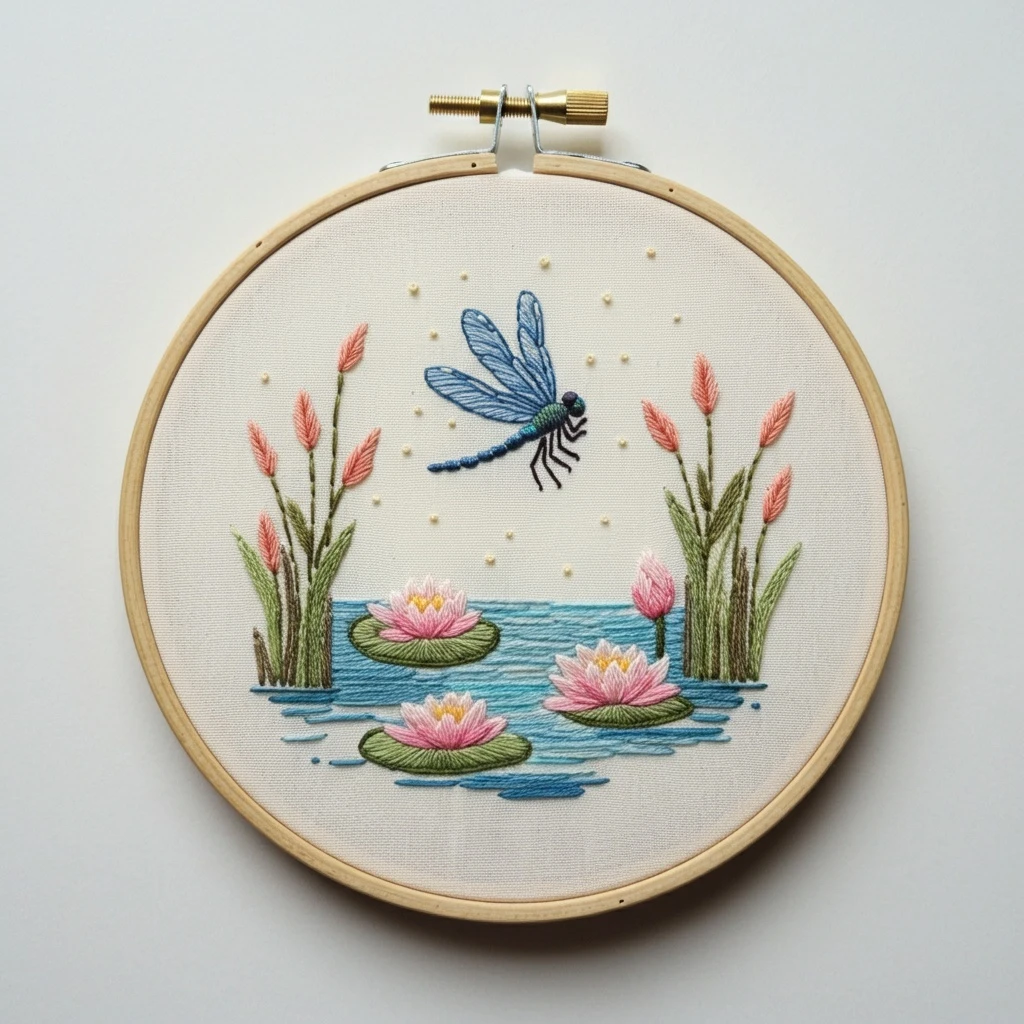
Tranquil Dragonfly Pond Embroidery Art — Hand Embroidery Pattern
Looking for a screen-free craft that still feels creative? Stitch Tranquil Dragonfly Pond Embroidery Art—a relaxing design that comes together one steady line at a time.
Skill-builder details
- A chance to experiment with shading by changing strand count or stitch direction
- A finished reference photo to help you check placement and proportion
- Clean outlines to practice even tension and smooth curves
- Fill areas that work well with satin stitch, long-and-short stitch, or your favorite alternatives
Personalize the finish
- Vary strand count: thicker for bold texture, fewer strands for delicate shading.
- Use tinted fabric to change the mood without changing thread colors.
- Scale it smaller for a quick win, or larger for a longer, slower project.
- Switch the color palette to match your space—pastels, jewel tones, or neutrals all work.
- Add a tiny initial or date near the edge to make it giftable.
- Try a different fill stitch in one area to practice a technique you’ve been curious about.
The pattern gives you the roadmap; you decide how Tranquil Dragonfly Pond Embroidery Art looks when it’s finished.
Display & gifting
- Stitch it onto a fabric panel for a tote, pillow front, or pouch
- Use it as a practice piece for new stitches before a bigger project
- Frame it in the hoop and hang it as easy wall decor
- Gift it as a handmade keepsake (add initials or a date)
- Keep a few hoops ready and rotate designs seasonally
Inside your download
The download is practical: clear pages, helpful references, and multiple hoop sizes.
- Printable pattern pages you can size for 3″ to 8″ hoops
- A DMC color guide to help you choose floss shades quickly
- Stitch suggestions and placement notes to keep the process smooth
- A beginner-friendly hand embroidery guide (plus a small sample pattern)
- A reference photo of the finished piece so you can compare as you stitch
Materials to grab
Most stitchers already have the essentials. Here’s a simple list:
- Embroidery needles, scissors, and a transfer method
- Optional: light source for tracing or stabilizer for extra support
- Cotton or linen fabric (tightly woven works well)
- Embroidery hoop (3″–8″)
- 6‑strand embroidery floss (DMC or equivalent)
Personalize the finish
- Switch the color palette to match your space—pastels, jewel tones, or neutrals all work.
- Vary strand count: thicker for bold texture, fewer strands for delicate shading.
- Scale it smaller for a quick win, or larger for a longer, slower project.
- Add a tiny initial or date near the edge to make it giftable.
- Try a different fill stitch in one area to practice a technique you’ve been curious about.
- Use tinted fabric to change the mood without changing thread colors.
The pattern gives you the roadmap; you decide how Tranquil Dragonfly Pond Embroidery Art looks when it’s finished.
Transfer the pattern
Use your favorite method—this is a straightforward approach:
- Print at 100% (no scaling) and choose your hoop size
- Transfer the lines to fabric using your preferred method
- Hoop the fabric with even tension
- Stitch outlines first, then fills/textures, then tiny details
- Finish the back neatly and display in the hoop or frame
Before purchasing: This listing is for a digital embroidery pattern PDF. Your files are delivered as a download—no physical item will be mailed. When printing, choose “actual size” so the hoop scaling stays accurate.
Benefits
- Stitch suggestions so you’re not guessing your next step
- Beginner guide included for a smoother first project
- Works beautifully as embroidery hoop wall decor or a handmade gift
- Reference photo to help you check proportion and placement
- Hoop-ready pattern pages sized for 3″–8″ frames
- Easy to personalize with color swaps, initials, or small accents
- DMC color guidance to speed up floss picking
FAQs
- When do I get the download?
Immediately after checkout. You’ll be able to download the PDF files from your order page or email. - Is it suitable for beginners?
Yes—these patterns are written to be beginner-friendly, with guidance included. If you’re newer, start with the smaller hoop size and stitch at your own pace. - How do I transfer the pattern onto fabric?
Common methods include tracing with a light source, using transfer paper, or marking with a water‑soluble pen. Use the approach you’re most comfortable with. - Can I resize the design?
Yes. The file includes sizes intended for 3″–8″ hoops. Printing at “actual size” helps keep scaling accurate.


Reviews
There are no reviews yet.