

Description
Intro: Suggestion: Vibrant Autumn Starburst: A Beginner's Embroidered Floral Mandala is a rustic pattern created for slow stitching, mindful making, and turning botanical beauty and timeless handmade style into fabric art.
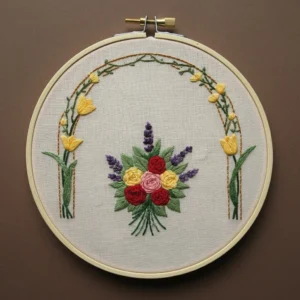
Visuals: Its visual charm comes from a symmetrical mandala layout with repeated shapes, balanced sections, and a relaxing rhythm for stitching.
What's included: Your download includes an easy-to-print PDF, clean outline pattern, pixelated stitching reference, stitch suggestions, hoop-size guidance, and a general embroidery guide.
Skill level and materials: It is suitable for patient beginners and intermediate stitchers using fabric, embroidery floss, a hoop, needle, scissors, and basic stitches like stem stitch, back stitch, satin stitch, detached chain, and French knots.
Usage ideas: Stitch it for home decor, special gifts, fabric embellishment, wedding-inspired keepsakes, or a calming floral project.
Digital notice: This listing is for a digital embroidery pattern PDF only, so nothing physical will be mailed to you.


Reviews
There are no reviews yet.