
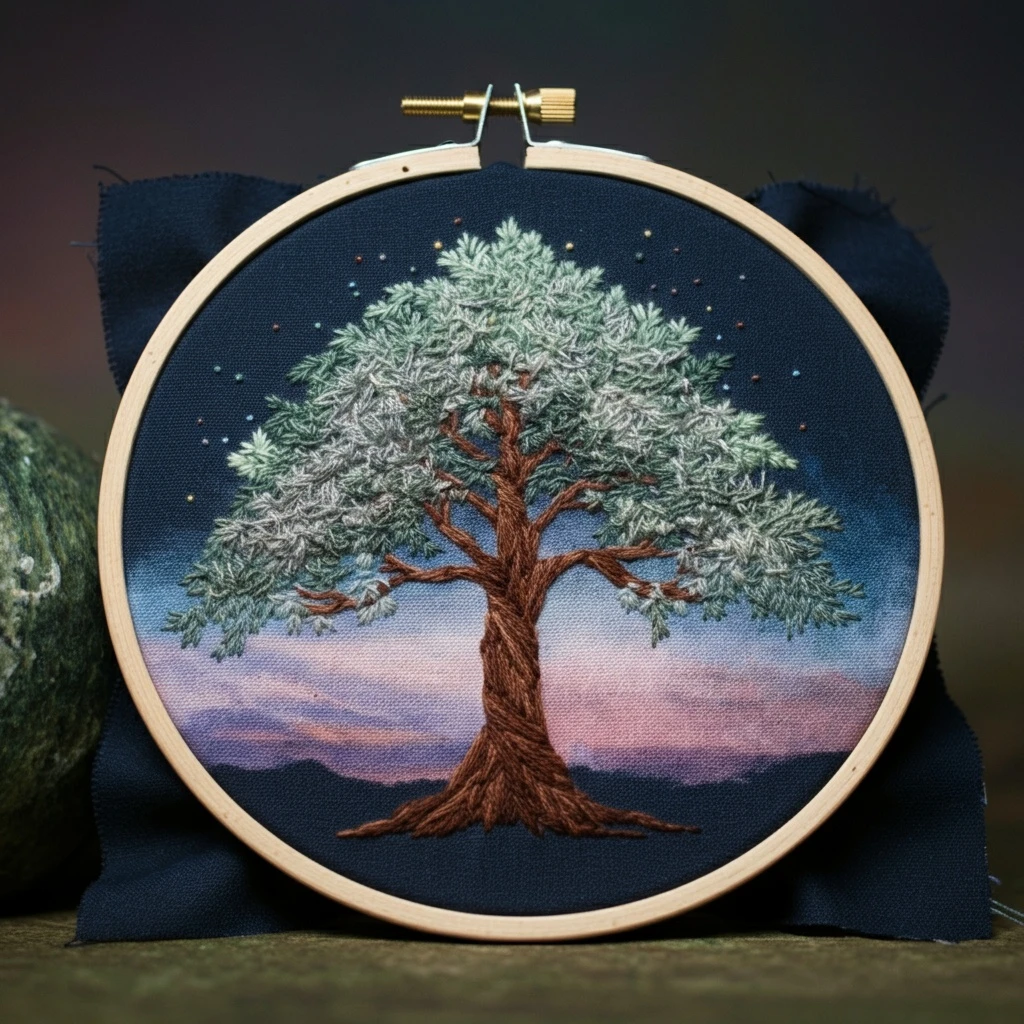
Celestial Tree
This celestial tree design combines grounded roots, a textured trunk, reaching branches, moonlit foliage, and starry accents woven through the canopy. The stitched version should feel mystical and organic: bark with directional texture, branches that taper cleanly, soft green and blue highlights, tiny golden stars, and luminous cream details that suggest moonlight filtering through the tree.
Polished DMC Color Palette
This palette balances earthy bark browns, muted leafy greens, moonlit creams, celestial golds, and cool blue-lavender accents. Keep the bark and roots grounded with warm browns, then lift the canopy with pale green, blue, cream, and gold.
Stitch Map by Design Element
Thread Count & Blending Guide
Fine details
Use 1 strand for branch tips, root ends, star rays, tiny leaf veins, and celestial dots. One strand keeps the delicate outer tree structure crisp.
Main structure
Use 2 strands for the trunk, main branches, foliage clusters, moon fills, and larger roots. Two strands give sturdy coverage without making the tree bulky.
Raised texture
Use 2–3 strands for French-knot stars, fruit-like celestial dots, or textured bark knots. Reserve three strands for focal dots in the canopy.
Shading, Outlining & Texture Suggestions
Bark texture
- Follow the trunk curve with all bark stitches so the tree feels rounded.
- Keep the darkest browns inside grooves and at branch junctions.
- Add short broken highlight stitches instead of continuous bright lines.
- Use a few tiny knots or seed stitches for bark knots and natural texture.
Branch and root taper
- Reduce from two strands to one strand as branches reach the tips.
- Make roots slightly heavier than branches so the tree feels grounded.
- Use split stitch for curves and stem stitch for long graceful lines.
- Do not over-outline every twig; fine broken lines look more organic.
Canopy glow
- Place darker leaves close to the trunk and lighter leaves near the outer edge.
- Mix leaf stitches with tiny star knots for a magical tree-top effect.
- Use pale blue and lavender sparingly so the greenery stays botanical.
- Leave small openings between branches and leaves for an airy celestial look.
Moon and star sparkle
- Reserve 3865 for the brightest moon rim and a few star points.
- Use gold dots around the canopy to suggest cosmic fruit or starlight.
- Vary star size with knots, seed stitches, and tiny crosses.
- Keep celestial accents clustered along the tree’s natural flow, not evenly scattered.
Beginner-Friendly Stitching Order
- Transfer main shapes: mark the trunk, roots, main branches, canopy outline, moon or star positions, and only the largest foliage clusters.
- Stitch trunk and roots: build the grounded structure first with browns, adding shadows before highlights.
- Add branches: work from the trunk outward, tapering thread count at the ends.
- Build foliage: add leaves and small sprigs in layers from dark inner greens to light outer greens.
- Stitch moon motifs: add moons or larger celestial shapes once the branch structure is in place.
- Finish with stars: add golden dots, tiny crosses, French knots, pale highlights, and final outline corrections last.
Practical Tips for a Clean Finish
Fabric & hoop
Warm cream cotton, linen, or cotton-linen supports both the earthy bark and the celestial sparkle. Keep the hoop drum-tight so long branch lines stay smooth and do not pucker.
Needle choice
Use a sharp embroidery needle size 7–9 for one- and two-strand details. If adding three-strand knots for stars or bark texture, switch to a slightly larger needle.
Keeping the silhouette clear
Step back after adding foliage and stars. If the canopy becomes crowded, stop adding leaves and use a few pale glow stitches to define open spaces instead.
Thread management
Do not carry dark brown floss behind pale moon or star areas. End dark threads cleanly and restart nearby so the light celestial accents stay crisp.


