
Design #41 · Botanical Symbolism
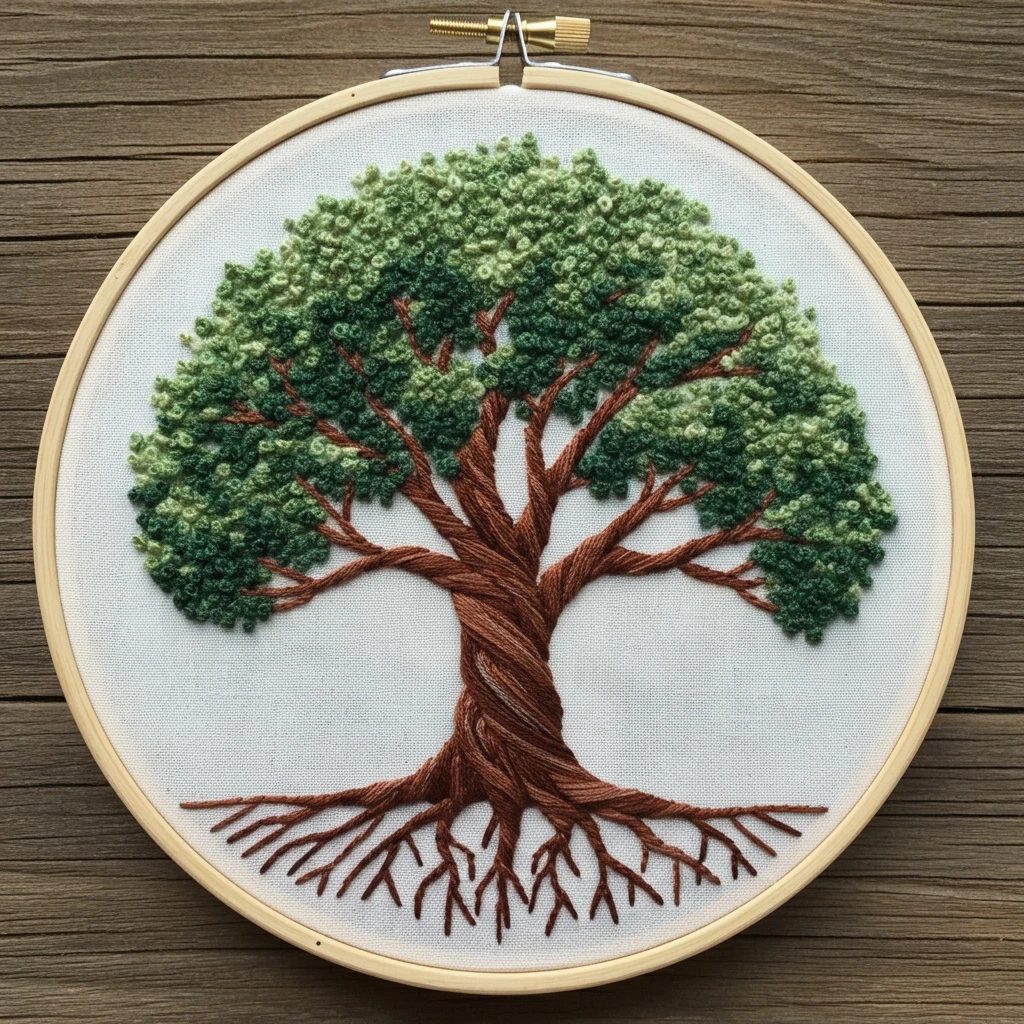
Tree Of Life
A polished DMC palette and embroidery plan for a richly textured Tree of Life hoop: twisted brown trunk, spreading roots, branching limbs, and a rounded canopy of raised green foliage.
Likely DMC Color Palette
Palette based on the visible hoop preview: layered moss and forest greens for the dense leafy crown, reddish warm browns for the twisted trunk, darker browns for roots and branch shadows, and soft neutrals for optional fabric-toned highlights.
Deep canopy pockets, lower leaf masses, shadowed areas behind branches.
Main mid-dark foliage, rounded clusters, transition between leaf shadows and highlights.
Soft mossy leaf texture, outer canopy, mixed knots that keep the greens natural.
Light leaf tips, airy top edge, small highlights around the crown silhouette.
Tiny sunlit leaf knots and lifted highlights on the upper left and outer canopy.
Main trunk, strong branch lines, exposed roots, bark ridges.
Warm trunk highlights, twisting bark bands, raised root sections.
Deep splits in bark, underside of branches, root tips and definition.
Reddish bark warmth and fine accent strokes where the trunk twists forward.
Very sparing dry-brush-style bark glints or hoop/fabric-toned practice marks.
Optional tiny lift stitches if your fabric is darker than the sample.
Minimal accents only: darkest root forks, branch notches, and trunk creases.
Coverage percentages are visual estimates from the preview and are intended for planning, not exact thread usage.
Stitching Suggestions
Work the design in layers: structural trunk first, roots and branches next, then build the canopy with raised knots and small clustered stitches so the leaves sit over the wood naturally.
| Element | Stitch Type | Notes |
|---|---|---|
| Twisted trunk base | Long and short stitch, split stitch | Follow the spiral direction of the bark. Alternate 801 and 975, adding 938 in the deepest grooves so the trunk looks braided rather than flat. |
| Bark ridges | Stem stitch or whipped backstitch | Lay curved lines from root flare to upper branches. Whip a few lines with 400 for warm reddish dimension. |
| Main branches | Stem stitch, split stitch | Use two strands for thicker limbs and taper to one strand near the tips. Keep stitch direction moving outward from the trunk. |
| Fine twig ends | Backstitch or single straight stitch | Use one strand of 801 or 938. Short, confident stitches make the twigs crisp under the leaf canopy. |
| Exposed roots | Stem stitch with couching accents | Stitch roots from the trunk outward. Let some roots overlap and fork; add dark tips with 938 or 3371. |
| Dense leaf canopy | French knots, colonial knots, seed stitch | Use mixed greens in small clusters. Place darker knots underneath and lighter knots toward the outer/top edge for depth. |
| Canopy silhouette | Detached chain, tiny straight stitches | Keep the edge uneven and organic. Add occasional 3348 highlights to prevent the canopy from becoming a solid green block. |
| Shadow gaps inside leaves | Small seed stitch and negative space | Do not fill every gap. Leaving small fabric spaces around branches makes the foliage look naturally layered. |
Thread Count, Blending & Shading
Thread-count guidance
- Use 2 strands for most trunk filling, main branches, and visible roots.
- Use 1 strand for twig tips, narrow root forks, and the darkest bark crease lines.
- Use 2 strands for French knots in the canopy; switch to 1 strand for tiny distant leaf speckles.
- For a plush crown, wrap French knots once for small dots and twice for the fuller moss-like clusters.
Blending ideas
- Blend one strand 801 with one strand 975 for a warm mid-bark tone.
- Blend one strand 975 with one strand 400 where the trunk turns toward the viewer.
- For foliage, combine 3363 + 3052 in the same needle for muted middle greens.
- Reserve 3348 for final leaf highlights so the tree keeps a calm, earthy palette.
Outlining details
- Outline only the key trunk edges and major roots; heavy outlining around every leaf cluster can make the canopy look cartoonish.
- Use 3371 sparingly in the deepest V-shaped root forks and hidden branch joints.
- Backstitch the root horizon lightly so the tree feels grounded without looking like a drawn baseline.
Texture strategy
- Keep bark stitches directional and smooth, then contrast them with bumpy knots in the leaves.
- Vary knot size across the canopy: larger knots in front, smaller knots toward the top and far edges.
- Layer a few green stitches over branch edges to suggest leaves sitting in front of the wood.
Where to Start
Start with the trunk because it anchors the whole composition. Fill the central twist with warm browns, then stitch the major branches and exposed roots so the tree structure is clear. After the wood is complete, add the darkest foliage clusters behind and around the limbs. Finish with medium greens, then place pale green highlights last along the upper canopy and outer edges.
For a neat finish, rotate the hoop as you stitch the roots and branches so each line follows your hand comfortably. The tree will look more graceful when the stitches flow outward from the trunk instead of fighting the curve.
Helpful Notes
- Use a sharp crewel needle for bark and branch stitches, then switch to a comfortable needle size for repeated knots.
- Keep the leaf canopy uneven: rounded overall, but with small bumps and gaps around the edge.
- Do not crowd the exposed roots. Small spaces between root lines make the lower design look delicate and intentional.
- Save the lightest green and darkest brown until the final pass; those accents control the depth of the whole piece.
- If knots feel bulky, reduce wraps first before reducing strands, so the color remains full.
Encouraging Finish
This design shines when the trunk feels flowing and the crown feels alive. Build it patiently from structure to texture: smooth twisting bark, fine branching lines, airy roots, then clustered leafy knots. The result should feel grounded, symbolic, and richly dimensional without requiring complicated stitches.


