
Golden Lantern Glow
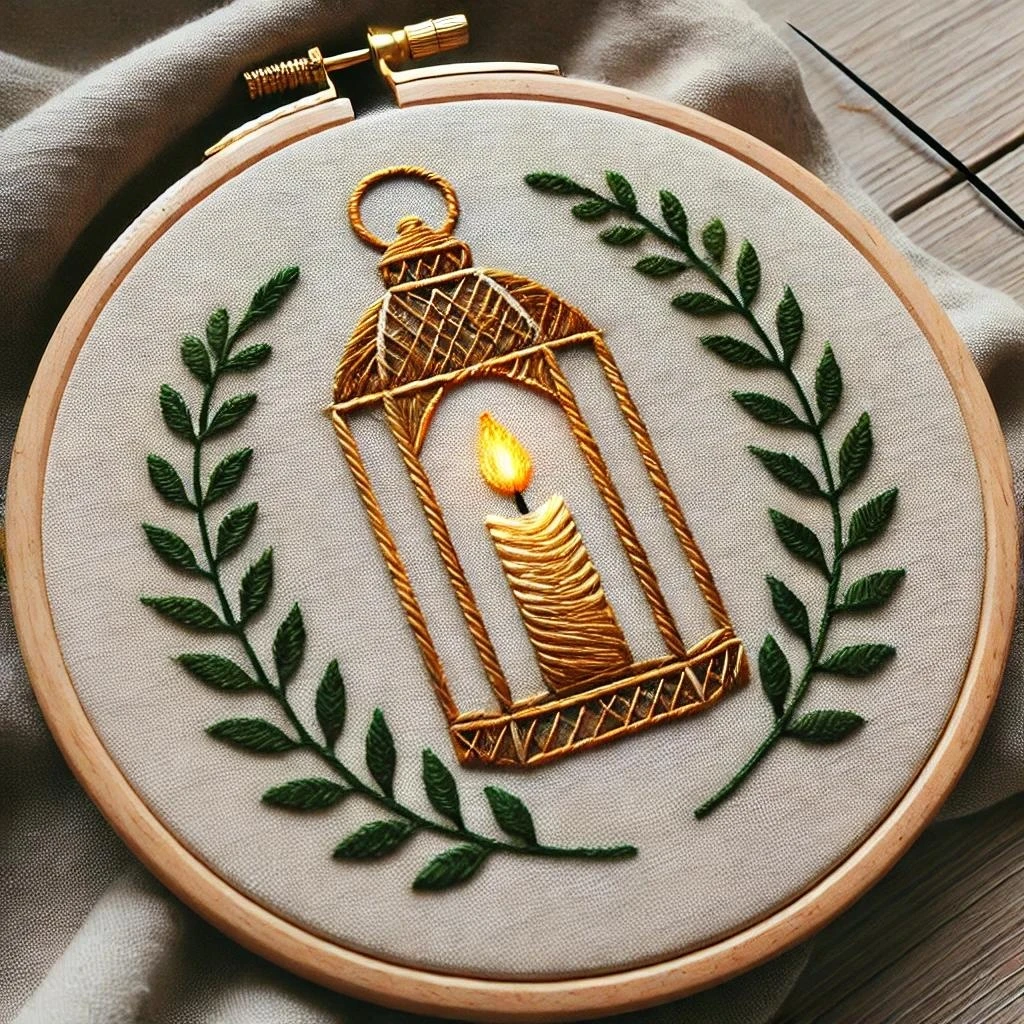
A warm lantern-and-vine hoop with burnished gold metalwork, a glowing candle flame, dark evergreen sprigs, and a neutral linen ground. The stitching plan below keeps the lantern crisp and dimensional while making the candlelight feel soft, bright, and beginner-friendly.
The reference image centers on a tall vintage lantern stitched in raised golden lines. A small candle sits inside with a bright yellow-orange flame, while symmetrical leafy branches curve around the frame. The strongest contrast is between dark green foliage, honey-gold lantern bars, and the quiet oatmeal linen background.
Core DMC palette
Stitch choices by area
Lantern frame
Use whipped back stitch or stem stitch with 2 strands of DMC 3852. Add a second pass in 782 along one side of each bar to create a rounded brass edge.
Crosshatched panels
Work long straight stitches in a tidy diagonal grid using 1 strand 3852, then add sparse 433/938 shadow lines where the lattice overlaps.
Candle wax
Use satin stitch or short-and-long stitch with 2 strands 677 and 3823. Follow the horizontal curve of the wax ridges rather than stitching straight across.
Flame
Layer tiny detached chain, fishbone, or satin stitches: 744 in the center, 972 around it, and a few 3852 stitches at the base for heat and depth.
Leafy branches
Stem stitch the branch with 2 strands 895. Fill each leaf in fishbone stitch using 3345, then add a single 3011 highlight stitch on the upper edge.
Thread-count guidance
- Outlines: 2 strands for visible lantern bars; 1 strand for fine inner lattice and wick.
- Filled shapes: 2 strands for candle wax and leaves; keep satin stitches short so they do not snag.
- Highlights: 1 strand of 744, 972, or 3823 gives controlled sparkle without bulky knots.
- Optional shine: couch a single strand of DMC Light Effects gold beside 3852 instead of stitching long metallic lines through fabric.
Blending ideas
For antique brass, thread the needle with one strand 3852 plus one strand 782. For deeper corners, blend 782 with 433. Keep the brightest 972 accents only on the top ring, candle-facing bars, and flame glow so the lantern does not become uniformly yellow.
Outlining details
Stitch the main lantern outline first, then the candle, then the interior grid. Use couching for the long vertical bars if you want perfectly smooth rails. Add the dark wick last with one tiny straight stitch in 938 or 310.
Texture suggestions
Use raised stem stitch or whipped back stitch on the outer lantern for a corded metal look. Leaves benefit from fishbone stitch because the center vein forms naturally. A few French knots in 972 near the flame can suggest small sparks.
Shading map
- Place 744 at the hottest flame center and use 972 around the flame edge.
- Use 3852 on the lantern areas facing the candle and 782/433 on lower and side edges.
- Keep leaf bases darker with 895, then move to 3345 and small touches of 3011 at the tips.
- Leave small gaps of linen between the lantern bars and foliage so the silhouette stays airy.
Beginner-friendly tips
- Transfer the lantern with crisp, light lines; the symmetry matters more than perfect fill.
- Work from the center outward: flame, candle, lantern frame, lattice, then vines.
- Use shorter thread lengths for gold and brown shades to avoid fuzzing from repeated passes.
- Rotate the hoop while stitching leaves so each fishbone stitch points neatly toward the leaf tip.
- Press from the back over a towel when finished to preserve raised corded stitches.


