
Magnolia Blossoms
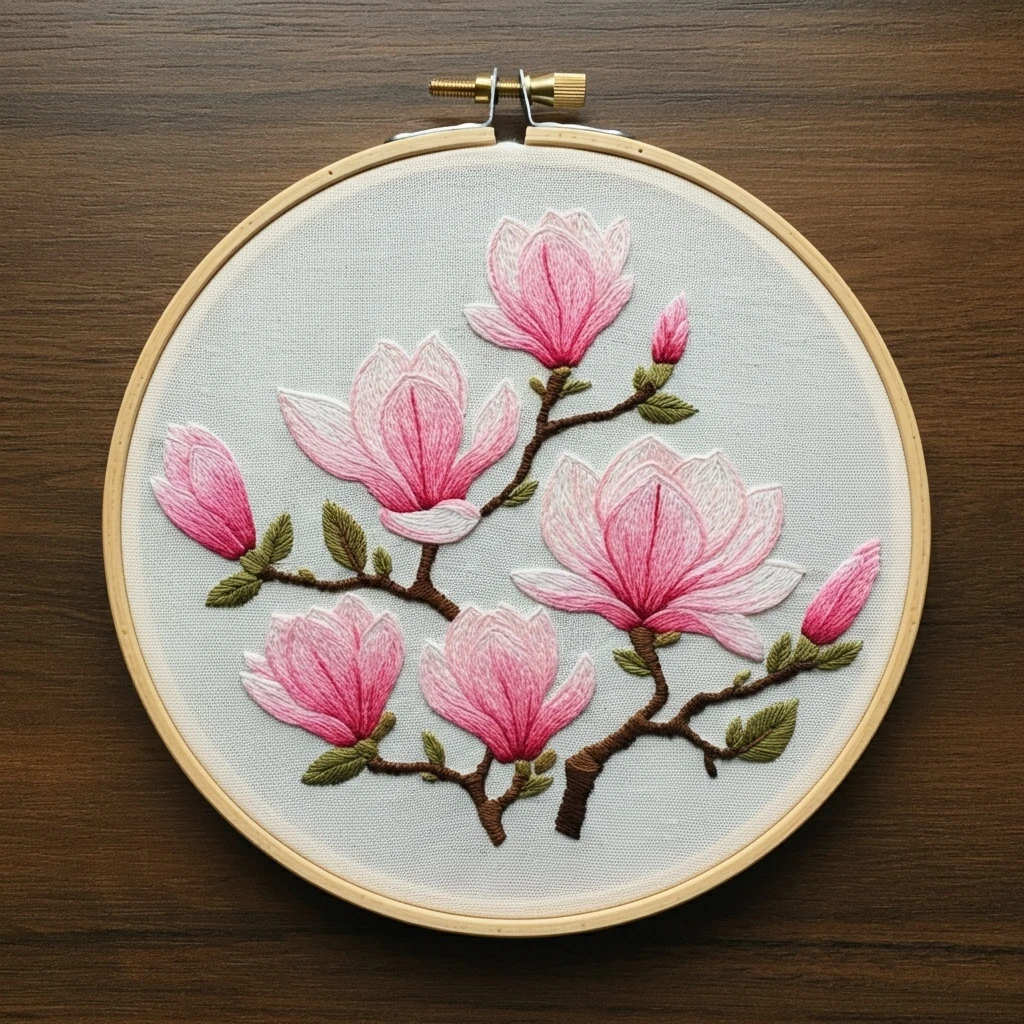
A soft botanical embroidery guide for luminous pink-white magnolia petals, olive leaves, and textured brown branches. The palette below is chosen for a gentle hand-shaded look: pale blush edges, rose-pink throats, natural green leaf veins, and dimensional bark.
Design Color Read
The design centers on magnolia flowers with creamy white outer petals, translucent blush-pink midtones, and deeper raspberry-pink shading radiating from the base of each bloom. The branches are warm dark brown with raised texture, while the leaves are muted olive greens with sharp vein detail. Keep the overall value range soft, then reserve the strongest pinks and browns for the petal bases, bud tips, and branch shadows.
Petals
Use white and very pale pink for petal edges, then feather medium and deep rose toward the flower center. Directional stitches should follow the curve of each petal.
Leaves & Bud Sepals
Work the leaves with olive greens rather than bright greens. Add a darker central vein and lighter edge stitches for a natural folded look.
Branches
Layer warm brown stem stitches with darker couching or split-stitch shadows. A little unevenness makes the bark feel organic.
Polished DMC Color Palette
Use this as a practical working palette. The listed notes explain where each shade appears most naturally in the design and how to combine it with neighboring colors.
Stitch Types by Area
| Design area | Recommended stitches | Practical guidance |
|---|---|---|
| Open petals | Long and short stitch, split stitch guide lines | Begin with one-strand split-stitch outlines, then fill with 1–2 strand long and short stitches following each petal's growth direction from base to tip. |
| Deep petal centers | Feather stitch, short straight stitches | Place short rose and cranberry strokes from the base upward, leaving gaps so pale pink can show through. This keeps the magnolia glow soft. |
| Petal rims | Stem stitch or tiny back stitch | Use B5200, 819, or 818. Avoid dark outlines on the outer petals; pale outlines keep the blossoms delicate. |
| Buds | Satin stitch, long and short stitch | Shade buds darker at the tip and base, lighter through the middle. Stitch lengthwise so the bud looks closed and tapered. |
| Leaves | Fishbone stitch, satin stitch, fly stitch | Work each side of the leaf toward the central vein. Add one dark green vein after the fill for crisp definition. |
| Branches | Stem stitch, split stitch, couching, whipped back stitch | Build branches with 2 strands for the first pass, then add darker one-strand shadows and small knots for bark texture. |
Thread Count & Blending Plan
Suggested strand counts
- Petal shading: 1 strand for fine painterly lines; 2 strands only for larger filled petals.
- Petal outlines: 1 strand in pale pink or white for a clean, airy edge.
- Leaves: 2 strands for fishbone fill, 1 strand for veins and serrated texture.
- Branches: 2 strands for the base stem stitch, 1 strand for bark shadows and highlights.
- Tiny buds and sepals: 1 strand for control around narrow shapes.
Blended needle ideas
B5200 + 819: petal tips and the lightest open areas.
818 + 3716: soft blush transitions across large petals.
3354 + 3733: warm inner petals and deeper folds.
3012 + 3011: dimensional olive leaves with a natural shadow side.
Shading, Texture & Outlining Details
Petal shading sequence
- Trace each petal with a pale split stitch in 819 or B5200.
- Lay the lightest stitches from the tip inward, leaving room at the base.
- Add 818 and 3716 in curved, uneven lengths to avoid striped bands.
- Use 3354, 3733, and tiny touches of 602 near the base and central vein.
- Finish with a few single-strand white highlight lines on top petals.
Branch texture sequence
- Stitch the branch skeleton in 839 with firm, even stem stitch.
- Add 898 along lower edges to make the branch appear rounded.
- Use 938 for the deepest fork shadows and underneath blossoms.
- Whip selected brown lines with a lighter brown if you want raised bark.
- Keep the twigs slightly irregular; perfectly smooth lines can look flat.
Outlining tip: In this magnolia design, outlines should support the shape but not dominate it. Use pale pink on petal edges, olive on leaves, and dark brown only on branch creases or hidden attachment points.
Beginner-Friendly Practical Tips
Start in the center
Begin with the central blossoms and main branch so the layout stays balanced. Add side buds and leaves after the largest petals are complete.
Use shorter needles of color
Magnolia shading changes quickly. Cut shorter lengths of floss to reduce fuzzing and switch colors often for cleaner gradients.
Mind the direction
Every petal stitch should point toward the petal base or tip. Direction matters more than perfectly even stitch lengths.
Test the darkest pink
Work a few cranberry strokes on scrap fabric first. Too much dark pink can make petals look heavy, so use it as an accent.
Keep leaves crisp
Leaves are small in the reference, so clean fishbone stitches and one dark vein will read better than heavy filling.
Press from the back
When finished, place the embroidery face-down on a towel and press lightly from the back to preserve raised branch texture.
Quick Working Order
- Transfer the pattern lightly; avoid thick lines under pale petals.
- Stitch main brown branches and blossom stems first.
- Fill the largest magnolia petals from light to dark, one petal at a time.
- Add buds with lengthwise satin or long-and-short stitches.
- Work leaves and sepals, then add dark veins and branch shadows.
- Finish with small highlight stitches and tidy pale outlines.


