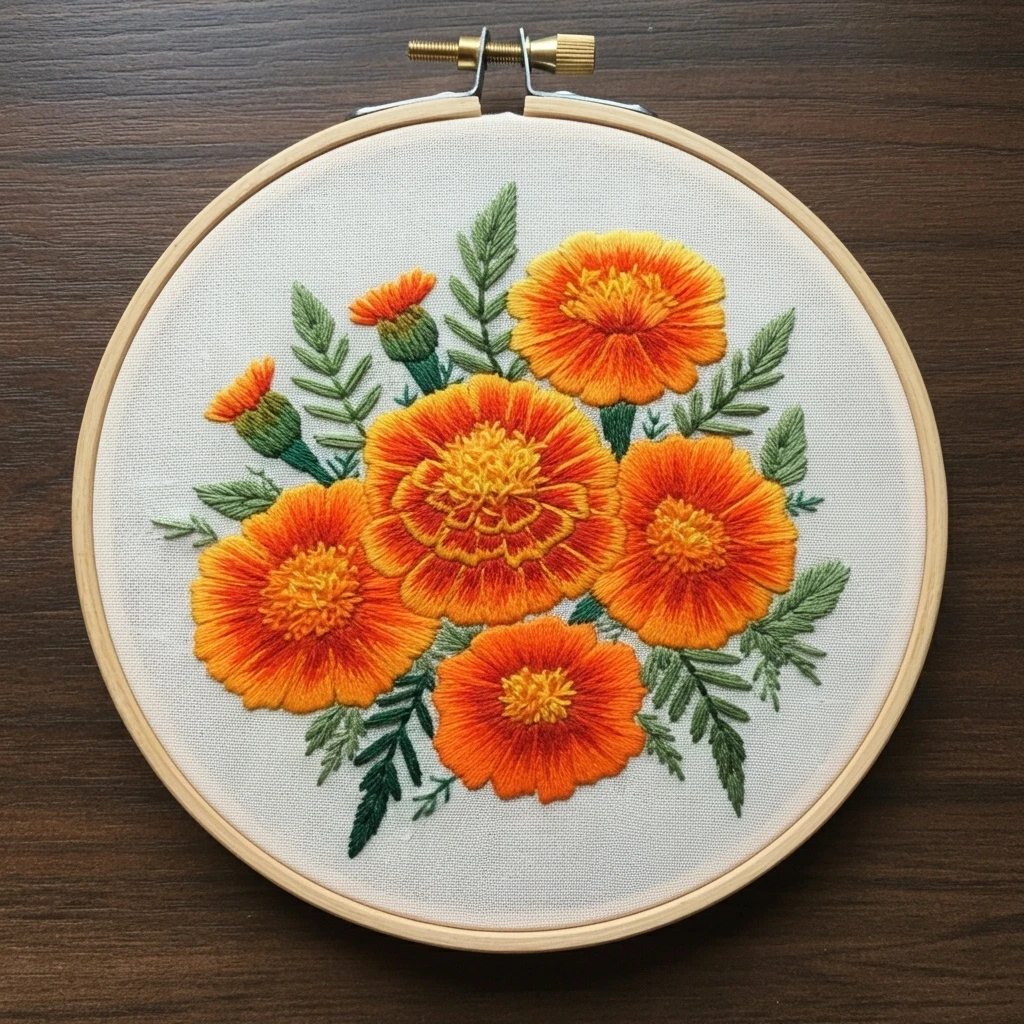

Orange Marigold Bouquet
A warm hoop design filled with five rounded orange marigolds, two smaller buds, dense golden centers, and fern-like green foliage on natural linen. The artwork depends on saturated orange petals, red-orange center shadows, yellow pollen texture, and layered olive stems that frame the flowers without overpowering them.
Best worked on natural or oatmeal linen in a 6–8 inch hoopColor story observed from the artwork
The bouquet is almost entirely a marigold-orange study: yellow-orange petal tips shift into pumpkin orange, then deepen to red-orange around the centers. The leaves are not bright spring green; they are dusty sage, olive, and deep blue-green, which keeps the bouquet earthy and lets the fiery flowers stay luminous against the pale linen.
Stitch map by design element
Large marigold petals
- Use long-and-short stitch from the flower center outward, following the round petal direction like spokes on a wheel.
- Begin with 919 or 720 at the base, graduate into 721, and finish the petal tips with 741 or 742.
- Keep the stitch lengths slightly uneven so each petal looks ruffled rather than like a flat stripe.
Raised flower centers
- Use French knots, colonial knots, and tiny seed stitches in 725 and 783 for the textured yellow centers.
- Pack knots densely in the middle; let them loosen toward the petal ring for a natural pollen effect.
- Add a few 301 or 919 knots at the lower edge to make the center look rounded.
Small buds
- Use satin stitch or tight long-and-short stitches for the orange bud caps.
- Work bud cups in 501 and 3011 with short vertical stitches that wrap around the base.
- Add one fine line of 500 on the shadowed side so the buds read as cylindrical.
Fern-like foliage
- Use stem stitch for the central green stems, then straight stitches for each small leaflet.
- For larger leaves, use fishbone stitch with 3011 as the body and 3052 on the tip or upper edge.
- Reserve 500 for only the darkest stems; too much dark green will make the bouquet heavy.
Thread-count and blending guidance
Recommended strand counts
- Petal fill: 2 strands for smooth coverage; use 1 strand for final vein lines and narrow highlight strokes.
- Flower centers: 2 strands with two wraps for raised knots; 1 strand with one wrap for small pollen dots.
- Bud caps: 2 strands for satin stitch so the orange remains vivid.
- Stems: 2 strands for main stems, 1 strand for fine sprigs and small branch tips.
- Leaves: 2 strands for fishbone stitch, 1 strand for veins and serrated leaf edges.
Useful blends
- Glowing petal midtone: 1 strand 741 + 1 strand 721 for most open petals.
- Deep petal shadow: 1 strand 720 + 1 strand 919 at the center of each flower.
- Soft petal highlight: 1 strand 742 + 1 strand 741 along the topmost petal tips.
- Golden center depth: 1 strand 725 + 1 strand 783 for dimensional knot clusters.
- Olive leaf transition: 1 strand 3011 + 1 strand 3052 for background leaves that should look lighter and softer.
Order of stitching
Mark the flower circles, petal direction lines, bud stems, and main leaf shapes. Keep marks faint because the linen background remains visible.
Work stems, fern fronds, and leaves before the blooms. This allows orange petals to overlap stem ends and creates a more natural bouquet.
Work from dark centers to bright outer tips. Rotate the hoop often so your stitches keep radiating from each flower center.
Use darker greens around bud bases and small orange strokes on the bud tops. Keep these simpler than the large flowers so they support the focal blooms.
Add French knots last so they stay crisp and raised. Then place a few 1-strand orange or green accent lines where extra definition is needed.
Outlining, shading, and texture notes
Shading approach
- Concentrate 919 and 720 at the heart of each bloom, then feather them outward with long-and-short stitch.
- Place 742 only at the outer scalloped petal edges and on the upper-left areas that appear brightest.
- Use 725 on the highest knots and 783 underneath them to make the flower centers look mounded.
- For leaves, shade with 500 near the stem and 3052 toward the tip for a soft botanical fade.
Texture approach
- Use compact knots in the central flower for the most texture, then slightly fewer knots on the smaller surrounding blooms.
- Make petal edges uneven with small staggered stitches to imitate marigold ruffles.
- Vary the length of fern leaflets so the greenery does not look comb-like.
- Add a few single-strand stitch lines over finished petals to suggest fine veins and folds.
Beginner-friendly practical tips
Hoop and fabric prep
- Use a firm cotton-linen or linen blend; very loose fabric can distort dense marigold centers.
- Keep the fabric drum-tight and re-tighten before starting each large flower.
- Use a size 7 embroidery needle for 2-strand stitching and switch to a size 5 or 6 needle when making dense knot clusters.
Clean finishing
- Avoid carrying dark green or red-orange thread behind pale open linen; end and restart instead.
- Stitch one flower completely before moving to the next to keep each bloom's shading consistent.
- Press from the back on a towel so knots and raised petal texture are not flattened.
Palette is a practical DMC approximation based on the visible artwork: keep the fiery orange family, golden textured centers, and muted olive-blue greenery to preserve the bouquet's warm marigold character.


