
Siberian Husky Portrait
A cool, high-contrast portrait built around black guard hairs, soft cream-white facial planes, icy blue eyes, warm rose details, and fine directional fur texture. Use long-and-short stitching as the foundation, then sharpen the expression with clean black outlining and tiny blue eye highlights.
Design color read
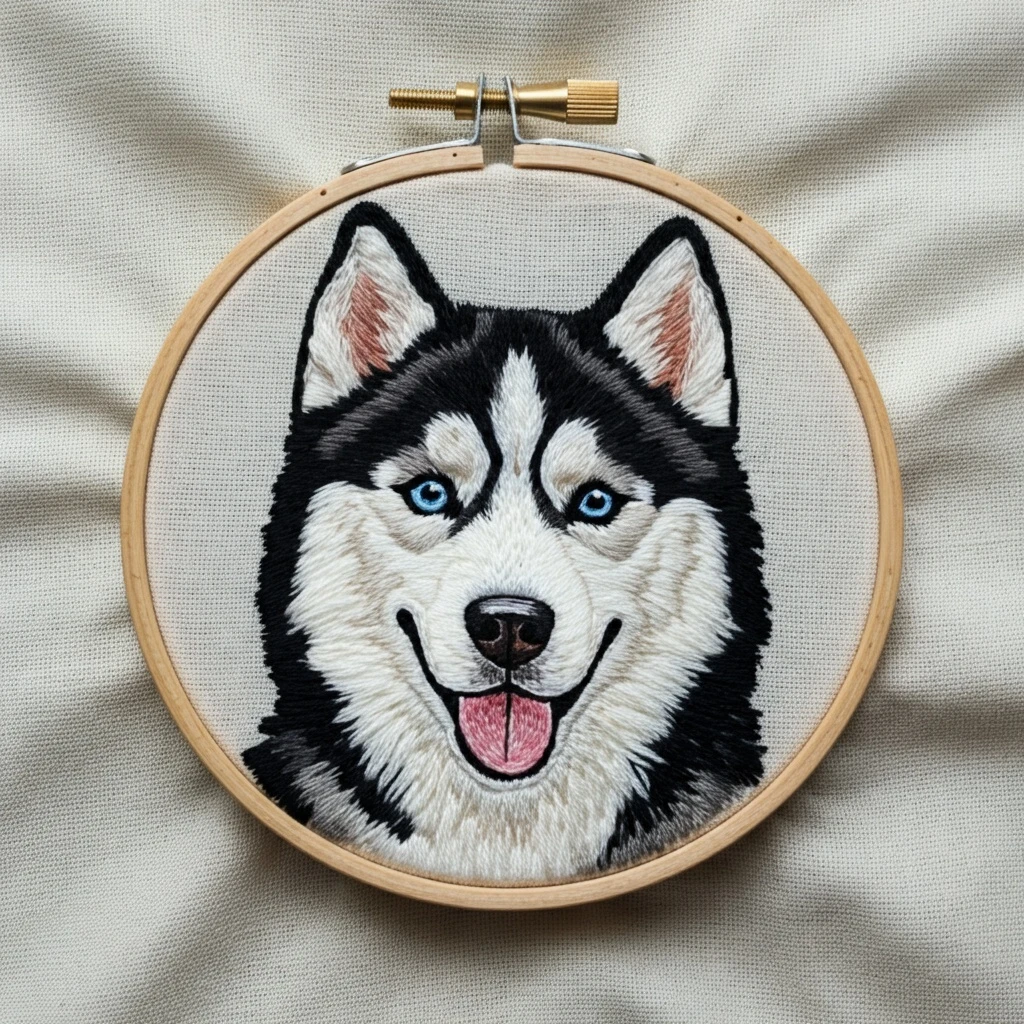
The reference image is dominated by a nearly black husky mask and outer ruff, layered over cool white and light gray fur. The eyes are the visual focal point: bright, glassy blue rings against dark eyelids. Smaller accents include dusty pink inner ears, a rosy tongue, a dark brown-black nose, and a neutral linen background. Keep the palette controlled so the face stays crisp and expressive rather than busy.
The most useful embroidery approach is to separate the dog into zones: dark mask, white muzzle and blaze, gray transition fur, blue eyes, warm mouth/ear accents, and final outline.
Polished DMC floss palette
Use these as practical equivalents for the visible tones in the portrait. Exact floss appearance can shift with fabric color and lighting, so test a small blended patch before filling the face.
Thread-count guidance
- Fur fill: 1 strand for most long-and-short work. It keeps the husky coat fine and layered.
- Black outline: 2 strands for the outer silhouette and ears; switch to 1 strand around eyes and mouth.
- Eyes: 1 strand only, using tiny satin or split stitches to avoid bulky circles.
- Tongue and ears: 1 strand for shading; 2 strands only if the area feels too pale after the first layer.
Best stitch choices
- Long-and-short stitch: primary fur technique for cheeks, forehead, ruff, and muzzle.
- Split stitch: smooth guide lines for the eyes, nose bridge, mouth, and facial markings.
- Satin stitch: small controlled sections such as the nose shine, tongue, and blue iris.
- Seed stitch: occasional soft texture in pale muzzle shadows; use sparingly.
Blending ideas
- Blend 310 + 3799 in alternating single-strand strokes for lively black fur.
- Blend 3865 + 762 for the white face so it does not look flat.
- Use 644 + 415 beneath the cheeks for subtle warm-gray volume.
- For eyes, place 3843 at the rim, 3846 toward the light spot, and a pinprick of white last.
Suggested stitching order
Area-by-area notes
| Area | Recommended colors | Technique notes |
|---|---|---|
| Outer mask & ears | 310, 3799, 413 | Use slightly uneven long-and-short stitches. Let a few gray strands break through the black so the fur looks glossy instead of solid. |
| Forehead blaze | 3865, 762, Blanc, 415 | Keep stitches vertical and tapered. Add brightest white only down the center ridge and leave gray at the edges. |
| Cheeks & muzzle | 3865, 762, 415, 644, 642 | Angle stitches outward from the nose and under the eyes. Warm beige-gray shadows make the muzzle appear rounded. |
| Eyes | 310, 3843, 3846, Blanc | Outline with one strand of black. Use radial blue satin stitches and reserve white for the final catchlight. |
| Nose & mouth | 3371, 310, 938, Blanc | Fill the nose in dark brown-black, then add short curved highlight stitches. Keep the smile line smooth and confident. |
| Tongue & inner ears | 761, 760, 3721, 758 optional | Work from pale to dark. Add a darker center crease on the tongue and soft feathered strokes inside the ears. |
Beginner-friendly practical tips
Keep the face symmetrical
Stitch both eyes and both cheek patches in the same sitting if possible. Matching tension and stitch length helps the portrait look balanced.
Do not overfill the white fur
White embroidery becomes bulky quickly. Leave tiny breathing spaces between some single-strand strokes; the linen ground helps the fur look airy.
Use directional arrows
Before stitching, pencil a few removable arrows showing fur direction: upward between the ears, outward on cheeks, downward on the chest, and curved around the muzzle.
Save highlights for last
The eye sparkle, nose shine, and brightest fur tips should be final details. Adding them too early makes later shading harder to control.
Texture and finishing suggestions
For a plush husky coat, vary stitch length rather than color constantly. A few long black guard hairs along the ears and ruff create the breed’s thick double-coat texture, while shorter pale stitches around the muzzle keep the expression friendly. After removing the hoop, steam from the back with a towel underneath and gently nudge any stray threads into the fur direction with a clean needle.
For a cleaner modern finish, leave the linen background unstitched and let the portrait float inside the hoop. For a more painterly finish, add sparse 644 and 762 background shadow stitches beneath the chin only.


