DMC Palette & Hand Embroidery Notes
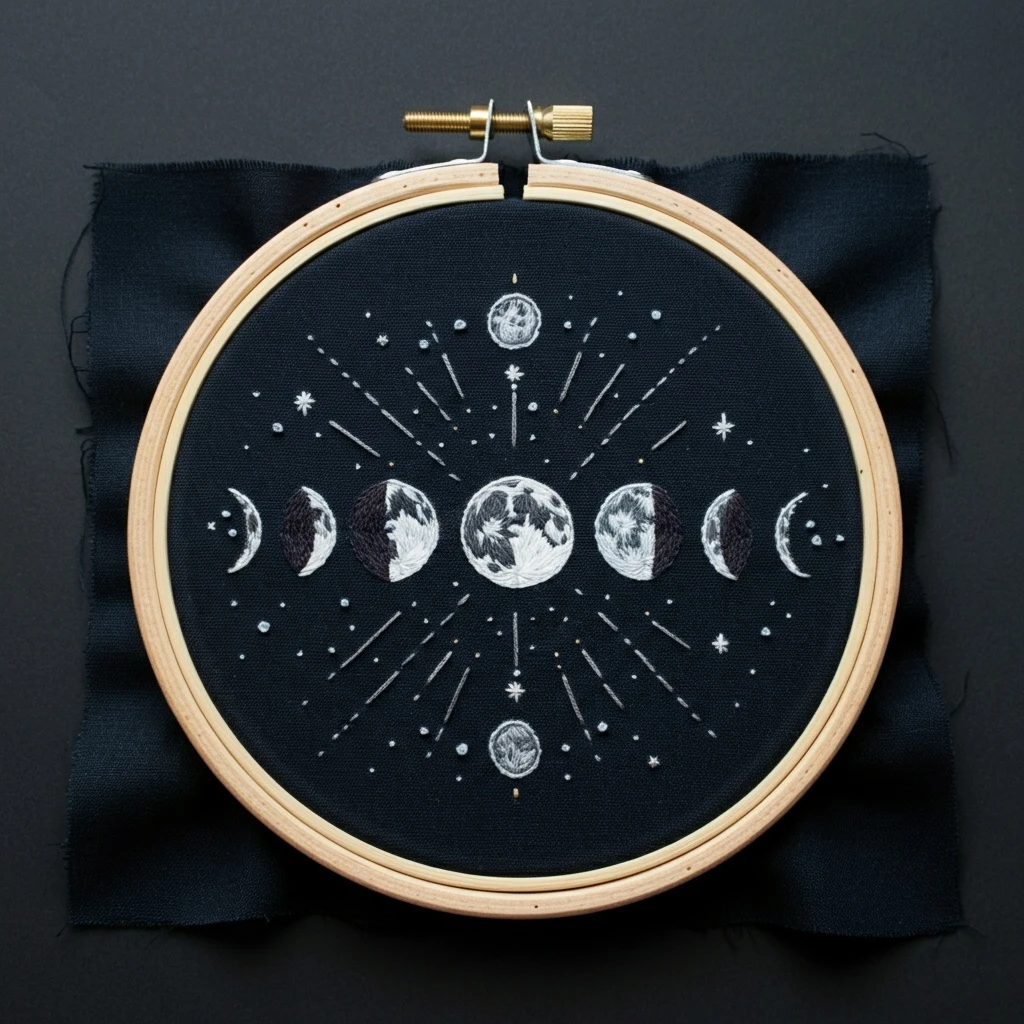
Phases Of The Moon Night Sky
A calm celestial hoop worked on dark fabric, featuring a central full moon, mirrored lunar phases, tiny stars, dotted constellations, and fine radiating sky lines.
The palette stays intentionally restrained: blue-black ground, soft moon whites, misty blue-greys, charcoal shadow, and a few antique-gold pinpoints for warmth.
Design read
This design relies on contrast more than many colors. The moons are built from broken white and pale grey stitches over a nearly black cloth, with charcoal areas left or stitched in to show waxing and waning shadows. Small stars, dots, and straight radiating lines make the hoop feel full without needing dense fill.

Suggested DMC floss palette
Use the whites and cool greys as the primary family, then add charcoal for the moon shadows and a restrained warm metallic-looking accent with standard cotton floss.
Brightest moon highlights, star centers, and crisp sparkle points.
Softer moon fill, crescent edges, and blended highlight transitions.
Pale lunar shading, delicate rays, and softer stars.
Mid-tone crater strokes, moon texture, and shaded line accents.
Deeper crater definition and the darker sides of larger moons.
Moon shadow sections, especially on half moons and crescents.
Optional touch-ups on outlines or shadow edges if the fabric is not deep enough.
Tiny warm star dots and subtle celestial accents near the ray field.
Cool glow around pale stars or blended into grey moon highlights.
Optional icy shimmer for dots, top moon highlights, and fine constellation marks.
Quiet transition shade for craters when 318 feels too strong.
Muted gold alternative for understated warm specks on dark fabric.
Stitch map by design element
| Area | Best stitches | Thread count | Practical notes |
|---|---|---|---|
| Central full moon | Long and short stitch, split stitch, seed stitch | 1-2 strands | Work irregular curved strokes from the lower edge upward. Leave small gaps of dark fabric or 3799 for crater pockets. |
| Waxing and waning moons | Satin stitch, long and short stitch, split stitch outline | 1-2 strands | Keep the lit edge bright with B5200/3865 and blend into 318/415 before the charcoal shadow. |
| Thin crescents | Split stitch, stem stitch, narrow satin stitch | 1 strand | Use a single smooth bright line first, then add a few short grey stitches on the inside curve for dimension. |
| Radiating sky lines | Straight stitch, back stitch, couching for very long lines | 1 strand | Keep lines airy and not perfectly identical; slightly varied lengths give the night sky a hand-drawn feel. |
| Star dots and constellations | French knots, colonial knots, tiny straight stitches | 1-2 strands | Use one wrap for tiny dots and two wraps for larger stars. Scatter B5200, 762, and a few 3828 points. |
| Starbursts | Straight stitch spokes, detached chain accents | 1 strand | Anchor each star with a tiny center knot, then add four to eight fine spokes in B5200 or 747. |
Blending & shading
- Soft moon glow: blend one strand B5200 with one strand 3865 for the brightest moon surfaces.
- Cool highlight: blend 3865 + 747 for a faint blue-white cast that looks luminous on black fabric.
- Crater texture: use single-strand 318 and 415 in short, curved, broken marks rather than smooth blocks.
- Shadow edge: feather 3799 into 415 with scattered straight stitches so the dark moon side does not look pasted on.
- Balanced sparkle: place warm 3828/3045 very sparingly; too much gold will shift the design away from its cool night-sky mood.
Outlining details
- Outline moon circles with split stitch in 762 or 318 before filling; this keeps the round shapes tidy.
- For crescents, stitch the outside curve first in B5200, then tuck inner shading stitches under that edge.
- Use a water-soluble white or silver transfer pencil on dark fabric, and test removal on a scrap first.
- Keep the ray lines thin; two strands can look heavy and reduce the elegant celestial spacing.
- For a clean finish, avoid carrying pale floss across the back behind open dark areas because it may show through.
Beginner-friendly stitching order
Transfer and stabilize
Use dark fabric in a firm hoop, then add a light stabilizer if the weave is loose. Mark only the key moon outlines and longest rays first.
Stitch main moons
Complete the central moon, then the two larger side moons. This sets the brightness level for the whole hoop.
Add crescents and small moons
Use one-strand outlines and light grey shading. Keep the side crescents delicate so they do not compete with the center.
Work rays outward
Stitch long straight rays from the moon area toward the hoop edge. Start with 762, then add a few B5200 highlights.
Place stars last
Add knots and starbursts after the linework so you can fill visual gaps naturally and preserve symmetry.
Final texture pass
Return to the moons with single-strand crater marks, then trim any fuzzy threads that catch light on the dark ground.
Texture suggestions
For luminous moons
Do not fill every section evenly. Alternate smooth satin areas with scratchy single-strand strokes to imitate craters. On the full moon, make the lower bright area denser and let some upper crater lines remain broken.
For a spacious sky
Use a mix of French knots, tiny seed stitches, and single straight stitches. The design looks more refined when the smallest dots are irregular in size rather than all matching.


