Detailed Autumn Tree
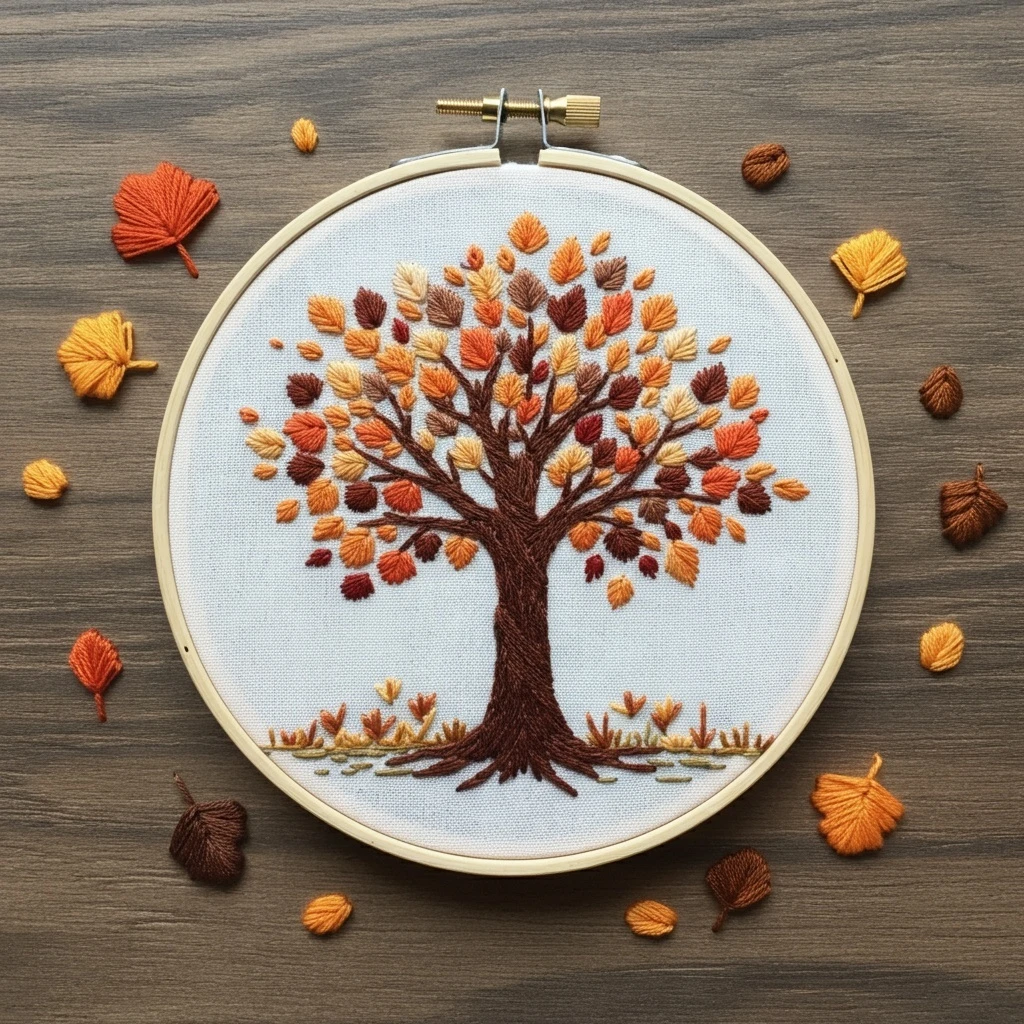
A warm, textured embroidery plan for a full autumn tree: rich bark, branching limbs, scattered leaf clusters, fallen leaves, and a soft ground line in honey, rust, copper, burgundy, and earthy brown.

Design read
The design centers on a strong brown trunk with many tapered branches, surrounded by individual teardrop leaves in gold, pumpkin orange, burnt sienna, deep red-brown, and cream-yellow. A low stitched grass line and fallen leaves keep the composition grounded without competing with the canopy.
Use the darkest browns first to establish the tree silhouette, then add mid-brown bark movement, and finish the canopy with separate leaf stitches so the top stays airy rather than solid.
Suggested DMC color palette
These DMC shades match the design’s warm autumn balance: dark textured bark, golden leaf highlights, orange leaf bodies, red-brown accents, and muted ground stitches.
DMC 3371 — Black Brown
Use for the deepest trunk grooves, branch undersides, root shadows, and a few dark leaf accents. Keep it sparse so the tree does not become heavy.
DMC 801 — Coffee Brown
Main bark color for the trunk and thicker branches. Work long-and-short stitches upward to mimic vertical bark fibers.
DMC 898 — Very Dark Coffee Brown
Good for mid-shadow bark, branch forks, and leaf stems. Blend with 801 for natural branch transitions.
DMC 920 — Copper
Primary burnt-orange leaf shade. Use for the fuller maple-like leaves and scattered falling leaves.
DMC 921 — Copper
Brighter orange for leaf centers and upper highlights. Pair beside 920 to keep the canopy lively.
DMC 972 — Deep Canary
Golden yellow leaves and warm sunlight touches. Best used as small clusters rather than large blocks.
DMC 3821 — Straw
Pale leaf tips, dry grass, and soft highlights on fallen foliage. Also useful for lifting dark orange areas.
DMC 355 — Dark Terra Cotta
Deep rust leaves and red-brown accents near the canopy edges. Adds depth without switching to a cool red.
DMC 3777 — Very Dark Terra Cotta
Use for the darkest burgundy leaves, leaf bases, and a few fallen leaves that need visual weight.
DMC 832 — Golden Olive
Muted ground stitches, dry grasses, and tiny stems. This keeps the base earthy instead of bright green.
DMC 422 — Light Hazelnut Brown
Useful for dry grass highlights, small seed-like ground marks, and softening the transition between soil and leaves.
DMC 746 — Off White
Optional: tiny light catches on pale leaves or a few final highlight stitches if your fabric is medium or dark.
Stitch map for the design
| Area | Recommended stitches | Thread count & notes |
|---|---|---|
| Trunk | Long-and-short stitch, split stitch, stem stitch, couching for raised root lines | Use 2 strands for the main fill; add 1 strand dark grooves in 3371. Follow the trunk direction from roots upward so the bark feels grown, not filled flat. |
| Branches | Stem stitch, whipped stem stitch, split backstitch | Use 2 strands for thick limbs and 1 strand for twig ends. Taper by reducing stitch length and stopping before the leaves. |
| Leaves | Fishbone stitch, detached chain, satin stitch, fly stitch | Use 2 strands for individual leaves. For larger leaves, split the leaf with a center vein and shade one side darker. |
| Falling leaves | Lazy daisy, tiny satin stitch, seed stitch | Keep these loose and slightly angled. Mix 920, 921, 972, and 355 to create motion around the canopy. |
| Ground line | Straight stitch, seed stitch, couching, short fly stitches | Use 1–2 strands. Let the grass line remain broken and uneven, with small clusters rather than a continuous heavy border. |
| Roots | Stem stitch, split stitch, short satin stitch | Use 2 strands of 801 and 898, then add single-strand 3371 at the lower edges for grounding shadows. |
Blending & shading ideas
Texture suggestions
Keep the canopy airy
Do not fill every gap. The reference has distinct leaves with visible fabric between them, which makes the tree feel detailed and light.
Vary leaf direction
Angle some fishbone and detached-chain leaves outward, some downward, and a few sideways. This creates the feeling of wind and natural growth.
Use bark ridges
After filling the trunk, add a few raised whipped stem lines over the surface in darker browns. These ridges make the trunk look dimensional.
Beginner-friendly working order
1. Start with structure
- Trace the trunk, main branches, roots, and ground line first.
- Stitch the trunk before adding leaves so branch ends can disappear naturally under foliage.
- Use short stitches around branch forks to avoid bulky knots.
2. Build the foliage in layers
- Place the darkest burgundy and rust leaves first for depth.
- Add orange and gold leaves around them, spacing colors evenly across the crown.
- Finish with pale straw highlights on selected leaf tips only.
3. Control thread count
- Use 2 strands for most leaves and bark fills.
- Use 1 strand for twig tips, bark cracks, leaf veins, and distant falling leaves.
- Use 3 strands only for a few raised roots or bold foreground leaf accents.
4. Finish cleanly
- Outline only where contrast is needed; too much outline can make the leaves look cartoonish.
- Press from the back over a towel so raised stitches do not flatten.
- Trim travel threads behind pale fabric so they do not shadow through the cloth.
Practical embroidery notes
Fabric choice
A pale cream, warm white, or very light beige cotton/linen will support the autumn palette beautifully. If using a darker linen, add DMC 746 and 3821 highlights so the leaves remain readable.
Needle & hoop
A size 7 or 8 embroidery needle works well for 1–2 strands. Keep the hoop drum-tight, especially while stitching the trunk, because dense bark stitches can pucker loose fabric.
Color placement
Repeat every major foliage color at least three times across the canopy. This prevents one side from feeling visually heavier than the other.
Outlining details
Use DMC 3371 sparingly for branch tips and interior bark lines. For softer outlines around leaves, choose 898, 355, or 920 instead of black-brown.


