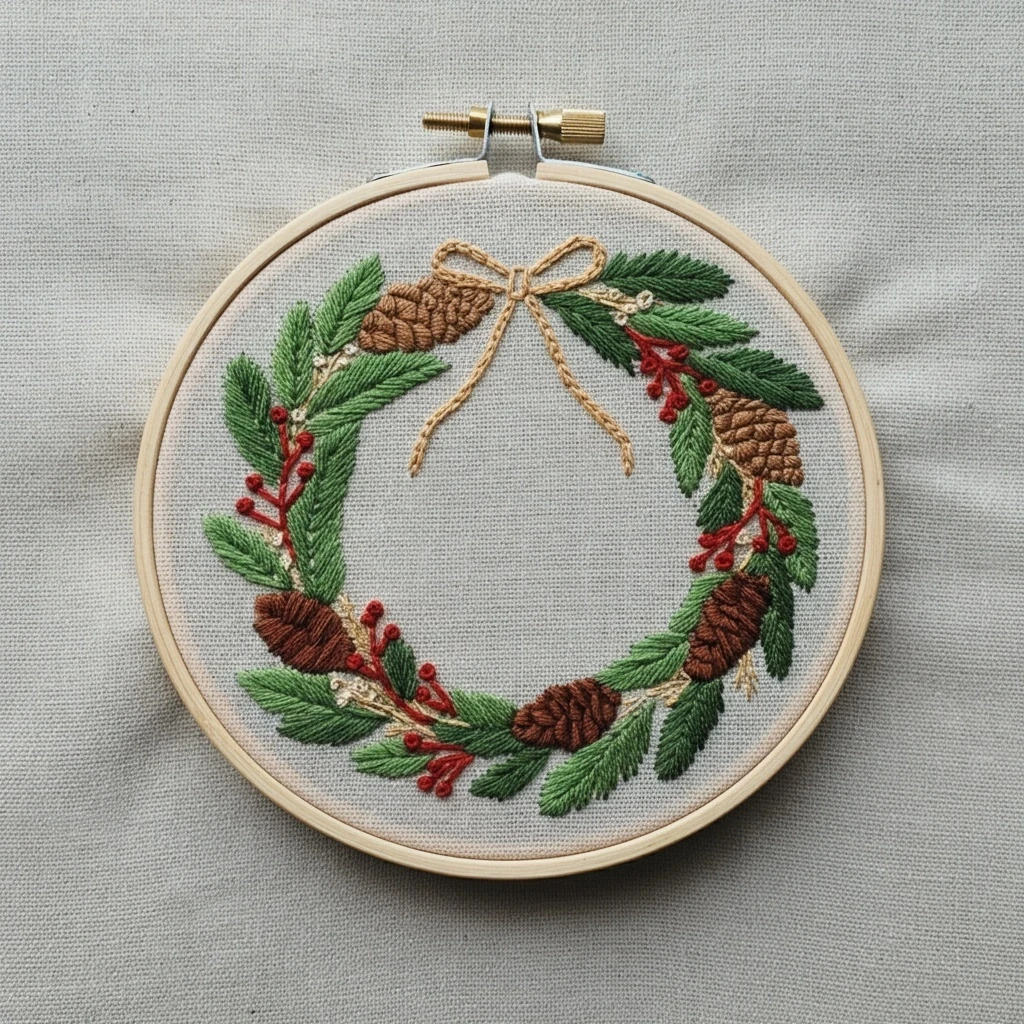

Christmas Wreath
This festive wreath design is built around layered evergreen sprigs, bright berries, ribbon or bow accents, and small holiday details such as gold dots, pinecones, or frosted highlights. The stitched version should feel full and circular but still airy: deep pine shadows inside the wreath, lighter green tips around the outside, rich red berries, warm gold sparkle, and soft cream highlights for a cozy handmade Christmas finish.
Polished DMC Color Palette
This palette balances classic Christmas greens, berry reds, ribbon accents, gold sparkle, and natural pinecone browns. Use the darkest greens toward the inner wreath and the lightest greens on the outer tips to create a lush layered circle.
Stitch Map by Design Element
Thread Count & Blending Guide
Fine sprigs
Use 1 strand for twig lines, small evergreen tips, berry glints, ornament strings, ribbon creases, and final outline corrections. This keeps the wreath airy and detailed.
Main foliage
Use 2 strands for evergreen branches, holly leaves, ribbon fills, pinecones, and larger ornaments. Two strands provide strong holiday color without flattening the wreath.
Raised berries
Use 2–3 strands for French-knot berries, gold dots, and pinecone scale accents. Use three strands sparingly for the largest foreground berries or ornaments.
Shading, Outlining & Texture Suggestions
Full wreath structure
- Lightly mark a circle before stitching to keep the wreath balanced.
- Place larger sprigs first at four or five anchor points, then fill between them.
- Angle evergreen needles around the circle instead of stitching them all straight outward.
- Leave a clean open center so the wreath shape is easy to read.
Evergreen texture
- Layer dark needles under lighter tips to create depth.
- Use broken short stitches rather than solid fill for a natural pine look.
- Repeat each green in several areas so the wreath feels cohesive.
- Add frosty cream or pale blue highlights only after the green texture is complete.
Berries and ribbon
- Cluster berries in small groups of three or five for a natural holiday look.
- Place berry highlights consistently on the same upper side.
- Use dark red inside ribbon folds and bright red on the lifted loops.
- Keep ribbon edges smooth so they contrast nicely with textured pine needles.
Natural accents
- Use pinecones or twigs as warm brown breaks between green and red areas.
- Stitch pinecone scales in overlapping layers for dimension.
- Use gold dots sparingly so they sparkle instead of cluttering the wreath.
- Outline with matching dark green, red, or brown rather than harsh black.
Beginner-Friendly Stitching Order
- Mark the wreath: lightly draw the circle, then mark the bow or ribbon, berry clusters, major pinecones, and a few evergreen sprig directions.
- Stitch the base greens: work the inner darker evergreen sprigs first, following the curve of the wreath.
- Add lighter foliage: layer mid-green and pale-green needles on top, especially around the outer edge.
- Stitch ribbon or bow: fill red ribbon shapes after the greens so the ribbon sits cleanly in front.
- Add berries and pinecones: place raised berries, pinecone scales, and brown twig details next.
- Finish with sparkle: add gold accents, frosty highlights, tiny white glints, and final outline corrections last.
Practical Tips for a Clean Finish
Fabric & hoop
Warm cream, natural linen, or oatmeal cotton-linen suits the Christmas palette and makes red berries and green sprigs pop. Keep the hoop drum-tight so knots and ribbon satin stitches do not pucker.
Needle choice
Use a sharp embroidery needle size 7–9 for one- and two-strand work. Switch to a slightly larger needle for three-strand berry knots or dense pinecone stitches.
Preventing clutter
Stop adding filler sprigs before the wreath becomes a solid green ring. A few open gaps help the red berries, ribbon, and gold accents stay visible.
Color balance
Repeat red and gold accents evenly around the circle. If one side feels too heavy, add a few pale green tips or cream highlights on the opposite side rather than more berries.


