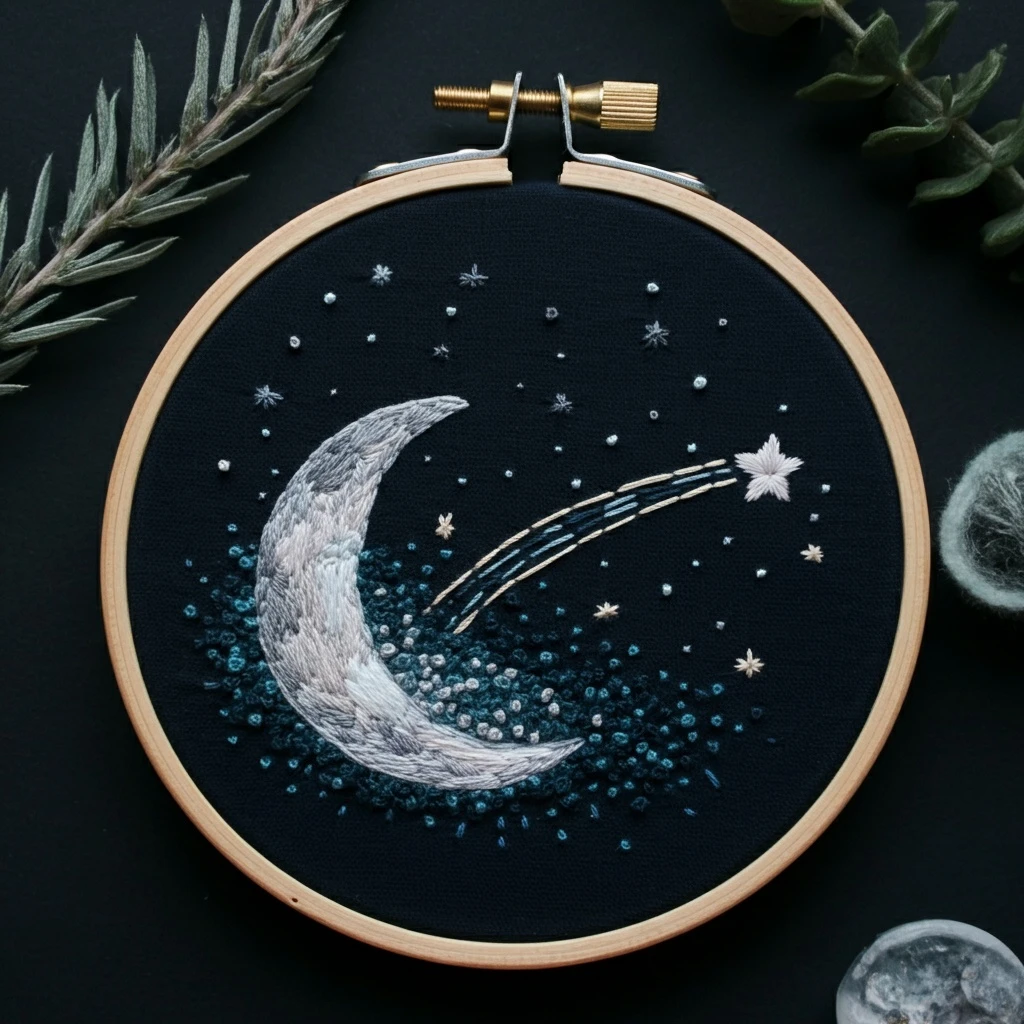

Celestial Crescent Moon and Shooting Star
This dreamy celestial hoop pairs a glowing crescent moon with a graceful shooting star trail and scattered sparkle accents. The stitched result should feel light and magical: a smooth moon curve, a bright star head, tapered streaks that show motion, and small golden details that brighten the open sky without crowding it.
Polished DMC Color Palette
This palette combines moonlit creams, warm golds, and soft blue-lavender accents. The moon should read as creamy and dimensional, while the shooting star uses brighter golds and whites near the head, fading into cooler pale tones along the trail.
Stitch Map by Design Element
Thread Count & Blending Guide
Fine details
Use 1 strand for moon contours, tiny star rays, small knots, trail-edge highlights, and final outline corrections. One strand keeps the celestial details elegant.
Main shapes
Use 2 strands for the crescent fill, shooting star head, and main trail lines. Two strands give clear coverage without making the design bulky.
Raised sparkle
Use 2–3 strands for focal French knots or larger star dots. Three strands works best only for the closest, brightest sparkles near the shooting star.
Shading, Outlining & Texture Suggestions
Crescent dimension
- Keep the outer crescent curve brightest and the inner curve softly shaded.
- Use shorter satin stitches around the narrow crescent tips to avoid gaps.
- Add the final highlight after the main fill so it sits cleanly on top.
- Use dark contrast only sparingly; the moon should feel soft and luminous.
Shooting-star motion
- Stitch the trail in the same direction as the star’s movement.
- Make the trail brightest and thickest near the star head.
- Taper the tail with broken stitches rather than ending it abruptly.
- Add a few scattered knots outside the trail to suggest drifting sparkle.
Star sparkle
- Use a mix of knots, tiny crosses, and straight stitches for natural variation.
- Reserve B5200 for only the brightest pinpoints.
- Place gold accents close to the star and cooler colors farther down the trail.
- Leave open fabric around the sparkle clusters so they read as sky.
Outlining approach
- Use split stitch for the crescent curves and stem stitch for sweeping trail lines.
- Outline after filling so the edges are crisp and not buried.
- Use 822 or 762 for gentle moon lines; reserve 414 or 3799 for tiny contrast.
- Do not outline every sparkle; many should remain simple knots or rays.
Beginner-Friendly Stitching Order
- Transfer lightly: mark the crescent outline, shooting star head, trail direction, and only the largest sparkle positions. Add small dots freehand at the end.
- Stitch the crescent first: fill the moon body, add inner shadow, then outer rim highlights.
- Build the shooting star: stitch the star head, then work the brightest part of the trail immediately behind it.
- Taper the trail: add shorter pale blue, lavender, and gray stitches as the tail fades.
- Add larger stars: work straight-stitch stars before tiny dot details.
- Finish with sparkles: add French knots, B5200 pinpoints, and final line corrections last.
Practical Tips for a Clean Finish
Fabric & hoop
Warm cream cotton, linen, or cotton-linen gives the moon and gold trail a soft glow. Keep the hoop drum-tight so the crescent satin stitch and long trail lines stay smooth.
Needle choice
Use a sharp embroidery needle size 7–9 for one- and two-strand stitching. Switch to a slightly larger needle for three-strand knots if the fabric pulls.
Trail control
For an elegant tail, reduce both stitch length and stitch density as the trail moves away from the star. This creates a natural fading motion.
Keeping pale floss clean
Use shorter lengths of cream and white floss, wash hands before stitching, and avoid carrying dark threads behind the crescent or pale trail sections.