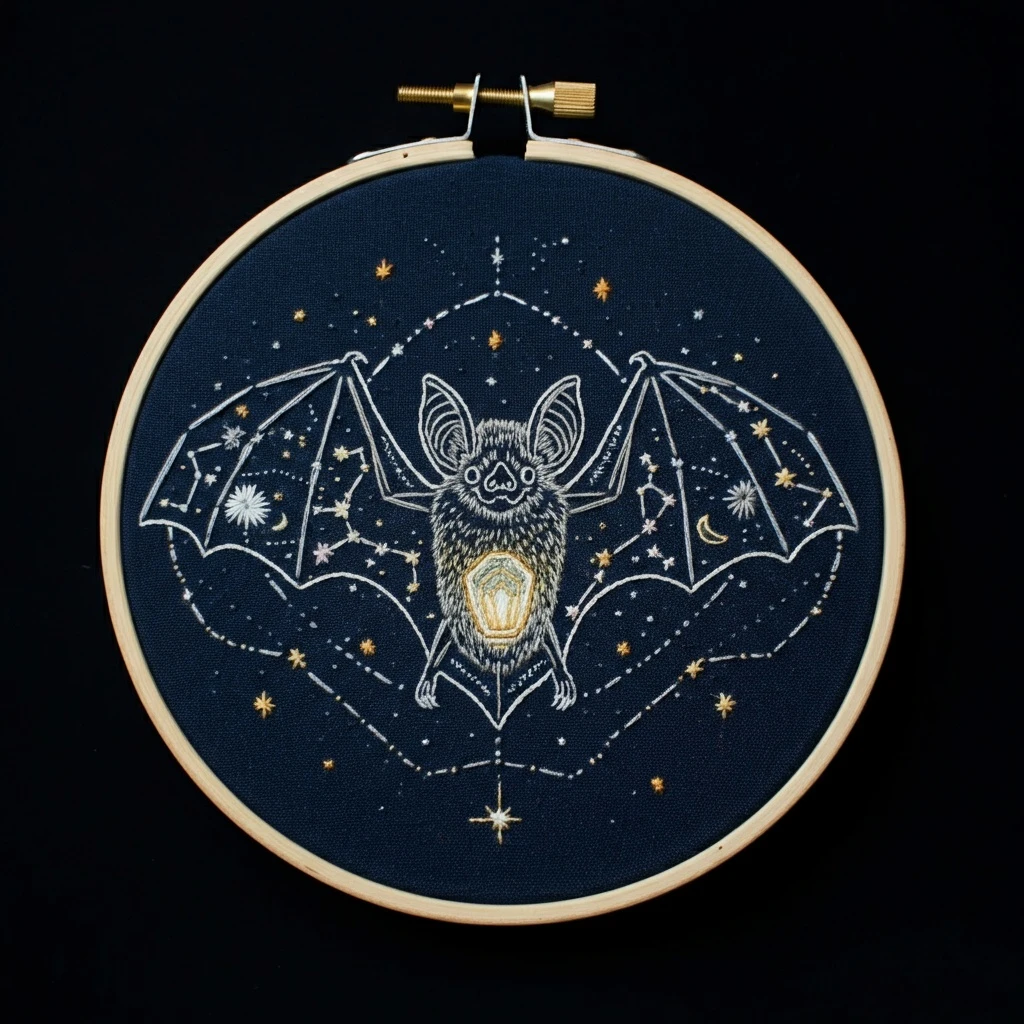
Celestial Bat
This moonlit bat design combines dramatic dark wings, soft purple-gray shading, warm celestial stars, crescent-moon accents, and fine mystical linework. The stitched version should feel elegant and slightly magical: crisp wing silhouettes, subtle membrane shading, delicate star texture, and enough pale highlights to keep the dark figure readable.
Polished DMC Color Palette
The palette below is designed for a dark celestial bat with purple undertones and warm metallic-looking details using standard cotton floss. Deep charcoal anchors the bat, plum and lavender soften the wing membranes, and golds and creams bring the moons and stars forward.
Stitch Map by Design Element
Thread Count & Blending Guide
Fine details
Use 1 strand for wing ribs, antenna-like ear details, star points, moon outlines, claws, eyes, and tiny celestial dots. One strand keeps the mystical linework delicate.
Main fills
Use 2 strands for wing membrane fills, body shading, crescent fills, and larger stars. Two strands give clean coverage while allowing smooth tonal shifts.
Raised sparkle
Use 2–3 strands for larger French-knot stars or raised constellation dots. Use three strands sparingly so the star accents pop without overwhelming the bat.
Shading, Outlining & Texture Suggestions
Wing structure
- Stitch each wing panel in the direction it stretches between ribs.
- Keep the darkest color close to the body and wing folds.
- Use lavender and pale gray highlights sparingly on outer membrane sections.
- Add the final rib lines after filling so they sit crisply on top.
Celestial glow
- Place gold and cream accents around the bat to frame the silhouette.
- Use 3865 only for the brightest star points or moon shine.
- Add small 822 stitches beside cream moons for soft shadow and shape.
- Vary star sizes: a mix of straight stitches, knots, and tiny crosses looks magical.
Body and face detail
- Use very short stitches for fur so the face stays readable.
- Add warm 3722 only inside the ears or in tiny accent areas.
- Keep eyes minimal: a tiny dark stitch plus a pale catchlight is enough.
- Do not overfill the body; heavy thread can make the bat lose its delicate shape.
Outlining approach
- Use black for wing tips and silhouette points, but charcoal or grape for softer curves.
- Outline after shading so the silhouette remains polished.
- Use split stitch for curves and back stitch for star rays or short straight details.
- If dark thread overwhelms the moon, add a tiny 3865 separator stitch nearby.
Beginner-Friendly Stitching Order
- Transfer carefully: mark the bat outline, wing ribs, main moon shapes, larger stars, and only a few celestial dots. Add tiny dots freehand as you stitch.
- Fill wing membranes: stitch the large dark areas first using directional long-and-short stitches or satin panels.
- Add body and head: work the body in dark short stitches, then add ears, eyes, and tiny face details.
- Stitch wing ribs and outline: use one-strand lines to sharpen the bat silhouette and define the wing structure.
- Add moons and stars: fill larger celestial shapes in gold, straw, cream, and beige-gray.
- Finish with sparkle: add French knots, seed stitches, tiny crosses, pale highlights, and final outline corrections last.
Practical Tips for a Clean Finish
Fabric & hoop
Warm cream, oatmeal, or lightly tea-dyed cotton-linen supports the night palette beautifully. Dark bat stitches stand out clearly while cream and gold celestial details still glow.
Needle choice
Use a sharp embroidery needle size 7–9 for one- and two-strand work. For larger French-knot stars, move to a slightly larger needle so the wraps pull through smoothly.
Managing dark floss
Use shorter lengths of black and dark purple floss, strip and recombine strands, and avoid carrying dark thread behind moon or star areas to prevent show-through.
Keeping symmetry
Check both wings before final outlining. If one wing feels heavier, balance it with a few matching highlight stitches or celestial dots rather than adding more dark fill.