Butterfly Garden Wreath
Design #377 · Butterfly Hoop Art, Colorful Wreath & Nature-Inspired Embroidery
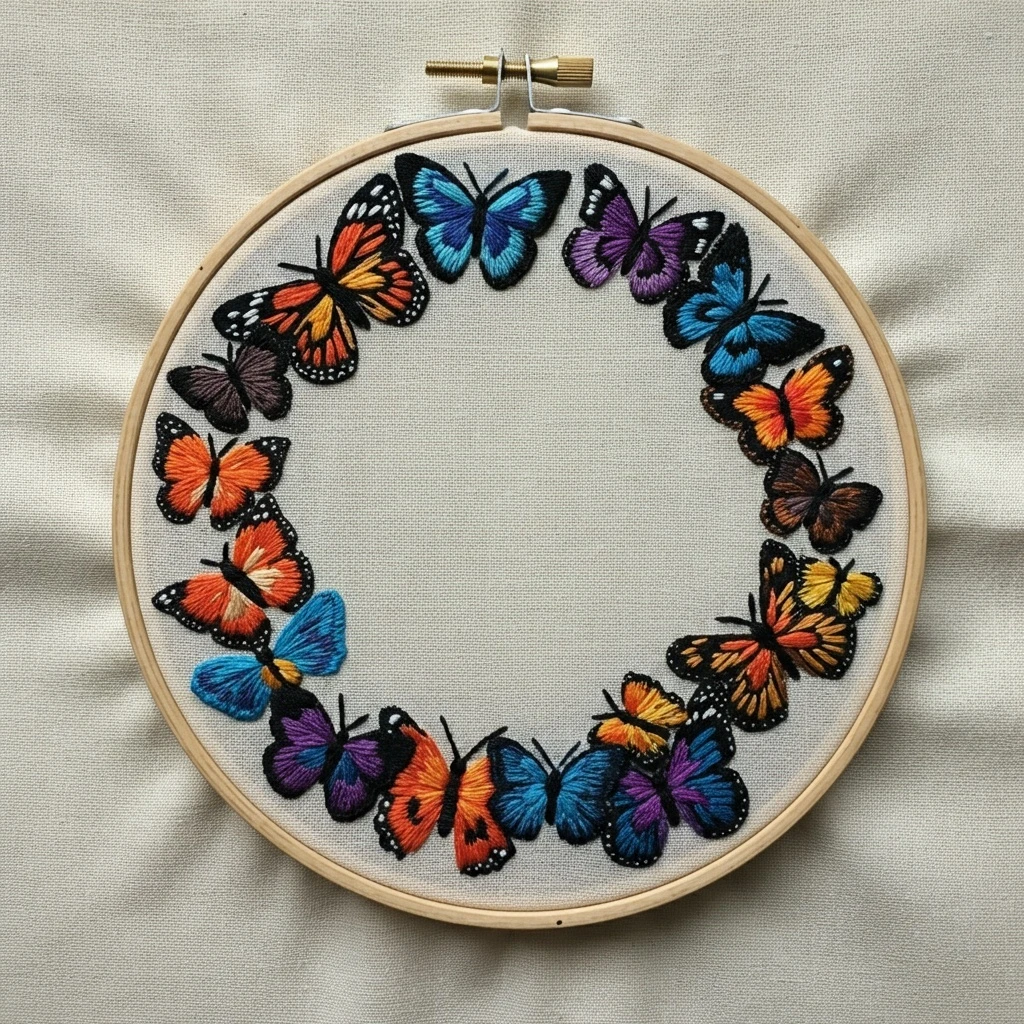
This guide is based on the visible hoop preview: a circular wreath of butterflies stitched around an open center, with bold black outlines, bright blue wings, warm monarch-style oranges and yellows, violet butterflies, white dotted accents, and a few darker brown wing sections.
Color coverage percentages are visual estimates only. They are judged from the preview image and should not be treated as exact floss usage or yardage requirements.
Preview

Preview image from linked source file.
The visible design shows a ring of many butterflies arranged like a wreath inside a wooden hoop. The center is left mostly open, while the stitched border alternates large and small butterflies in blue, orange, yellow, purple, dark brown, black, and white details.
Likely DMC Color Palette
The matches below are close visual DMC choices for the shades visible in the butterfly wreath. The dark outlining is especially important because it gives the butterflies their crisp silhouette and wing separation.
| DMC | Approx. Hex | Thread Name | Coverage | Where It Appears |
|---|---|---|---|---|
| 310 | #000000 | Black | 30% | Outer wing outlines, butterfly bodies, antennae, wing veins, and the dark edging around nearly every butterfly. |
| 3843 | #00a8c8 | Electric Blue | 14% | Bright blue butterfly wings along the top, right side, lower center, and lower left of the wreath. |
| 995 | #2696b6 | Electric Blue Dark | 8% | Deeper blue shading near the black wing veins and outer edges of the blue butterflies. |
| 741 | #f47f22 | Tangerine Medium | 13% | Main orange sections of the monarch-style butterflies on the left, lower center, and right side. |
| 970 | #f55d18 | Pumpkin Light | 7% | Warmer red-orange shading in the deeper parts of the orange wings and small lower wing accents. |
| 742 | #f6b943 | Tangerine Light | 7% | Golden yellow highlights in orange butterflies and the small yellow butterfly on the right. |
| 550 | #5b2a83 | Violet Very Dark | 8% | Deep purple wings in the upper-right butterfly, lower-left butterfly, and lower-right butterfly. |
| 552 | #8a4aa6 | Violet Medium | 5% | Lighter violet fills and highlights inside the purple butterflies. |
| 3371 | #1e1411 | Black Brown | 5% | Dark brown butterfly wings and warm shadow areas, especially the small butterflies on the left and right. |
| 3865 | #f7f4e8 | Winter White | 3% | Small dotted wing markings and tiny bright accents on the black-edged butterflies. |
Stitching Suggestions
| Design Element | Recommended Stitches | Practical Notes |
|---|---|---|
| Butterfly outlines and bodies | Back stitch, stem stitch, satin stitch | Work the black outlines cleanly and consistently. Use shorter back stitches around tight curves so wing scallops and body shapes stay smooth. |
| Large filled wings | Long and short stitch, satin stitch | Stitch from the outer wing edge toward the body, changing direction with each wing section. Blend bright and darker shades by overlapping slightly near the vein lines. |
| Wing veins | Straight stitch, back stitch | Add the veins after the colored fills are complete. This keeps the black lines crisp and helps divide each butterfly into clear panels. |
| White dotted markings | French knots, colonial knots, tiny seed stitches | Keep dots small and even. One wrap for French knots is usually enough for the delicate white marks along the black wing borders. |
| Antennae and fine legs | Single-strand back stitch or straight stitch | Use one strand for the thinnest details. Pull gently so the antennae remain fine and do not pucker the fabric. |
| Wreath arrangement | Consistent outline-first workflow | Because the butterflies form a circular frame, check spacing as you stitch. Keep the inner open area clean and avoid carrying dark threads across the back where they may show through. |
Where to Start
Begin with the larger butterflies that anchor the wreath: the orange butterfly at upper left, the blue butterfly near the top, and the blue butterfly on the right. Stitch their colored wing fills first, then add darker outlines and veins once the fills are settled.
After the larger shapes are complete, move around the hoop in one direction and stitch the smaller butterflies. This helps preserve the circular rhythm of the wreath and makes it easier to keep colors balanced around the open center.
Helpful Notes
- Use two strands for most filled wing sections, then switch to one strand for antennae, tiny black details, and very small wing divisions.
- For the blue and purple butterflies, place the brightest shade in the center of the wing panels and the darker shade closer to the black veins for depth.
- For the orange butterflies, blend tangerine, pumpkin, and golden yellow with short overlapping stitches rather than harsh stripes.
- Stitch white dots last so they stay bright and sit neatly on top of the dark edging.
- If transferring the pattern, mark the inner open circle lightly so the butterfly wreath stays round and the center remains uncluttered.
Encouraging Finish
This is a cheerful design with a lot of small, satisfying wins. Each butterfly can be treated like a tiny mini-project, and the wreath becomes more lively with every finished wing. Take your time with the black outlines and final white dots; those crisp finishing details are what make the bright colors sparkle.