Puffy Rainbow
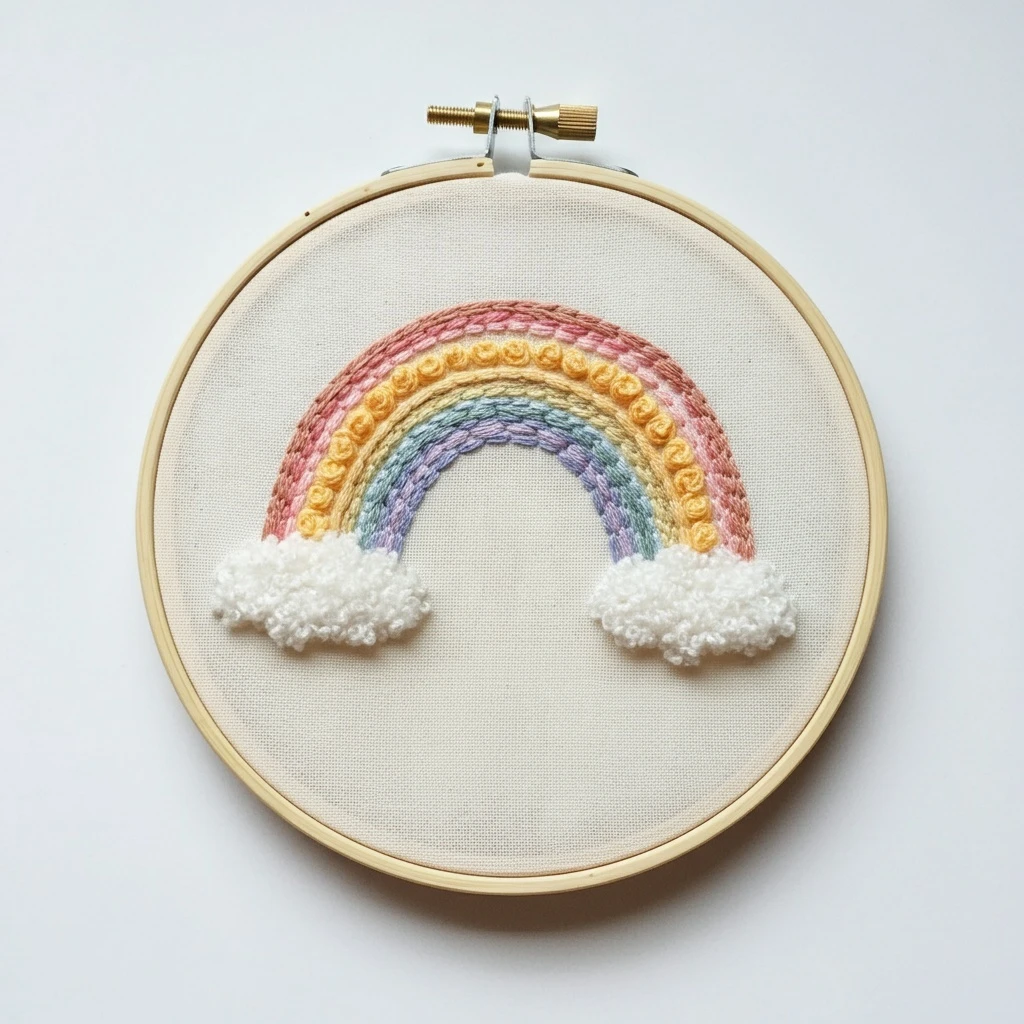
A soft, nursery-sweet rainbow stitched in rounded pastel bands, with highly textured white clouds at both ends. The reference combines braided or chain-like rainbow rows, a raised yellow bump row, muted pinks, sage-aqua tones, lavender blue, and plush cloud texture that should look pillowy rather than flat.
Design color read
The stitched sample shows an arched rainbow with a dusty rose outer band, warm peach/coral shading, a golden yellow raised row, muted sage and aqua-green middle bands, and a soft lavender-blue inner band. The clouds are bright creamy white with heavy looped texture and slight beige shadowing underneath.
Suggested DMC floss palette
These DMC colors are chosen for a soft handmade rainbow rather than a bright primary-color rainbow. Use the stronger shades sparingly and blend with lighter neighbors for a plush, faded look.
Outer pink arch, especially the warm dusty rose row seen along the top.
Soft highlight stitches in the pink band and gentle transition into peach.
Peach-coral inner row beside the pink, useful for warmer shadowed sections.
Golden raised bumps or colonial knots across the yellow rainbow band.
Yellow highlights and lighter stitches between raised knots for a sunny pastel feel.
Muted sage band that keeps the rainbow vintage and gentle.
Aqua-green band and cool bridge between sage and lavender.
Blue-toned stitches in the lower cool band; use lightly to avoid overpowering.
Lavender inner arch and shadowed lower curve near the cloud edges.
Lavender highlights and softened inner band texture.
Main puffy cloud loops and bright cloud top highlights.
Subtle underside cloud shadows and optional grounding stitches under the fluff.
Stitch map by design element
Outer pink arch
Use chain stitch or split stitch in a smooth curve. Add one strand of lighter salmon in scattered stitches to soften the edge.
Peach transition row
Work stem stitch or rope stitch following the same curve. Keep the stitches snug but not crowded so the arch remains even.
Raised yellow band
Use colonial knots, French knots, or padded satin bumps. Place knots evenly to mimic the rounded bead-like row in the sample.
Sage and aqua bands
Use chain stitch, whipped backstitch, or split stitch. Slightly alternate green and aqua stitches for a soft blended middle.
Lavender inner band
Use a tidy chain stitch or backstitched curve with short stitches around the tightest part of the arch.
Puffy clouds
Use turkey work, dense French knots, or loop stitch in winter white. Trim gently only if you want a fuzzy cloud surface.
Thread-count and blending guidance
| Area | Strands | Blending idea | Practical note |
|---|---|---|---|
| Rainbow bands | 2–3 strands for chain/stem rows | For a soft heathered effect, use 1 strand of the main color plus 1 strand of its lighter neighbor. | Stitch each arch from the center outward, rotating the hoop so your hand follows the curve naturally. |
| Yellow raised row | 2 strands for knots; 3 strands for chunkier bumps | Use mostly 3820, then add occasional 744 knots on the upper edge for highlight. | Keep knot spacing consistent; uneven yellow bumps will stand out more than uneven flat stitches. |
| Cloud texture | 3–6 strands, depending on desired puff | Use 3865 for most loops and tuck a few 842 stitches along the bottom edge for shadow. | Add clouds after the rainbow bands so the fluff overlaps and hides the rainbow ends cleanly. |
| Outlines and edges | 1 strand only | Use matching band colors instead of dark outline; add beige only under clouds for depth. | Avoid heavy black or brown outlines. The design depends on soft, rounded pastel edges. |
Recommended stitching order
- Transfer the rainbow arcs lightly, marking each band with tiny guide ticks at both ends.
- Stitch the inner lavender band first, then work outward one band at a time to maintain spacing.
- Add the raised yellow knots after the flat bands so they sit proudly on top.
- Work any small highlight stitches along the pink, sage, and aqua rows.
- Finish with the clouds, letting the loops or knots cover the band ends.
Beginner-friendly practical tips
- Use a hoop that keeps the fabric drum-tight; loose fabric makes curved bands wobble.
- Shorten stitches on the inside curve and lengthen them slightly on the outside curve.
- Thread only 12–15 inches at a time when making clouds, because heavy loop work roughens floss quickly.
- For even arches, draw the curves with a disappearing pen and check spacing before stitching.
- Comb cloud loops gently with a clean needle tip rather than pulling them with fingers.
Texture, shading, and finishing notes
This design works best when the rainbow bands look tidy and soft, while the clouds look plush and dimensional. The contrast between smooth curves and bouncy cloud texture creates the sweet “puffy rainbow” effect.
Curved band control
Use the same stitch family across most bands for a cohesive look. Chain stitch gives the plump, braided texture visible in the sample; stem stitch gives a smoother, more delicate finish. Keep tension relaxed so the arches do not pinch the fabric.
Cloud dimension
Build clouds in layers: first a low base of white split stitch, then loops or knots on top, and finally a few beige shadow stitches underneath. This prevents gaps and makes the cloud edge look intentionally fluffy.