
Whimsical Snail and Mushroom Beginner
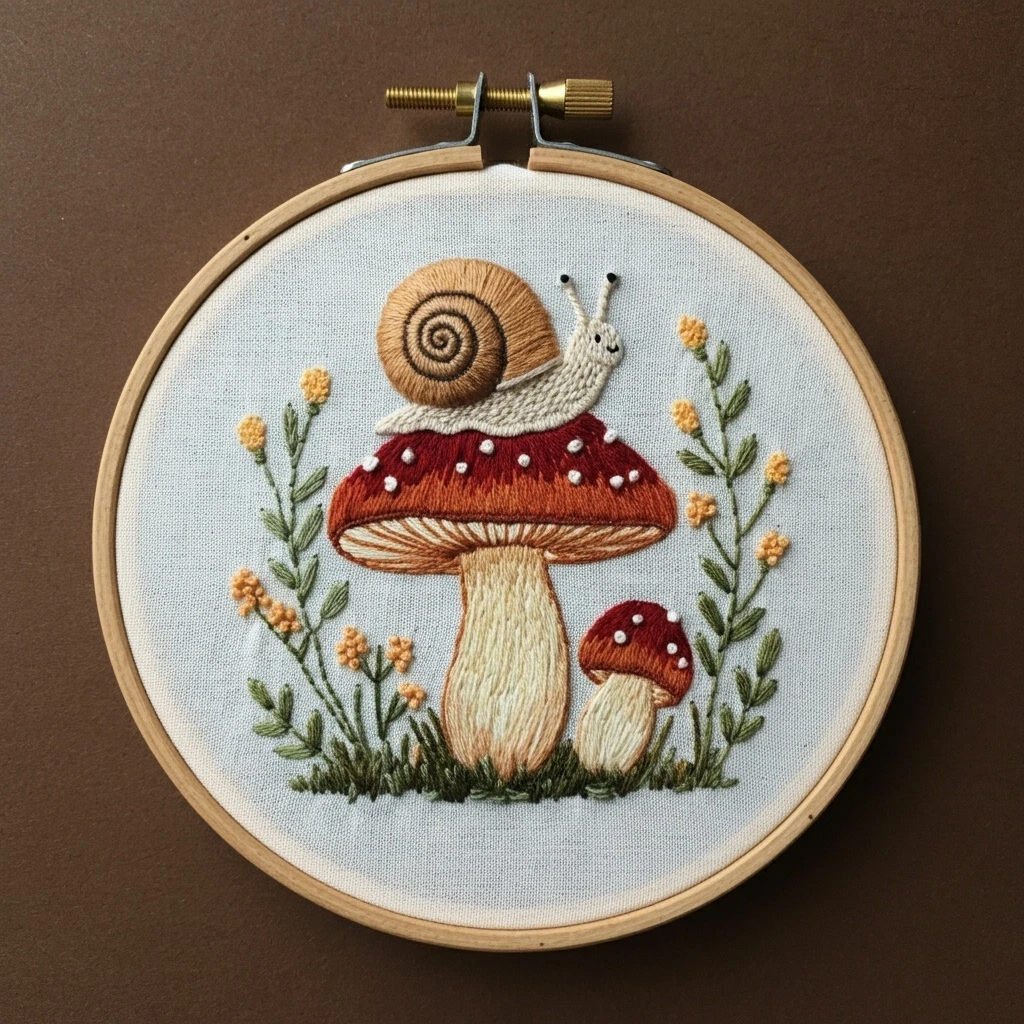
A polished DMC floss palette and practical stitch plan for the cozy hoop design featuring a smiling snail perched on a red-capped mushroom, soft cream stems, leafy sprigs, yellow wildflowers, and grassy woodland texture.
Image Color & Design Read
The reference is built around a warm woodland palette: a rusty red toadstool cap with white spots, creamy mushroom stems, a tan spiral snail shell, a pale gray-beige snail body, olive greenery, dark grass at the base, and soft golden flower clusters. The design relies more on clear shapes and texture than complex realism, making it ideal for a beginner who wants a charming finished hoop.
Coverage percentages below are visual estimates for choosing thread priorities, not exact floss yardage.
Stitching Character
Keep the mushroom cap smooth, the snail shell warmly ribbed, and the ground stitches loose and grassy. The most important details are the shell spiral, the underside gills of the mushroom, tiny white cap dots, and the snail face and antenna tips.
Likely DMC Color Palette
Stitch Types & Thread Guidance
| Element | Recommended stitch | Thread count & practical notes |
|---|---|---|
| Large mushroom cap | Long and short stitch or satin stitch | Use 2 strands. Work vertical/curved strokes from the cap edge toward the dome, blending 815 in the lower edge, 921 through the middle, and 920 in highlight streaks. |
| White cap spots | Satin stitch, tiny straight stitches, or French knots | Use 2 strands of 3865. Stitch spots after the red cap is filled so they sit cleanly on top. |
| Mushroom stems | Long and short stitch | Use 2 strands. Keep the stitches mostly vertical and slightly wavy. Blend 738 with 3826 near the edges and base for soft volume. |
| Cap underside and gills | Straight stitch plus backstitch | Use 1 strand for fine gill lines. Fan 3826 and 975 from the stem outward so the underside feels dimensional but not heavy. |
| Snail shell | Split stitch outline, then satin/long stitches | Use 2 strands for the shell fill. Follow the shell curve with 3826, then stitch the spiral in 975 or 898 with 1 strand for crisp definition. |
| Snail body | Stem stitch outline and short split stitches | Use 1-2 strands of 738 and 644. Keep the body texture soft and slightly bumpy; avoid overfilling the face. |
| Antennae and face | Backstitch and tiny French knots | Use 1 strand for antennae. Add 898 for eyes and tips only at the end to prevent dark details from smudging into the fill. |
| Leafy side stems | Stem stitch with detached chain leaves | Use 1 strand for stems and 2 strands for leaves. Alternate 3052 and 3363 so the sprigs look natural. |
| Yellow flowers | French knots | Use 2 strands of 783, one or two wraps. Cluster knots loosely rather than forming perfect dots. |
| Grass base | Straight stitch, fly stitch, and seed stitch | Use 1-2 strands of 3363 with touches of 3052. Vary stitch height to create a soft woodland floor. |
Blending & Shading Ideas
- Mushroom cap: blend 815 + 921 for the shaded lower curve, then 921 + 920 in alternating strokes for a warm highlight.
- Snail shell: use 3826 as the base and add 975 curved lines following the spiral; reserve 898 for the darkest spiral groove.
- Stem volume: place lighter 738 in the center and 3826 along both sides so the mushroom stem looks rounded.
- Leaves: stitch one half of each leaf in 3052 and the other in 3363 for simple two-tone shaping.
Outlining & Texture Details
- Use 1 strand of 975 around the mushroom cap if the red edge needs definition.
- Outline the snail shell spiral slowly with split stitch; short stitches make the curve smoother.
- Keep the underside gill lines thin, evenly spaced, and radiating from the stem.
- Add a few random dark grass stitches over the mushroom bases to ground the design.
Beginner-Friendly Stitching Order
Anchor the big shapes
Backstitch the mushroom caps, stems, snail body, and shell. This gives you clear boundaries before filling.
Fill cap, stem, and shell
Work the mushroom cap first, then the stem, then the snail shell. Follow the natural direction of each shape.
Add details last
Finish with spots, shell spiral, flower knots, grass, antennae, and face details so the small elements stay crisp.
Practical Tips for a Clean Finish
- Use 2 strands for most fills and 1 strand for outlines, shell spiral, antennae, gills, and tiny facial marks.
- Keep satin stitches shorter than 1 cm where possible; split long areas into rows of long-and-short stitches to prevent snagging.
- For the beginner version, do not overblend. Two or three colors per area are enough to create depth.
- Place French knots after surrounding stitches are complete so the raised flowers and mushroom spots remain dimensional.
- Press from the back on a towel after stitching to protect knots and raised texture.