
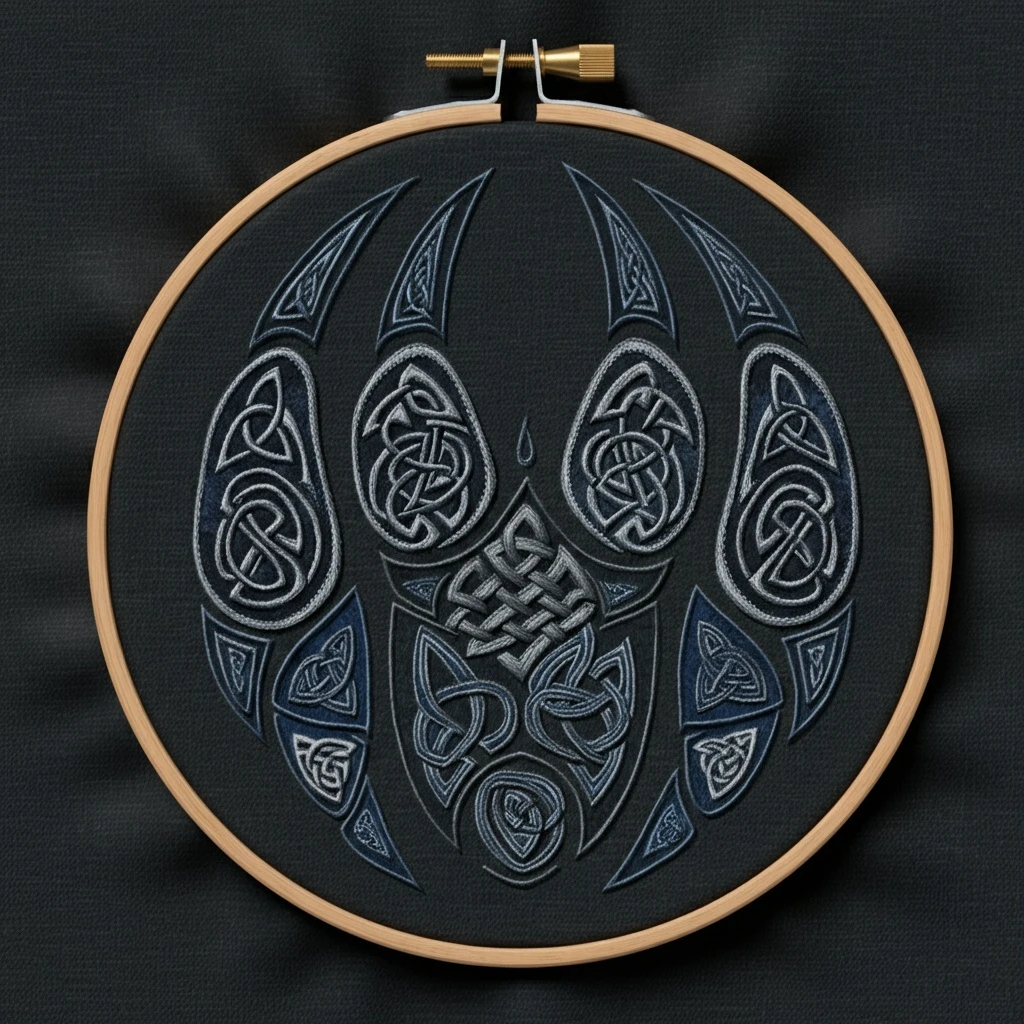
Celtic Wolf Paw
This design combines a wolf paw silhouette with Celtic interlace, giving it a cooler and sharper mood than a bear-paw version. The finished embroidery should feel strong, woodland-inspired, and precise: crisp paw pads, clear over-under knot crossings, smoky wolf-gray shading, pine-green or blue accent options, and enough light highlights to make the knotwork read cleanly.
Polished DMC Color Palette
This palette uses charcoal, pewter, silver-gray, forest green, and muted blue to suit a wolf theme, with a small amount of warm gold for Celtic accent glints. Use the darkest shades for crossing shadows and outlines, and the pale grays for lifted band highlights.
Stitch Map by Design Element
Thread Count & Blending Guide
Fine definition
Use 1 strand for crossing shadows, tight corners, claw tips, inner knot lines, and tiny accent glints. One strand keeps the interlace clean and readable.
Main fills
Use 2 strands for paw pads, broad knot bands, main outlines, and larger accent sections. Two strands provide strong coverage without making crossings bulky.
Raised effects
Use 2–3 strands for padded highlights or a few raised knots. Use three strands only away from dense intersections, where bulk can distort the Celtic pattern.
Shading, Outlining & Texture Suggestions
Readable Celtic crossings
- Mark every over-under point before stitching the knot bands.
- Work the lower strand first, then place the top strand over it.
- Add a tiny dark shadow at the underpass and a pale highlight on the overpass.
- Keep intersections flat and tidy; too many strands can blur the woven effect.
Wolf-paw shape
- Keep toe pads slightly leaner and more pointed than a bear paw for a wolf-like feel.
- Shade each pad from dark lower edge to light upper edge.
- Use charcoal and pewter grays instead of warm browns for a cooler canine mood.
- Reserve black for the sharpest claw or corner details only.
Knot band texture
- Follow each band path with stitch direction so curves remain smooth.
- Use shorter stitches around tight Celtic turns and longer stitches on straighter paths.
- Repeat green or blue accent sections in balanced places to avoid a random look.
- Use gold glints sparingly at focal crossings or central accents.
Outlining approach
- Outline after fills so the paw and knot edges are sharp.
- Use 3799 or 413 for most outlines; use 310 only for tiny final contrast.
- Split stitch works best for curves, while back stitch is clean for short straight details.
- Do not thicken every line; selective contrast gives a more polished finish.
Beginner-Friendly Stitching Order
- Transfer accurately: mark the paw outline, toe pads, central pad, Celtic paths, and every over-under crossing. The knot logic is the most important part of the pattern.
- Stitch under-passing bands: complete the lower knot sections first, including the small shadow at each crossing.
- Fill paw pads: work toe pads and central pad with curved gray shading before final outlines.
- Stitch top knot bands: add the raised interlace sections, keeping curves smooth and highlights consistent.
- Add outlines: sharpen paw edges, knot edges, and selected inner corners with one- or two-strand lines.
- Finish with accents: add icy highlights, green or gold details, tiny glints, and final corrections last.
Practical Tips for a Clean Finish
Fabric & hoop
Natural linen, oatmeal cotton, warm cream, or pale gray fabric works well with wolf-gray thread. Keep the fabric drum-tight so the knot bands stay crisp and the curves do not wobble.
Needle choice
Use a sharp embroidery needle size 7–9 for one- and two-strand stitching. At dense crossings, a smaller needle helps prevent stretched holes and bulky thread buildup.
Crossing control
Check each intersection against the reference before adding highlights. If one crossing is reversed, the knot path can look broken, so use shadow and highlight placement deliberately.
Keeping it wolf-like
Favor cooler grays, blue-gray highlights, and pine accents over warm browns. This creates a sharper, woodland-night feeling that suits the wolf paw theme.