
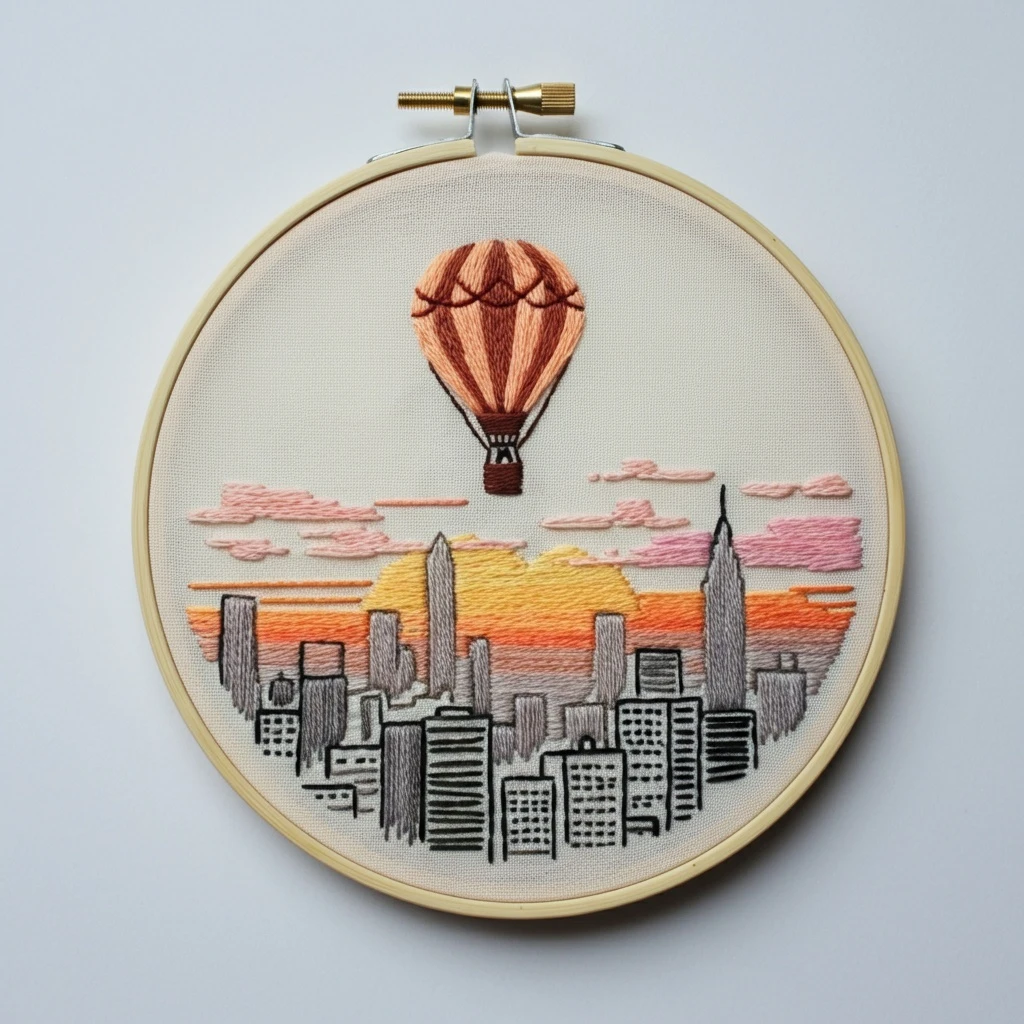
City Sunset Hot Air Balloon
This atmospheric design combines a drifting hot air balloon, glowing sunset sky, and a city skyline below. The embroidery should feel warm and expansive: sunset yellows and oranges near the horizon, rose and lavender transitions in the sky, a structured balloon with curved panel shading, fine rope and basket details, and a crisp dark skyline that grounds the scene without overpowering the balloon.
Polished DMC Color Palette
This palette balances warm sunset tones, cool evening purples and blues, balloon panel colors, dark skyline values, and basket browns. Use the brightest yellow-orange as the sunset focal glow and keep the skyline in deep blue-gray so the balloon remains the star.
Stitch Map by Design Element
Thread Count & Blending Guide
Fine detail
Use 1 strand for balloon seams, ropes, window dots, antennae, skyline rooflines, basket weave, and tiny sun glints. One strand keeps the city and basket details crisp.
Main fills
Use 2 strands for the balloon panels, sunset bands, skyline blocks, basket fill, and larger cloud areas. Two strands give enough color without making the sky bulky.
Raised highlights
Use 2–3 strands for a few French-knot window lights or bright star-like sunset glints. Use three strands only for the most important points of light.
Shading, Outlining & Texture Suggestions
Sunset gradient
- Keep the brightest yellow and cream near the sun or horizon line.
- Blend warm orange into coral, rose, lavender, and blue as the sky rises.
- Use short overlapping stitches for smooth transitions rather than hard stripes.
- Leave small areas of fabric visible if the design needs an airy evening glow.
Balloon dimension
- Follow the curve of each balloon panel with stitch direction.
- Place darker shades along one side and near panel seams for roundness.
- Keep highlights consistent on the same light-facing side of the balloon.
- Use seam lines sparingly; too many dark seams can flatten the balloon.
City silhouette
- Stitch the skyline after the sky so the buildings sit cleanly on top.
- Use dark navy and pewter rather than pure black for a softer sunset look.
- Add only a few windows to avoid cluttering the lower edge.
- Use straight vertical and horizontal stitches to keep buildings architectural.
Basket and ropes
- Use one-strand ropes so the basket does not look oversized.
- Make the basket darkest at the lower edge and lighter at the top rim.
- Add tiny woven lines only after the basket fill is complete.
- Check rope symmetry before stitching final dark outlines.
Beginner-Friendly Stitching Order
- Transfer the main shapes: mark the balloon outline, panel seams, basket, ropes, skyline, horizon, and any sun or cloud areas. Keep fine window details for the end.
- Stitch the sky first: work broad warm-to-cool sunset bands or scattered atmospheric stitches before foreground details.
- Fill the balloon: stitch each panel from shadow side to highlight side, following the panel curve.
- Add basket and ropes: connect the balloon to the basket with one-strand lines, then add simple basket shading.
- Stitch the skyline: place dark building shapes over the finished sky for crisp silhouettes.
- Finish with lights: add window dots, cloud glints, balloon rim highlights, basket weave, and final outline corrections last.
Practical Tips for a Clean Finish
Fabric & hoop
Warm cream, pale peach, or natural linen fabric enhances the sunset palette. Keep the hoop drum-tight so long sky stitches and balloon panel fills stay smooth.
Needle choice
Use a sharp embroidery needle size 7–9 for one- and two-strand stitching. For raised window or light knots, switch to a slightly larger needle only if needed.
Keeping depth clear
Make the sky soft, the balloon moderately detailed, and the skyline crisp. This contrast keeps the scene readable even when the design is small.
Avoiding color muddiness
Blend adjacent sunset colors in short overlaps, but do not mix too many dark stitches into the warm horizon. Save the darkest shades for the skyline and panel shadows.