
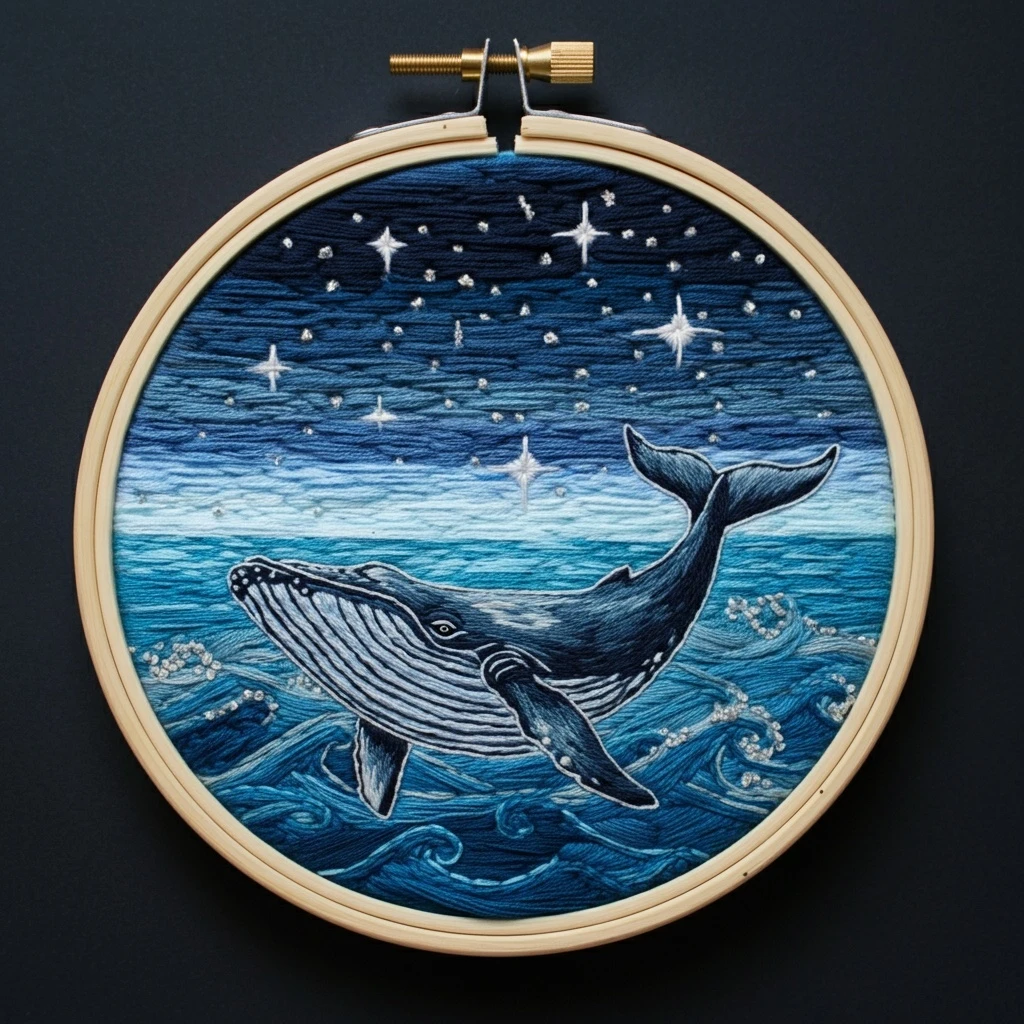
Cosmic Whale
This celestial whale design combines the quiet strength of an ocean creature with galaxy color, starry spray, and moonlit movement. The stitched version should feel graceful and vast: a deep blue whale body with smooth shading, lighter belly and fin edges, violet galaxy accents across the back, aqua glow along the waterline, and tiny gold-white stars that suggest the whale is swimming through space as much as sea.
Polished DMC Color Palette
This palette blends whale-body blues with galaxy purples, aqua glow, soft gray shadows, and gold-white sparkle. Use darker blues along the whale’s back and underside, lighter blue-gray on the belly and fins, and celestial purples and stars as decorative accents.
Stitch Map by Design Element
Thread Count & Blending Guide
Fine details
Use 1 strand for the eye, belly grooves, star points, tiny spray dots, orbit lines, and final edge highlights. One strand keeps the whale graceful and not over-outlined.
Main body fills
Use 2 strands for whale body shading, fins, tail, larger wave accents, and broad color blends. Two strands gives smooth coverage while preserving the curved silhouette.
Raised sparkle
Use 2–3 strands for selected French-knot stars or water-spray droplets. Reserve three strands for only a few focal sparkles so the whale remains the main subject.
Shading, Outlining & Texture Suggestions
Whale volume
- Follow the whale’s long body curve with every fill stitch.
- Keep the back and underside darker, then blend toward a lighter belly or upper highlight.
- Use smooth stitch direction changes around the head, tail base, and fins.
- Reserve the brightest white only for tiny glints, not large filled areas.
Tail and fin movement
- Stitch the tail fluke from the center outward so it looks sweeping and strong.
- Use darker shades at fin roots to make fins appear tucked under the body.
- Add fine edge highlights on fluke tips for a moonlit effect.
- Keep outlines light; heavy dark borders can flatten the whale.
Cosmic atmosphere
- Add galaxy dots after the whale body is complete so they sit cleanly on top.
- Cluster stars near spray, tail arcs, and decorative orbit lines.
- Use aqua and lavender as glow accents, not full background coverage.
- Leave open fabric around the whale so the silhouette feels spacious.
Outlining approach
- Use navy, dark gray, or deep violet for selective outlines instead of harsh black.
- Use split stitch around the silhouette and stem stitch for wave or orbit curves.
- Break outlines where light should soften the whale’s edge.
- Add final outlines before the last stars, spray, and white highlights.
Beginner-Friendly Stitching Order
- Transfer lightly: mark the whale outline, fins, tail, belly grooves, eye, star spray, and orbit or wave lines. Save tiny star dust for the end.
- Stitch the whale body: work dark back and underside areas first, then blend into mid-blue and pale highlights.
- Add fins and tail: stitch fin roots darker and taper highlights toward fin and fluke tips.
- Refine belly and face: add fine belly grooves, eye detail, and any small mouth or head accents with one strand.
- Add cosmic markings: place purple, lavender, aqua, and gold dots or swirls on and around the whale.
- Finish with sparkle: add stars, spray droplets, white glints, gold knots, and final outline corrections last.
Practical Tips for a Clean Finish
Fabric & hoop
Soft black, navy, deep purple, pale aqua, or warm cream fabric all work. Dark fabric gives the whale a dramatic galaxy feel; pale fabric makes the design softer and more storybook. Keep the hoop drum-tight for smooth long body stitches.
Needle choice
Use a sharp embroidery needle size 7–9 for one- and two-strand stitching. Use a slightly larger needle only for raised star knots or thicker spray droplets.
Keeping the whale readable
Do not cover the body with too many galaxy dots. Place cosmic details mainly along the back, spray, and orbit areas so the whale silhouette stays clear.
Preventing puckers
Long body and orbit stitches need gentle tension. If a decorative line is very long, couch it with tiny matching stitches rather than pulling it tight across the fabric.