
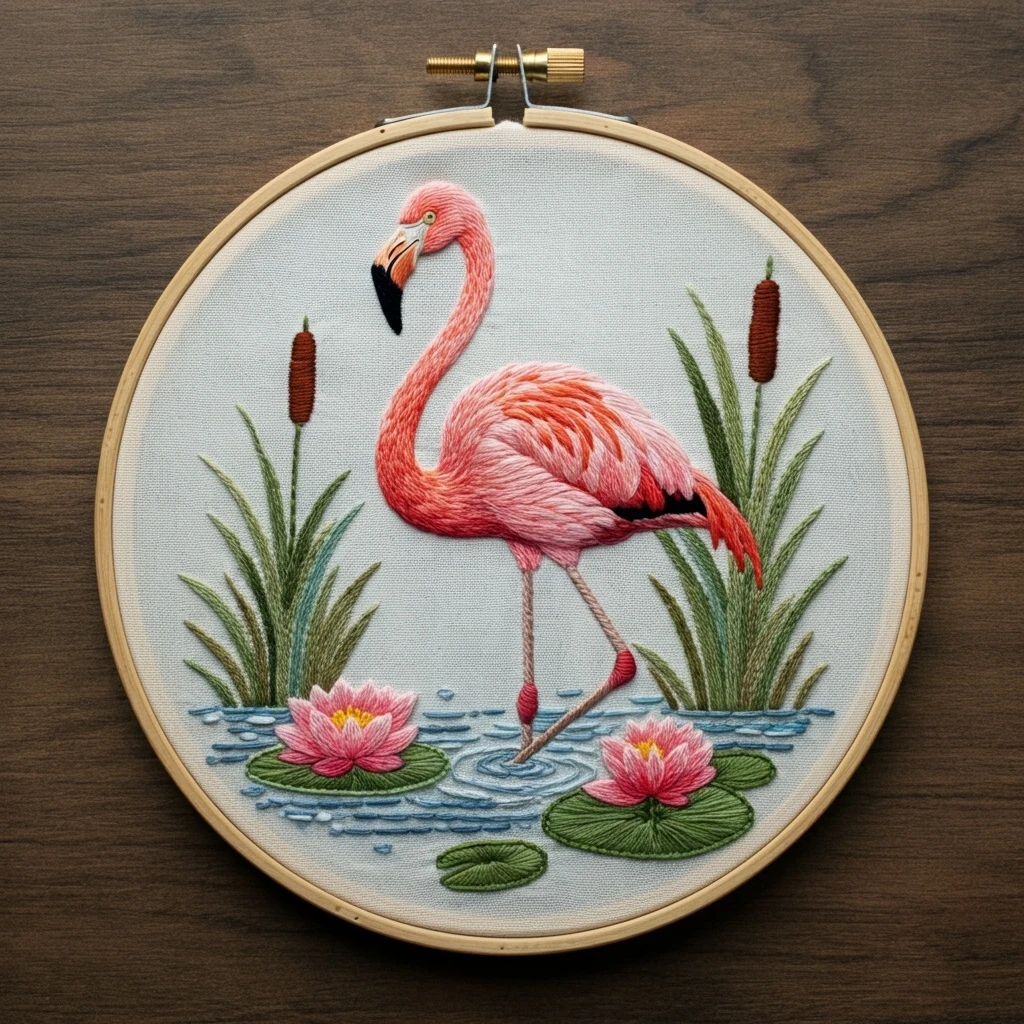
Embroidered Flamingo in a Lily Pond
A polished DMC palette and practical stitch plan for a graceful pink flamingo standing among lily pads, water ripples, cattails, reeds, and soft waterlily blooms. Colors are estimated from the visible hoop preview and matched to close DMC embroidery floss shades.
Likely DMC Color Palette
Palette based on the flamingo body, coral wing feathers, black beak accents, blue water, green reeds and lily pads, pink waterlilies, warm cattails, and light fabric background.
Softest flamingo highlights, pale wing tips, and lily petal lights.
Main flamingo neck and body color; blend into lighter pinks.
Warm feather shadows, neck curves, and deeper lily petals.
Bright wing streaks, tail feathers, and saturated accents.
Darkest pink-red feather pockets and leg/ankle shadows.
Beak tip, wing slit, small eye accent, and crisp contrast.
Beak base, face transition, and warm pale underside details.
Orange beak section and warm touches in cattail shadows.
Cattail heads, deep beak crease, and rusty texture bands.
Deep reed shadows, lily pad veins, and leaf outlines.
Reed highlights, lily pad mid-tones, and grassy movement.
Pale reed edges and soft background greenery.
Blue water ripples, pond outlines, and shadow strokes.
Soft water highlights, rings around the standing foot, and reflections.
Waterlily centers and tiny golden pollen knots.
Eye glint, beak highlight, petal tips, and optional shine accents.
Stitching Suggestions
Work from the main bird outward, then finish with water and small textured details so the design stays clean.
| Element | Recommended stitches | Practical notes |
|---|---|---|
| Flamingo neck | Long and short stitch, split stitch guide line | Mark the neck curve first with one strand of split stitch, then fill with directional strokes that follow the S-curve. Blend 818, 3716, 760, and touches of 350 for a soft feathered gradient. |
| Body and wing feathers | Long and short stitch, fishbone stitch, straight stitch overlays | Use 2 strands for broad body fill. Keep stitches slanting from shoulder toward tail; add short coral and garnet strokes last to separate the wing feathers. |
| Tail and dark wing slit | Satin stitch, straight stitch, backstitch | Lay red-coral tail stitches in narrow tapered groups. Place the black wing slit after the pink fill is complete for a crisp edge. |
| Face, eye, and beak | Satin stitch, tiny backstitch, single French knot | Use one strand for the face details. Keep the beak edge sharp with black backstitch; add a tiny pale highlight and a small eye knot only at the end. |
| Legs and feet | Stem stitch, whipped backstitch, satin stitch for joints | Use 1 strand for slim leg lines and whip with a second warm taupe or pink strand where the legs need dimension. The bent foot can be a short satin fill. |
| Water ripples | Backstitch, running stitch, whipped running stitch | Use loose broken lines rather than solid rings. Mix 3810 with 3752, keeping the lightest blue closest to reflected highlights around the feet. |
| Lily pads | Fishbone stitch, satin stitch, backstitch veins | Fill from the center vein outward with medium green, then outline in dark hunter green. Add curved vein lines to make the pads read as rounded and floating. |
| Waterlilies | Lazy daisy stitch, satin stitch, French knots | Use pale pink for outer petals and salmon or garnet at petal bases. Add yellow French knots in the center after all petals are stitched. |
| Reeds and grasses | Straight stitch, stem stitch, fly stitch | Use mostly 1 strand for fine reed blades. Vary greens from dark to pale and angle stitches slightly differently so the clumps feel natural. |
| Cattails | Satin stitch, couching, seed stitch texture | Build the brown cattail shapes with close horizontal satin stitches. Add a few darker seed stitches or couching bars to suggest fuzzy ridges. |
Thread Count, Blending & Shading
Small strand changes make the hoop look dimensional without making the pattern difficult.
Suggested strand plan
2 strands: flamingo body fill, larger wing feathers, lily pad fill, waterlily petals, cattail bodies.
1 strand: face details, eye, beak outline, legs, reed tips, water ripples, lily pad veins, feather separation lines.
3 strands sparingly: raised cattail texture or a few foreground water-ripple accents if you want extra relief.
Blending ideas
For the flamingo, thread one strand of 818 with one strand of 3716 for pale body transitions, then one strand of 3716 with one strand of 760 for the neck shadow. Use 350 only as short top strokes on the wing and tail, and reserve 816 for the deepest creases.
For water, alternate single strands of 3810 and 3752 instead of fully blending them; the broken color changes mimic ripples more naturally.
Outlining details
Outline selectively. The beak, black wing slit, lily pad edges, and cattail silhouettes benefit from firm backstitch. The flamingo neck should stay softer, with only hidden split-stitch guidelines under the fill rather than a heavy final outline.
Texture suggestions
Use smooth long-and-short shading for feathers, crisp backstitch for water lines, fishbone veins for leaves, and clustered French knots for flower centers. This contrast lets the flamingo remain elegant while the pond setting feels lively.
Beginner-Friendly Order of Work
A calm sequence helps avoid snagging finished details while stitching the dense bird.
Trace the flamingo, lily pads, reed clumps, and waterline lightly. Start with hidden guide stitches on the flamingo neck and body.
Complete the large pink areas before adding black, red, or facial details. Keep the stitch direction consistent for a smooth feather flow.
Stitch lily pads and water ripples next. Keep water lines broken and airy so they do not compete with the bird.
Use long single-strand stitches for reeds, adding darker strokes near the bases and lighter strokes on the outer edges.
Add cattail ridges, flower-center knots, eye glint, and final outlines as the last pass to keep raised details neat.
Step back before adding more dark lines. A few sharp accents are enough; too many can flatten the soft flamingo shading.