
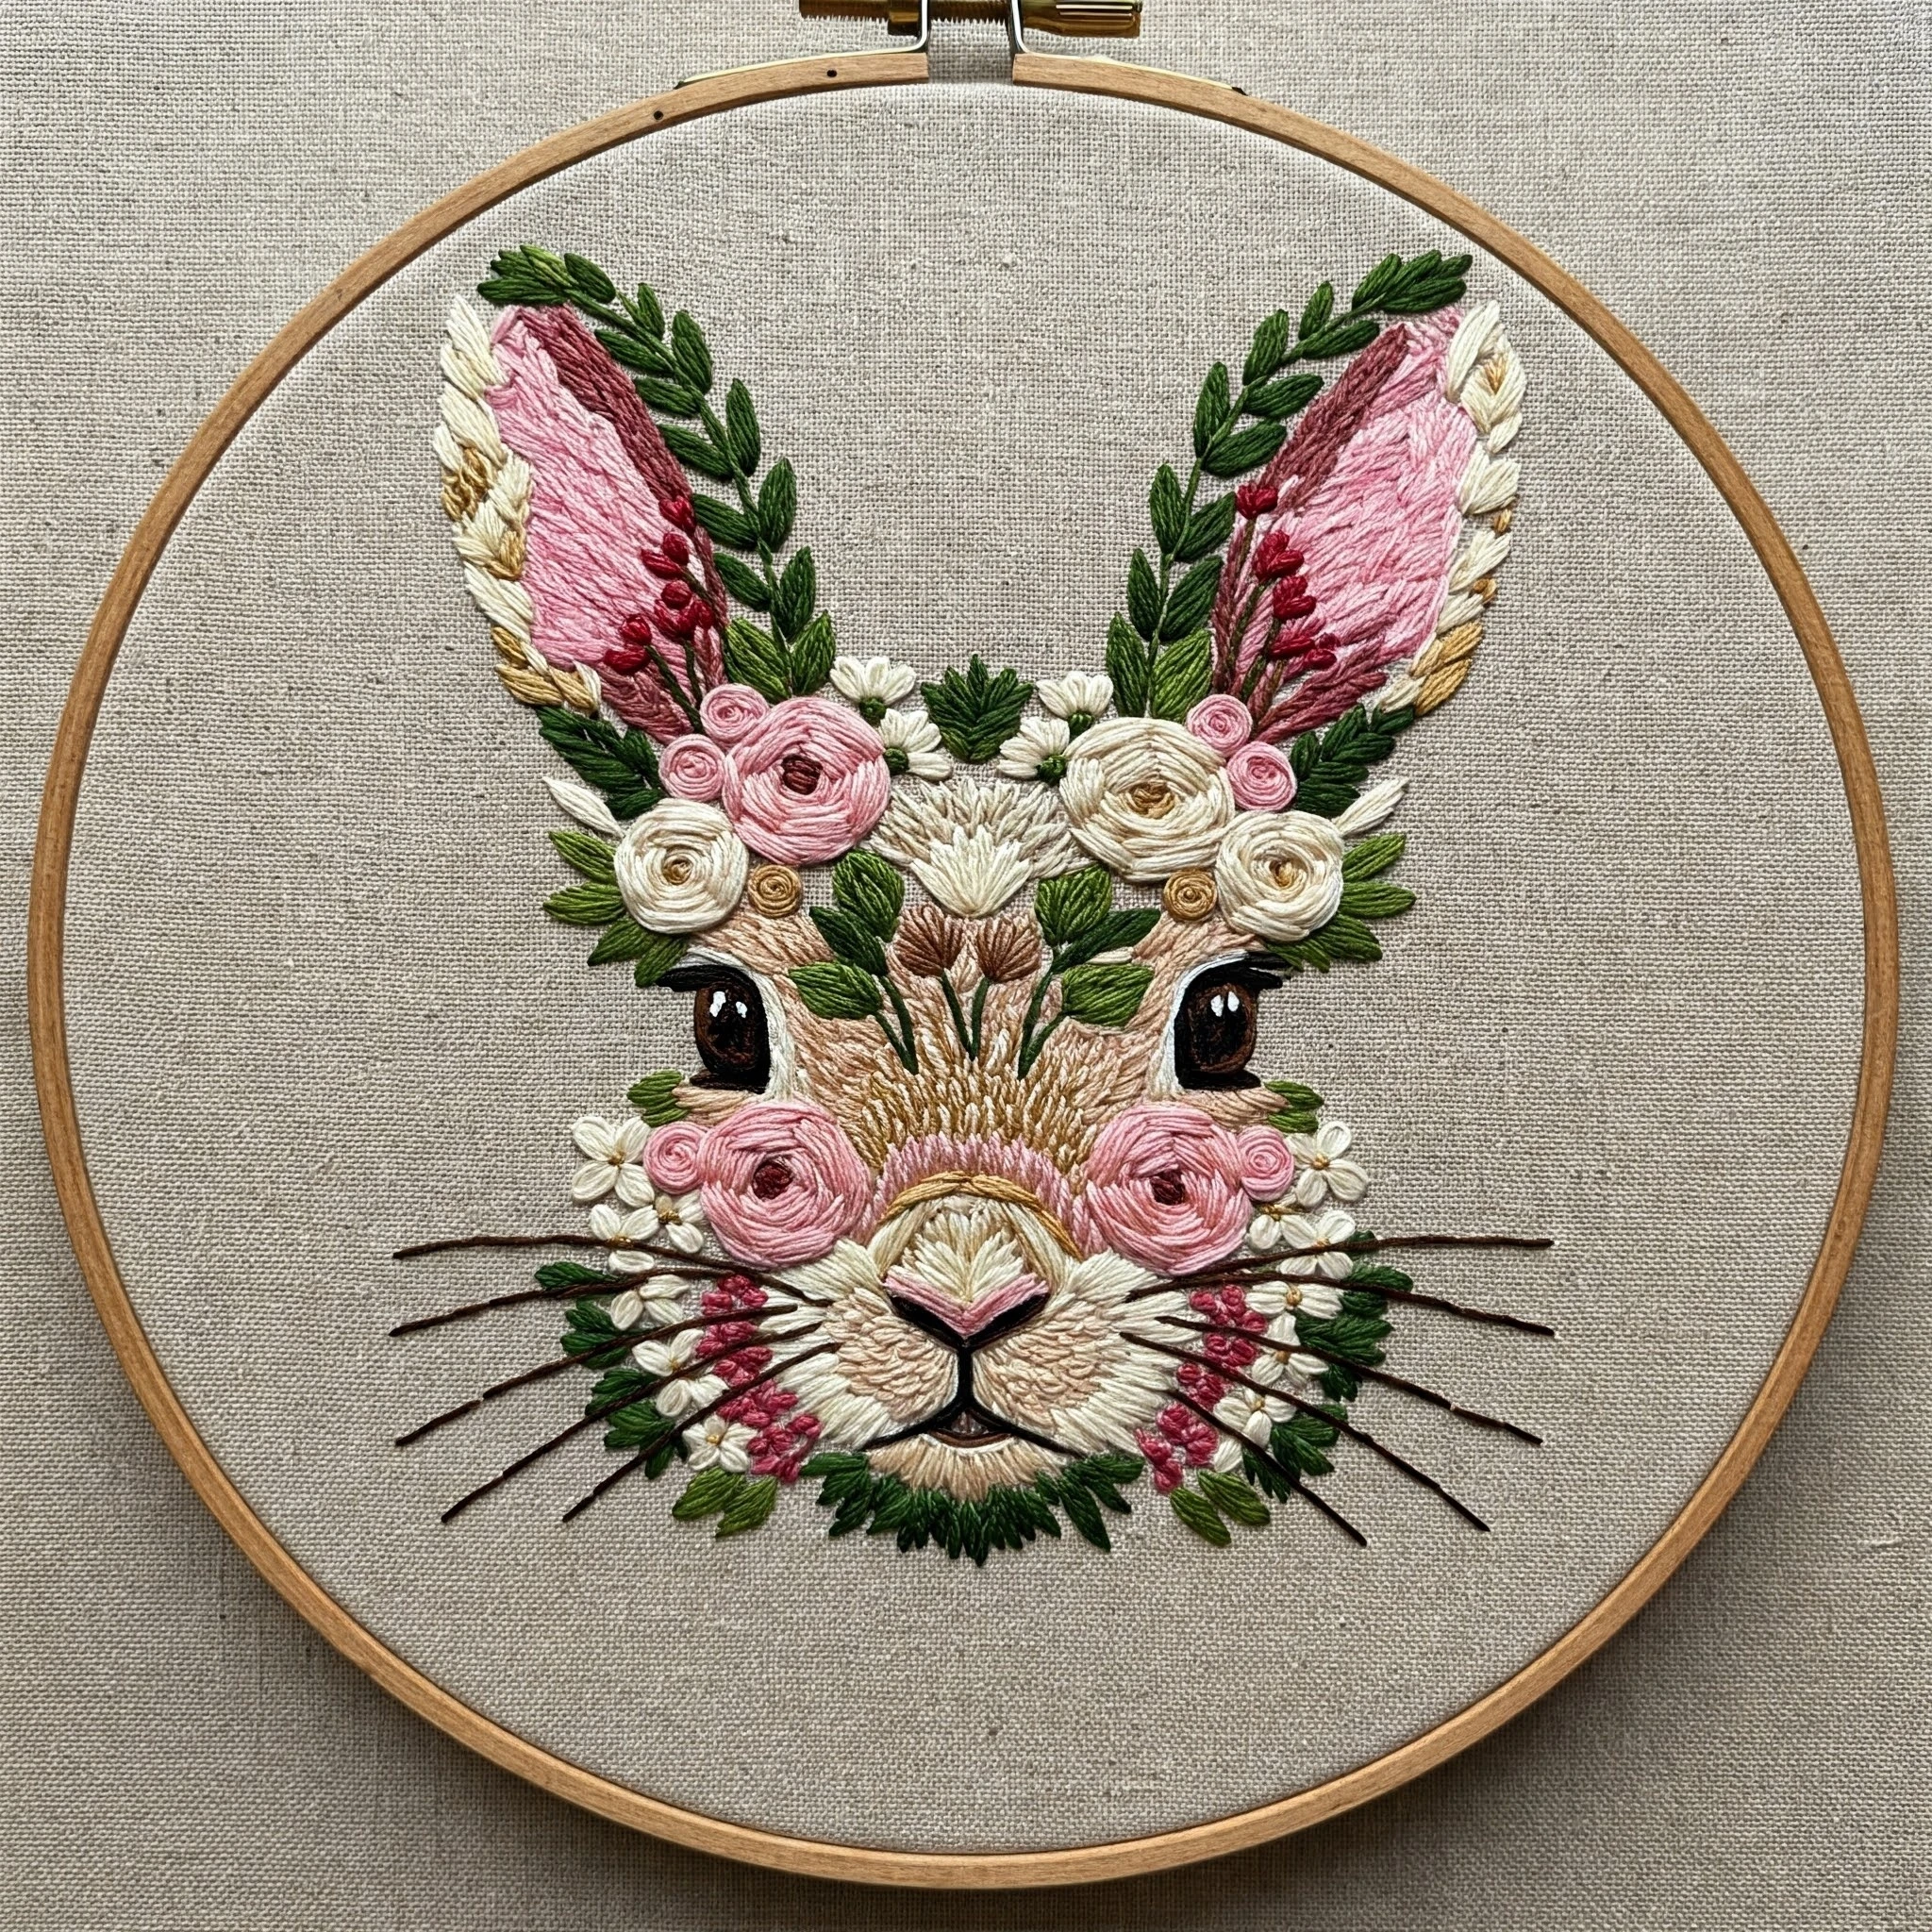
Floral Bunny
A gentle spring bunny portrait framed with garden leaves, soft pink roses, creamy blossoms, warm tan fur shading, glossy eyes, berry accents, and fine whiskers. This guide translates the design into practical DMC choices and beginner-friendly stitch planning.
Recommended DMC palette
Use the lighter values generously so the bunny stays soft; reserve the darkest browns and burgundy for tiny definition points only.
Palette balance
Keep about half the visible stitching in creams, tans, and peachy neutrals. Let pink roses and deep greens carry the decorative contrast, with burgundy only as tiny berry punctuation.
For a softer nursery-style version, replace some 815 berries with 3722 and outline fewer shapes in 3371.
Stitch map by design area
The reference relies on direction, layering, and raised floral stitches rather than heavy outlines.
Bunny fur & face
- Long and short stitch: work 1–2 strands in 738, 754, and Ecru; point stitches outward from the nose and downward around cheeks.
- Split stitch guidelines: use a faint 1-strand split stitch for the nose bridge before filling so the center remains symmetrical.
- Satin stitch nose: fill the heart-shaped nose with 151 and 754, then add a tiny 3371 crease and B5200 highlight.
Pink ears
- Directional satin stitch: angle strands from the ear edge toward the center, alternating 151 and 223.
- Shadow edge: add 3722 in short tucked stitches along the lower inside edge and near the rose clusters.
- Cream border petals: use detached chain or fishbone leaf stitch in Ecru/B5200 around the outer ear rim.
Roses & blossoms
- Woven wheel roses: use 3–4 spokes and 2 strands; start 3722 at the center, transition to 223, finish with 151.
- Lazy daisy flowers: stitch creamy petals with Ecru and B5200, then add 782 or 435 French knots.
- Raised texture: do the roses after surrounding leaves so they sit forward like the sample.
Leaves & greenery
- Fishbone stitch: use 2 strands of 699 for individual leaves; split each leaf down the center for a natural vein.
- Layered greenery: place 890 at leaf bases and under overlaps, then add 470 on tips with single highlight strokes.
- Chin foliage: make shorter, denser leaf stitches to form a dark green base under the muzzle.
Eyes, berries & whiskers
- Padded satin eyes: fill with 898, rim with 3371, and add two tiny B5200 straight stitches for shine.
- Berries: use 815 French knots or colonial knots with 2 strands; cluster them unevenly for a botanical look.
- Whiskers: use one strand of 3371 in long straight stitches; couch the longest whiskers at the base if needed.
Outlining strategy
- Minimal outline: avoid outlining every flower; define only the eyes, mouth, nose crease, and whisker roots.
- Soft contour: use 738 or 754 split stitch around cheeks instead of dark brown to keep the bunny gentle.
- Clean finish: stitch facial details last so they stay crisp over the surrounding fur texture.
Thread-count & blending guide
| Area | Recommended strands | Practical note |
|---|---|---|
| Fine fur shading | 1 strand | Use many short, staggered stitches; blend 738 + 754 by alternating rows rather than twisting them together. |
| Main leaves | 2 strands | Fishbone leaves look full without becoming bulky; switch to 1 strand for tiny leaves near the face. |
| Woven roses | 2 strands, sometimes 3 for large blooms | Keep spokes taut but not tight; loose weaving creates the rounded rose texture seen in the design. |
| Cream petals | 2 strands | Use Ecru for most petals and B5200 only on the top edge so the white reads as highlight. |
| Whiskers and mouth | 1 strand | Use a sharp needle and one confident stitch per whisker; avoid re-stitching over the same line. |
Best blending idea
For the bunny’s face, thread one needle with 738 and a second with 754. Stitch a few warm peach strokes near the cheeks, then immediately soften them with beige strokes pointing in the same direction. This gives the portrait a furry gradient without complicated thread mixing.
Beginner-friendly stitching order
This order reduces snagging and helps the raised flowers stay clean.
Shading guidance
Place darker tan and brown only where forms turn away: under the ears, beside the eyes, under the flower crown, and just below the cheeks. Keep the forehead and muzzle in Ecru, 738, and light peach.
Texture suggestions
Combine smooth satin ears, feathery long-and-short fur, knotted berries, woven roses, and fishbone leaves. This contrast is what makes the design feel dimensional even on plain linen.
Hoop & fabric tips
Use a tightly stretched medium-weight linen or cotton-linen blend. If your fabric is loose, add a lightweight backing so long whisker stitches do not distort the weave.
Quick troubleshooting
If the roses look bulky, reduce to two strands and loosen the wheel spokes. If the face looks too striped, shorten the fur stitches and alternate colors more frequently. If whiskers sag, couch them once at the cheek edge with a tiny matching dark stitch.