
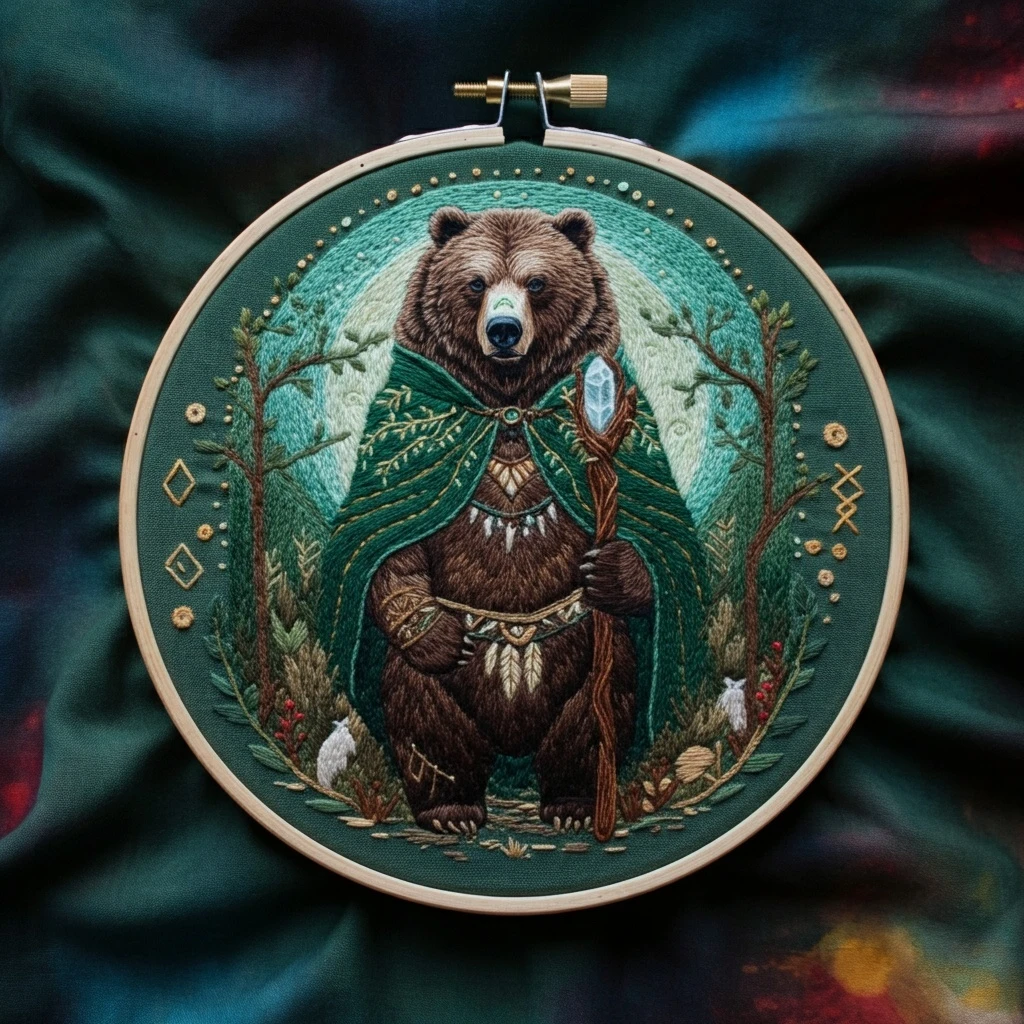
Forest Guardian Bear
A woodland hoop with a solemn bear guardian, deep emerald cloak, moonlit forest halo, gold talisman details, bark staff, icy crystal, winter grasses, red berries, and soft cream woodland accents.
Color Story
The design reads as a protective forest spirit: dark chocolate bear fur against a saturated green cloak, with a pale mint moon behind the figure and small ceremonial touches in gold, bone, bark, crystal blue, and berry red. Keep the background relatively soft so the bear face, cloak clasp, staff, and central charm remain the focal points.
Stitch Plan by Design Area
| Area | Recommended stitches | Practical guidance |
|---|---|---|
| Bear face and body | Long-and-short stitch, split stitch, tiny straight stitches | Use 1 strand for the face and 2 strands for the body. Follow the natural fur direction: radiate from the nose, sweep down the cheeks, and angle strokes around the belly. |
| Emerald cloak | Satin stitch, split stitch, stem stitch, couching | Lay broad cloak sections in 2 strands of 500/3818, then overlay single-strand gold vine lines. Keep fold lines slightly curved to suggest heavy fabric. |
| Moonlit background | Seed stitch, open satin, irregular running stitch | Use 1 strand of 772 and 3814 with scattered spacing. Do not overfill; the dark fabric can act as shadow between moonlit textures. |
| Tree branches and staff | Stem stitch, whipped backstitch, split backstitch | Start with 938, whip selected ridges with 3860 or 729. Vary stitch length so the branches look organic rather than outlined like wire. |
| Crystal top | Satin stitch, backstitch, single straight highlight | Fill each facet separately in pale blue. Outline only the inner facet edges with 1 strand so the crystal remains translucent. |
| Gold dots and charms | French knots, colonial knots, straight stitch, couching | For the dotted border, use consistent wraps and spacing. Metallic thread can replace DMC 729 for sparkle, but use short lengths to avoid fraying. |
| Grasses, leaves, berries | Fly stitch, fishbone stitch, lazy daisy, French knots | Work greenery in clustered layers: darker stems first, then lighter leaf tips. Add berries last so they sit clearly on top. |
Thread Count, Blending & Shading
Thread-count guide
- 1 strand: bear face, muzzle, eyes, crystal facets, fine gold markings, moon texture.
- 2 strands: bear body, cloak fill, trunks, staff, major foliage.
- 3 strands: only for bold outer cloak edges or heavy lower body shadows on larger hoops.
Blending ideas
- For fur, thread one needle with 938 + 3860 for warm mid-shadow transitions.
- For deep cloak folds, blend 500 + 3818; for lit edges use 3818 + 3814.
- For antique gold, alternate 729 and 739 rather than filling every detail in one flat gold.
Outlining details
- Use 3371 in 1 strand for eyes, nose, paw separations, and the deepest jaw line.
- Outline the bear only where it overlaps the moon or cloak; broken outlines look more natural than a continuous cartoon edge.
- Use dark green, not black, for most cloak edges so the garment stays soft.
Shading approach
- Build the bear from dark to light: place 3371/938 shadows first, then stitch 3860 and 842 highlights over the top.
- Keep the muzzle lighter and cooler than the body to make the face readable.
- Let the moon glow fade outward with fewer stitches near the tree line.
Texture Suggestions
Fur texture
Use many short stitches rather than long satin blocks. Stagger the ends of each stitch and rotate the angle gradually around the cheeks, shoulders, and belly. A few pale stitches on the brow and snout are enough to create expression.
Cloak texture
Give the cloak a woven feel by stitching the base vertically, then adding diagonal vein-like lines in a single strand. Tiny gold seed stitches can imitate embroidered leaves without overcrowding the cape.
Forest floor
Layer grasses with fly stitches and detached chain stitches. Add small straight stitches in 739 and 642 near the paws so the guardian feels grounded inside the hoop.
Raised accents
Use French knots for the dotted ring and berries. Keep knot sizes varied: one-wrap knots for distant gold dots, two-wrap knots for berries and larger talisman beads.
Beginner-Friendly Working Order
- Transfer only the main outlines first. Mark the bear, cloak, staff, moon circle, trees, and border dots; add tiny foliage details freehand later.
- Stitch background before the figure. Complete the moon glow and distant greenery so later bear and cloak stitches sit cleanly on top.
- Complete the bear in small zones. Finish the face before moving to the body; this prevents the most expressive area from becoming muddy.
- Add cloak and staff next. Keep the staff slightly raised with whipped stem stitch and use gold accents after the green fill is finished.
- Save knots, berries, crystal highlights, and metallic touches for last. These raised details can snag while you are still filling large areas.
Hoop handling
Because the design uses dark fabric and many pale accents, wash hands often and cover completed areas with tissue while working. Re-tighten fabric gently rather than pulling hard near dense fur.
Practice first
Before stitching the face, test fur strokes on scrap fabric using 3371, 938, 3860, and 842. Practice changing stitch direction around a small oval to mimic the snout and cheeks.