
DMC color palette & embroidery notes
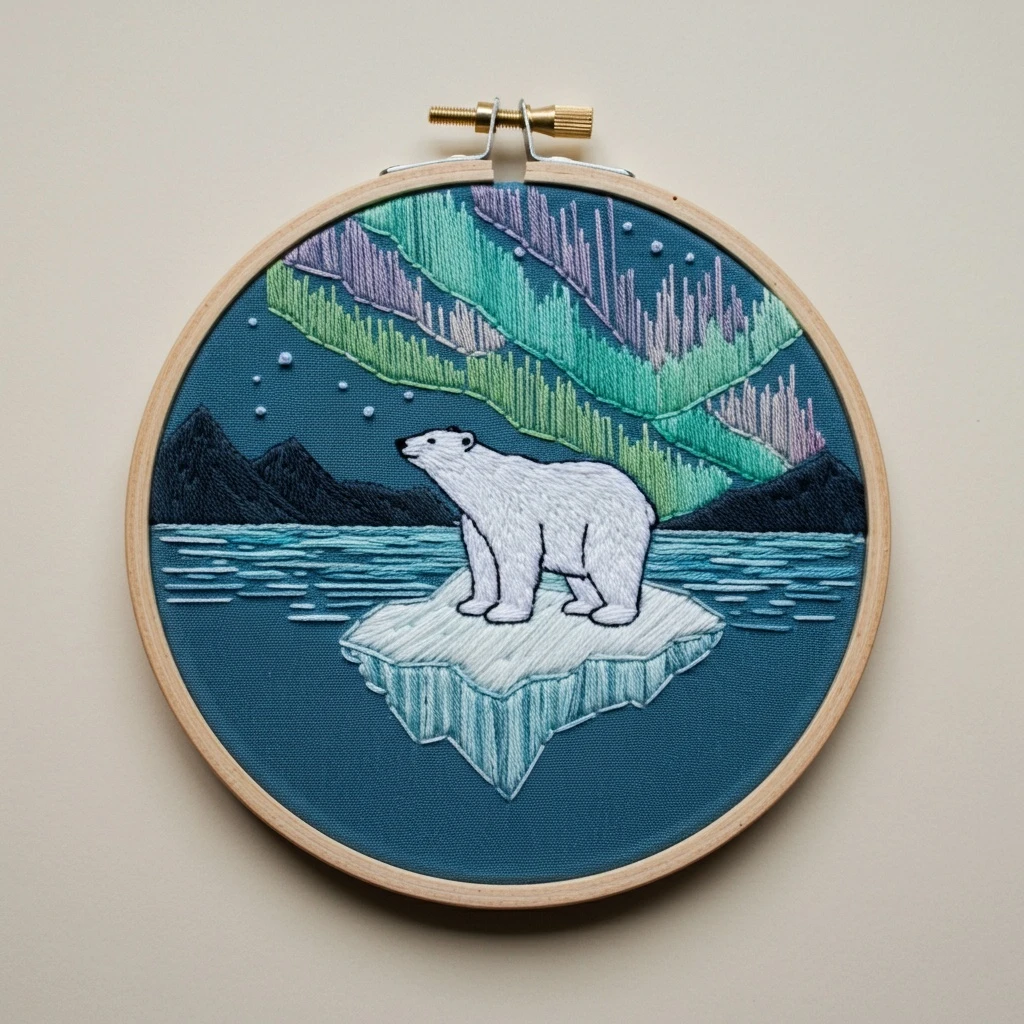
Northern Lights Polar Bear
A cool arctic hoop built from deep teal sky, black-blue mountain silhouettes, rippling turquoise water, glowing mint-and-lavender aurora bands, and a soft white polar bear standing on layered ice. The stitching should feel crisp, luminous, and slightly textured without becoming bulky.
Suggested DMC palette
Use these colors as a practical floss map. The palette is organized by visual role so you can substitute similar shades from your stash while keeping the same night-sky contrast.
Main mountain shadow, deepest sky edges, and the strongest outline accents.
Teal fabric-matching outline, lake depth, and softened dark transitions.
Lake ripples, bright water streaks, and cool reflections below the bear.
Icy highlights on water, snow dots, and light edges along the floe.
Main glowing aurora ribbons and blended teal strokes in the sky.
Green aurora edges, grassy glow sections, and reflected hints on the ice.
Lavender aurora spires, cool sky highlights, and gentle shadow in white areas.
Soft violet glow in the aurora and subtle polar-bear shadow blending.
Polar bear body, snow dots, top ice highlights, and the cleanest sparkle marks.
Bear shading, ice plane texture, muzzle softness, and cool white transitions.
Iceberg side planes, pale water glints, and the lighter blue-white broken lines.
Bear nose, eye, paw separation, and final selective definition only.
Stitch plan by design area
The original artwork relies on directional lines: vertical aurora strokes, horizontal water ripples, diagonal ice texture, and short fur strokes. Keeping those directions consistent will make the hoop read clearly from a distance.
Aurora bands
Work long-and-short stitch in vertical strokes that follow each ribbon. Use 2 strands for coverage, then add single-strand lavender and mint spikes on top for the combed light effect.
Polar bear
Fill with short directional split stitch or long-and-short stitch using Blanc and 762. Keep stitches moving from shoulder to belly and hip to legs; reserve 310 for tiny facial details.
Mountains
Use 2 strands of 939 in split stitch or close stem stitch. Add a few 3768 ridgeline strokes so the peaks do not flatten into one black shape.
Water
Build horizontal broken running stitches with 3844, 3846, and 3753. Vary stitch lengths; leave teal fabric gaps to preserve the lake’s dark depth.
Ice floe top
Use 1 to 2 strands of Blanc, 762, and 3753 in diagonal satin or split stitch. Leave tiny gaps between strokes so the surface feels frosty rather than solid white.
Iceberg sides
Stitch vertical straight lines with 3753 and 3846, then outline lower cracks with one strand of 3768. Keep the bottom point slightly darker for dimension.
Thread count, blending & shading
Strand guide
Use 2 strands for most filled areas, 1 strand for facial details, fine aurora highlights, snow dots, and water glints, and 3 strands only for bold foreground outlines if your pattern is larger than 6 inches.
Blended aurora
For luminous bands, try one strand 959 plus one strand 913 in the green areas, and one strand 340 plus one strand 3743 for the violet areas. Blend only short sections so color shifts stay lively.
White animal shading
Avoid filling the bear with pure white alone. Place 762 under the belly, inside the legs, at the back haunch, and under the chin; then soften with Blanc stitches over the top.
Outlining approach
Use one strand 310 for the nose, eye, mouth, ear, paws, and a few leg separations. Use 939 or 3768 for larger outlines so the bear stays defined without looking cartoon-heavy.
Texture control
Keep aurora stitches long and vertical, water stitches short and horizontal, bear stitches short and fur-like, and ice stitches diagonal or vertical. Direction change is what creates the scene’s texture.
Background fabric
A medium-dark teal fabric works best because it becomes the night sky and water base. If stitching on pale fabric, fill the sky lightly with 3768 using sparse horizontal satin or seed stitch.
Beginner-friendly practical tips
Stitch order
- Start with mountains and water.
- Add aurora bands before the bear.
- Stitch the ice floe, then the bear.
- Finish with snow dots and crisp outlines.
Clean curves
For the bear’s back and belly, outline first with tiny split stitches, then fill up to that edge. This keeps the silhouette smooth and prevents white stitches from wandering into the sky.
Snow and stars
Use French knots with 1 wrap for small snow and 2 wraps for larger dots. Mix Blanc with 3846 for a few blue snow specks to echo the icy palette.
Avoid bulk
The aurora already has dense vertical stitch texture, so keep water and ice slightly lighter. Too many strands in every area will make the hoop stiff and obscure the fine linework.
Needle choice
A size 7 or 8 embroidery needle suits 2-strand work on cotton or linen. Switch to a finer size 9 needle for the polar bear face, paw divisions, and single-strand highlights.
Finishing polish
After stitching, gently steam from the back over a towel. Do not press directly on French knots or dense aurora stitches; they should stay raised and light-catching.
Quick working recipe
For a polished version, keep the sky fabric visible, make the aurora the brightest feature, shade the bear with pale grey before adding white, and reserve black for only the smallest accents.