
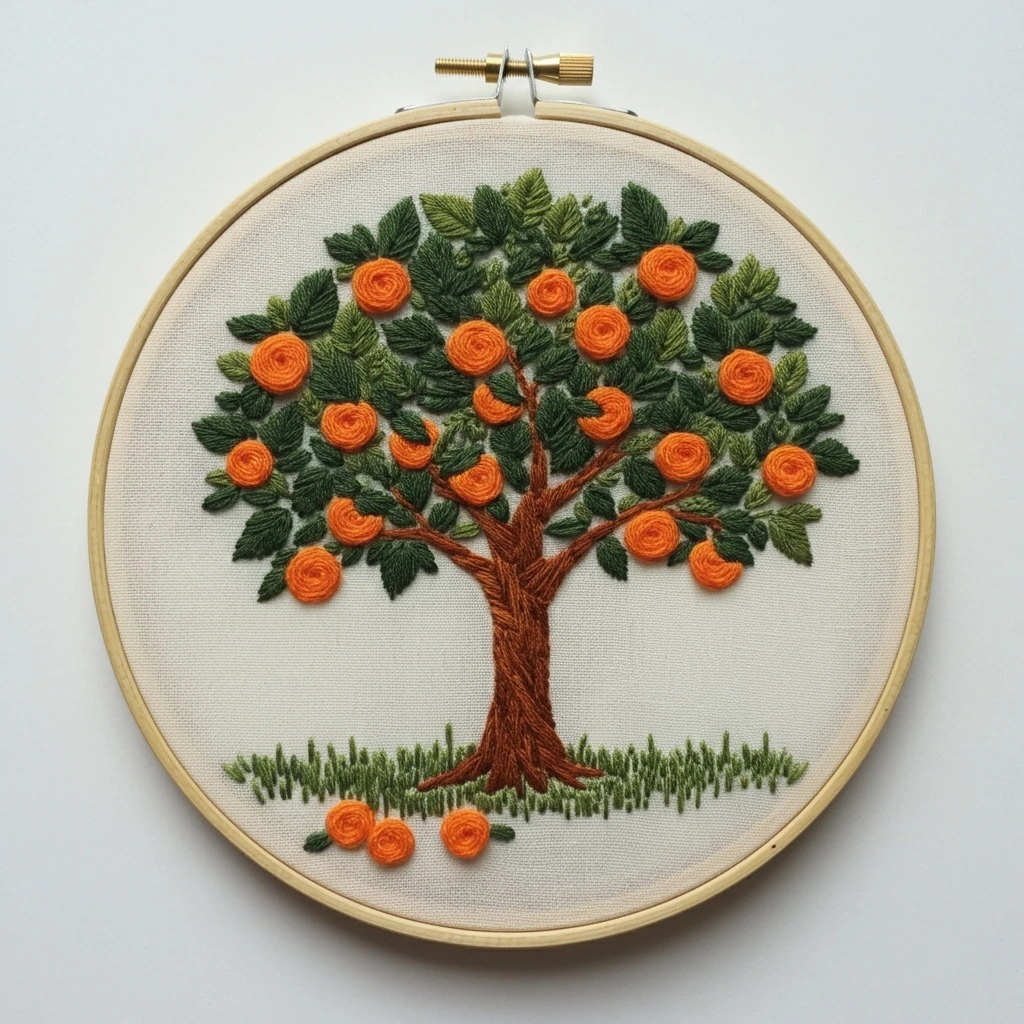
Orange Tree
A cheerful hoop design built around a sturdy brown trunk, layered dark-green foliage, bright spiral oranges, and a grassy base. The strongest visual effect comes from plush fruit, directional leaf veins, and bark-like thread movement.
Suggested DMC Palette
Use this as a practical working palette rather than a strict rule. The sample reads as saturated orange fruit against deep forest greens, with reddish-brown bark and soft linen background space.
Stitch Map by Design Area
Oranges
Use whipped or padded spirals to echo the round citrus shapes.
- Start with a small spiral of 741, then wrap outward with 740.
- Add 721 or 900 on the lower-left edge for dimension.
- For very raised fruit, place a tiny felt or seed-stitch pad underneath before covering.
Leaves
The sample leaves look directional and ribbed, so keep every stitch angled from the midrib.
- Fishbone stitch is ideal for individual leaves.
- Use 3362 or 895 for shadow leaves and 3011/3012 for top leaves.
- Back stitch a central vein only where the leaf needs definition.
Trunk & Branches
The trunk should feel woody, not flat. Direction matters more than perfect coverage.
- Use split stitch or long-and-short stitch following the trunk curve.
- Blend 801 + 433 for warm bark and add 938 in narrow crevices.
- Keep branches slimmer with 1–2 strands so they do not overpower the oranges.
Thread Counts & Blending Guide
| Area | Recommended strands | Why it works |
|---|---|---|
| Fruit spirals | 3 strands for body; 2 strands for final shadow arcs | Gives the oranges a plump, dimensional look while keeping the spiral readable. |
| Large leaves | 2 strands | Good coverage with clean tips, especially for fishbone and satin stitches. |
| Small leaves / veins | 1 strand | Prevents the leafy canopy from becoming bulky or crowded. |
| Trunk fill | 2–3 strands | Creates rich bark texture; vary strand count to suggest ridges and depth. |
| Grass | 1–2 strands | Short vertical stitches stay delicate and let the tree remain the focal point. |
Stitching Order
1. Transfer and stabilize
Use a fine transfer line and keep the fabric drum-tight. A light stabilizer helps if your linen is loose or if you plan raised oranges.
2. Stitch trunk and main branches
Work from the trunk center outward, following the natural growth direction. Add dark bark lines last so they remain crisp.
3. Build the leaf canopy
Place darker leaves first in the background, then layer medium and lighter olive leaves over them. This gives the tree depth without complicated shading.
4. Add oranges as focal points
Stitch fruit after nearby leaves so the orange circles sit cleanly on top. Keep the spirals consistent and slightly raised.
5. Finish grass and dropped fruit
Use irregular straight stitches for grass, then add the bottom oranges. A few small green stitches near fallen fruit help anchor them visually.
Texture, Outlining & Shading Tips
Texture Suggestions
- Fruit: whipped back stitch spirals, stem stitch spirals, or padded satin circles.
- Leaves: fishbone stitch for tidy leaves; detached chain for tiny background leaves.
- Bark: split stitch, stem stitch, and long-and-short rows in mixed browns.
- Grass: random straight stitches in two greens; vary height for a natural base.
Outlining Details
- Outline the trunk selectively with 938, not all the way around; broken outlines look more natural.
- Use 895 only on the deepest leaf edges so the canopy does not become too heavy.
- For oranges, a partial lower outline in 721 or 900 creates roundness while keeping the fruit bright.
- Avoid black unless you want a graphic illustration style.
Practical Finishing Notes
Neatness
Because the design has many small leaves, keep thread lengths short—about 14–16 inches. Long strands fray and lose shine, especially in dark greens.
Dimension
Let the oranges be the raised elements and keep the leaves flatter. This contrast makes the fruit pop without making the whole hoop bulky.
Color Balance
Scatter 3012 highlights across both sides of the canopy. If highlights appear only on one side, the tree can feel lopsided.
Hoop Display
Mount on natural linen, oatmeal cotton, or pale cream fabric. Warm backgrounds flatter the orange fruit and reddish-brown bark.