
DMC palette & practical embroidery guide
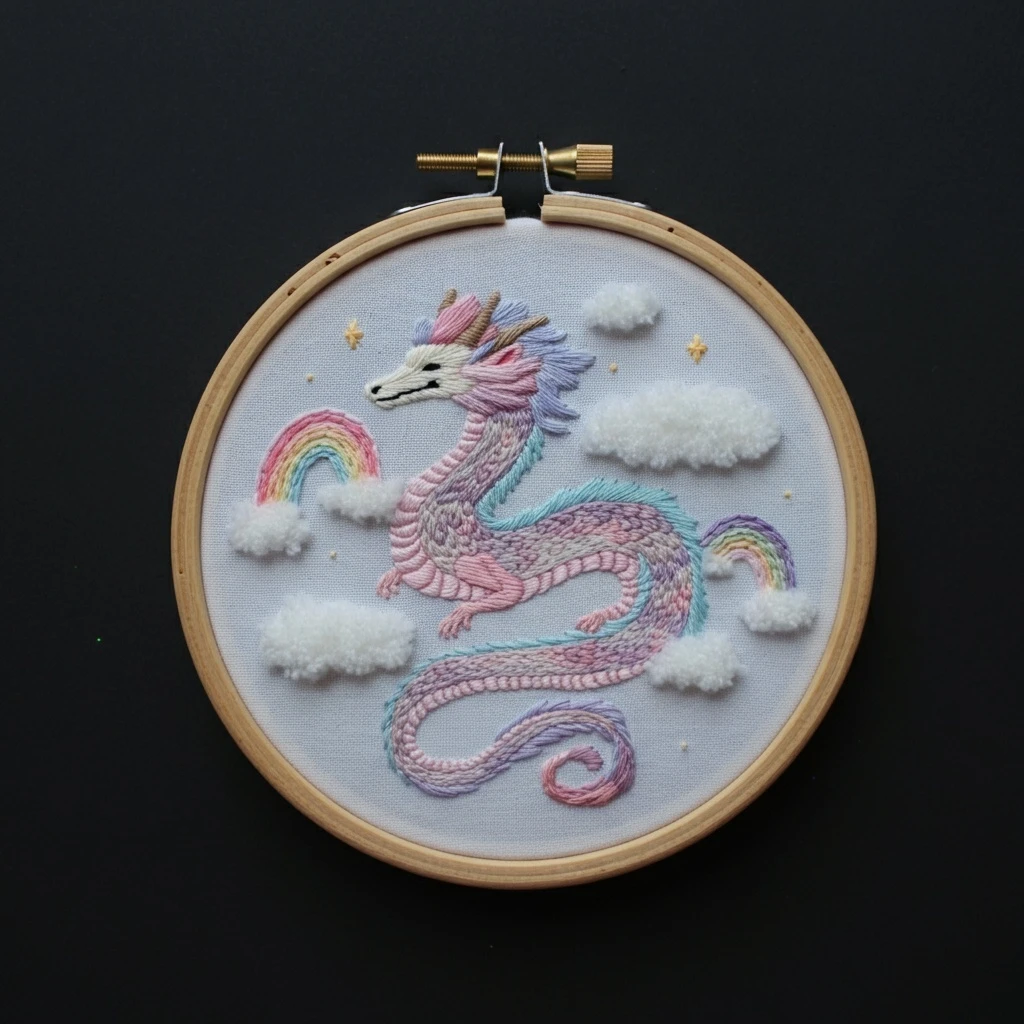
Pastel Rainbow Dragon
A dreamy hoop design with a curled pastel dragon drifting among fluffy clouds, tiny gold stars, and rainbow arcs. The visible sample uses a cream dragon face, blush-pink belly and mane, lavender body scales, aqua feathered spines, violet tail shading, and soft rainbow bands that stay muted rather than bright.
Color read of the design
The dragon is built from gentle candy colors with cool lavender shadows and warm pink highlights. The body reads as a blend of mauve, lilac, and shell pink; the mane and belly are pinker; the spines along the back are aqua-turquoise; the face is warm ivory with a few black details. The clouds are highly textured and nearly white, while the rainbows use soft pink, peach, yellow, mint, aqua, blue, and violet bands.
Suggested DMC floss palette
Dragon face, muzzle, horn highlights, and the warm base for pale cloud stitches.
Very light contouring on the face and cloud undersides when white needs definition.
Use sparingly for eyes, nostril, mouth line, and tiny claw points with one strand.
Main pink for belly plates, legs, mane shadows, and soft tail transitions.
Highlights on belly ridges and outer mane tips; blend with lavender for pastel scales.
Deeper rose accents in mane, legs, underside curves, and rainbow pink bands.
Primary lilac body shading and the paler outer edges of the tail curl.
Scale shadows, tail underside, mane depth, and purple rainbow bands.
Cool bridge shade between lavender body sections and blue rainbow bands.
Brightest aqua for back spines, cheek fringe, and the luminous rainbow stripe.
Deeper aqua shadow at the base of spines and along the dragon's back edge.
Mint rainbow stripe and a soft blending bridge between yellow and aqua.
Yellow rainbow band, small star centers, and a warm glint on horns.
Gold stars and horn ridges; mix with 727 for a softer antique-gold effect.
Optional peach-coral rainbow stripe and warm blush at the base of the mane.
Final cloud highlights only; combine with 712 so the white does not look stark.
Stitch plan by design element
Dragon body and scales
- Fill the long curled body with long-and-short stitch, following the curve from head to tail so the direction feels serpentine.
- Use 2 strands for the smooth base: DMC 211 + 225 in light areas, then DMC 210 + 224 in shaded bends.
- Add individual scales with tiny detached chain, seed stitch, or short split stitches in 210, 223, and 341.
Belly plates and underside
- Work each ribbed belly segment in satin stitch or padded satin, using the stitch angle to separate the plates.
- Outline plate dividers with one strand DMC 223 or 210; keep the lines soft and slightly broken.
- Add DMC 225 on the upper edge of each plate to make the belly look rounded.
Mane, whiskers, and aqua spines
- Use straight stitches and split stitch radiating outward from the head and back ridge.
- For mane tufts, alternate 224, 225, 211, and 210 so the pink and lilac feather together.
- For aqua spines, stitch from the body outward with 598, then add a few 597 stitches at the root for depth.
Clouds, rainbows, and stars
- Make clouds with turkey work, loose French knots, or dense colonial knots, then trim gently for a fluffy surface.
- Use 2 strands for rainbow arcs in neat back stitch, stem stitch, or whipped back stitch so the bands stay tidy.
- Work stars with tiny straight stitches or crossed star stitches in 727 and 3821.
Thread-count, blending, and shading notes
Beginner-friendly working order
1. Transfer with a light hand. The lavender ground fabric and pale floss make dark transfer lines hard to hide. Use a fine erasable pen and test removal first.
2. Stitch the dragon outline and face first. Establish the cream muzzle, black details, horns, and the main body curve before filling texture.
3. Fill the body in soft sections. Work from head toward tail, changing between pink-lavender blends and cooler blue-violet shadows where the body bends underneath itself.
4. Add spines, mane, and belly plates. These raised directional stitches should sit on top of the body fill for a lively fantasy-creature look.
5. Finish with clouds, rainbows, and stars. Save the fluffy clouds for the end so they stay clean and do not catch every thread as you stitch.