
Realistic Apricot
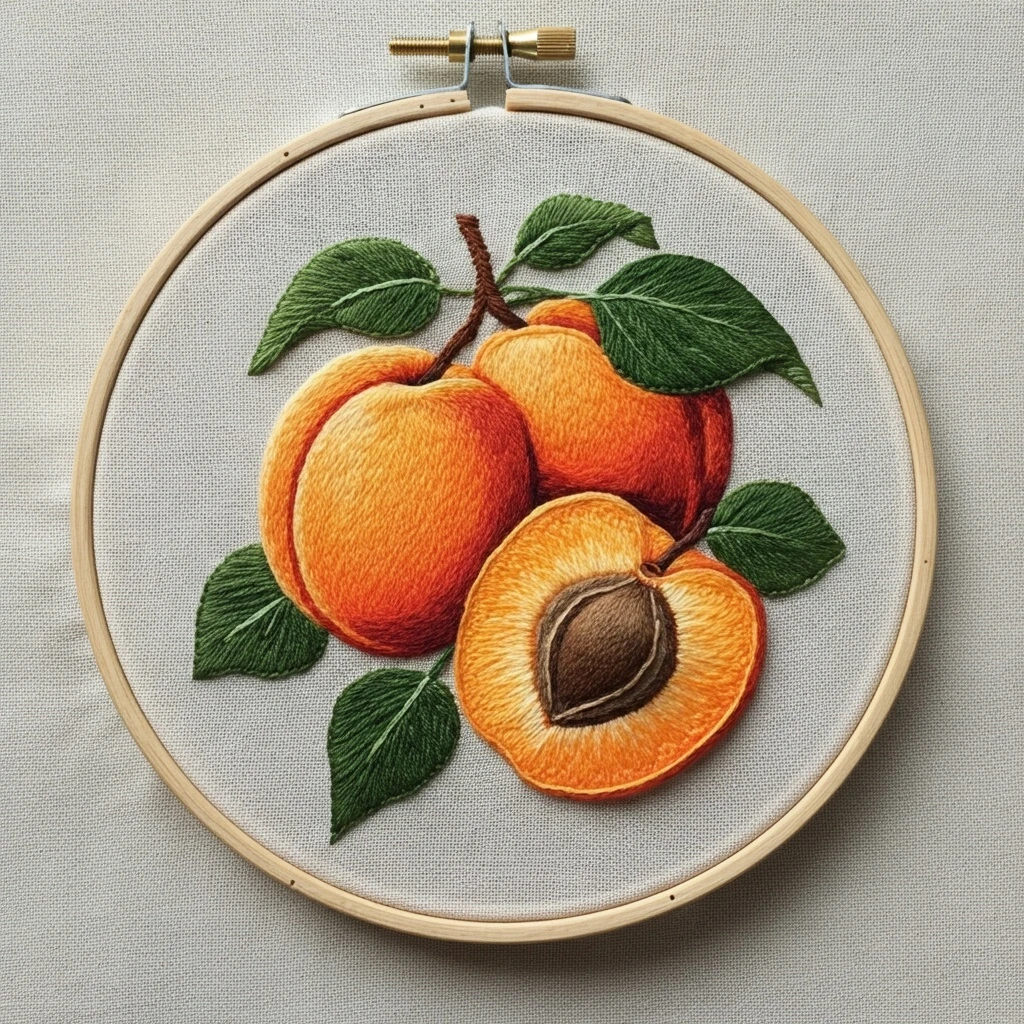
A polished embroidery color and technique guide for a dimensional apricot branch: glowing peach-orange fruit, deep russet shadow pockets, textured green leaves, woody stems, and a cut apricot with a sculpted brown pit.
Soft long-and-short shading creates rounded fruit volume, with darker red-orange edges, pale golden highlights, ribbed leaves, and a raised satin-stitched stone.
Curated DMC Color Palette
Use these flosses as a realistic fruit-and-leaf range. The notes explain where each shade works best and how to blend adjacent values for smooth painterly shading.DMC 3823 — Yellow Ultra Pale
Sunlit fruit bloom, cut apricot rim, and the brightest raised threads on the left-facing curves.
DMC 728 — Topaz
Main warm yellow-orange fill for the apricot flesh; excellent for the center of the cut fruit.
DMC 741 — Tangerine Medium
Core apricot skin tone. Work in long-and-short rows following the curve of each fruit.
DMC 740 — Tangerine
Richer orange transition beside seams, lower fruit edges, and behind overlapping fruit.
DMC 946 — Burnt Orange Medium
Ripe red-orange blush on shaded cheeks and narrow crescents around the whole apricots.
DMC 900 — Burnt Orange Dark
Dark side edges, crease at the stem, and the red shadow lip around the cut apricot.
DMC 3777 — Terra Cotta Very Dark
Smallest shadow pockets where fruit overlaps; use sparingly for realism.
DMC 3822 — Straw Light
Soft inner flesh highlights and feathery strokes radiating from the pit opening.
DMC 743 — Yellow Medium
Bridge shade between pale flesh and orange skin; useful for smooth cut-surface gradients.
DMC 801 — Coffee Brown Dark
Stem core, pit grooves, and tight branch shadows with one strand for controlled linework.
DMC 938 — Coffee Brown Ultra Dark
Deepest pit crease and underside of the woody stem; keep lines narrow and directional.
DMC 975 — Golden Brown Dark
Warm raised ridges on the apricot stone and dry bark texture on the stem.
DMC 3012 — Khaki Green Medium
Leaf veins, turned leaf edges, and the lightest strokes on top-facing foliage.
DMC 895 — Hunter Green Very Dark
Main leaf mass; stitch from central vein outward to build natural ribbing.
DMC 890 — Pistachio Green Ultra Dark
Undersides, leaf tips, and tucked foliage behind fruit.
DMC 642 — Beige Gray Dark
Very light cast shadows or hoop/fabric accent marks, used only if the design needs grounding.
Stitch Map by Design Element
| Area | Best stitches | Working notes |
|---|---|---|
| Whole apricots | Long-and-short stitch, split stitch underdrawing | Start with split-stitch outlines, then shade in curved bands from highlight to shadow. Vary stitch length so color changes feather rather than stripe. |
| Cut apricot flesh | Long-and-short, satin accents, tiny straight stitches | Radiate strokes from the pit cavity outward. Keep the center pale and warm, then deepen toward the rind with orange and terra-cotta. |
| Pit / stone | Padded satin stitch, seed stitch, couching | Add a narrow padded base first, then cover with brown satin stitches. Add a few darker seed stitches and one highlighted ridge for a carved 3D look. |
| Leaves | Fishbone stitch, satin stitch, stem stitch veins | Work each leaf from the center vein to the outer edge. Alternate mid and dark greens to create ribbed texture, then add light vein stitches last. |
| Stem and branch | Stem stitch, whipped backstitch, split stitch | Use two browns together in broken lines. A few angled straight stitches make bark look woody instead of flat. |
| Outer accents | Fine backstitch, single-strand split stitch | Outline only the shadowed edges: fruit overlaps, leaf tips, stem junctions, and the lower rind. Avoid outlining every highlight edge. |
Strand Plan
- 1 strand: facially fine veins, pit cracks, final shadow lines, and tiny texture marks.
- 2 strands: most fruit shading, leaf fill, stems, and smooth long-and-short coverage.
- 3 strands: padded pit base, bold lower rind, or raised front fruit edge only.
- Blending: combine 1 strand light + 1 strand mid when crossing a transition zone.
Blending & Shading Guidance
Reserve DMC 3823 and 3822 for the upper-left glow and raised flesh ridges. Do not fill highlights too densely; let a little fabric texture breathe through.
Move from 3823 → 728 → 741 → 740 → 946, then add 900 and 3777 only at the deepest overlaps. Keep strokes curved like contour lines around the fruit.
Thread-blend 728/741 for golden mids and 740/946 for blush edges. Insert a few single stitches of the previous color into the next color area.
Use 938 only where the pit meets the flesh and where stems disappear behind leaves. High contrast in tiny amounts makes the fruit look more dimensional.
Texture Suggestions
- Velvety apricot skin: finish the fruit with scattered one-strand flyaway stitches in 3823, 728, and 741, all following the fruit curve.
- Soft seam line: stitch the central groove with 946 and 900, then soften one side with 740 so it reads as an indentation, not a hard stripe.
- Leaf ribbing: use fishbone stitch with alternating greens; add a single light vein after the leaf fill is complete.
- Raised pit: pad the stone with 2–3 foundation stitches, then cover with satin stitches in 801 and 975; add 938 in the deepest groove.
- Rind edge: work a narrow split stitch in 900/3777 around the cut apricot’s lower edge for a crisp, realistic lip.
Beginner-Friendly Order
Stitch the stems first, then leaves behind the fruit, then back fruit, front fruit, cut flesh, pit, and final outlines. This order keeps overlaps clean and prevents dark greens from muddying the orange areas.
Needle & Fabric
Use a size 7–9 crewel needle on medium linen or cotton. For dense fruit fills, keep the fabric drum-tight in the hoop and let each stitch lie flat without twisting.
Practical Tip
Work in short sessions and compare the fruit from arm’s length. Realistic embroidery often looks rough close up but becomes smooth once the values are balanced across the whole piece.
Final Details for a Polished 3D Apricot
- Keep the brightest highlight on each apricot slightly off-center so the fruit appears rounded.
- Use darker red-orange at the bottom and tucked edges to separate overlapping fruit.
- Add leaf vein highlights after all green fill is complete; this keeps the veins crisp and visible.
- Trim carried threads behind pale flesh areas so shadows do not show through light fabric.
- For a display-hoop finish, steam lightly from the back, never pressing the raised pit or padded highlights flat.