
Simple Garden Scene Watering Can And Wildflowers Beginner
A gentle beginner garden motif with a gray watering can, tall pink and yellow wildflowers, olive-green leaves, tiny golden buds, and a warm butterfly floating above the scene. The design relies on clean outlines, soft satin petals, and simple line work rather than complicated realism.
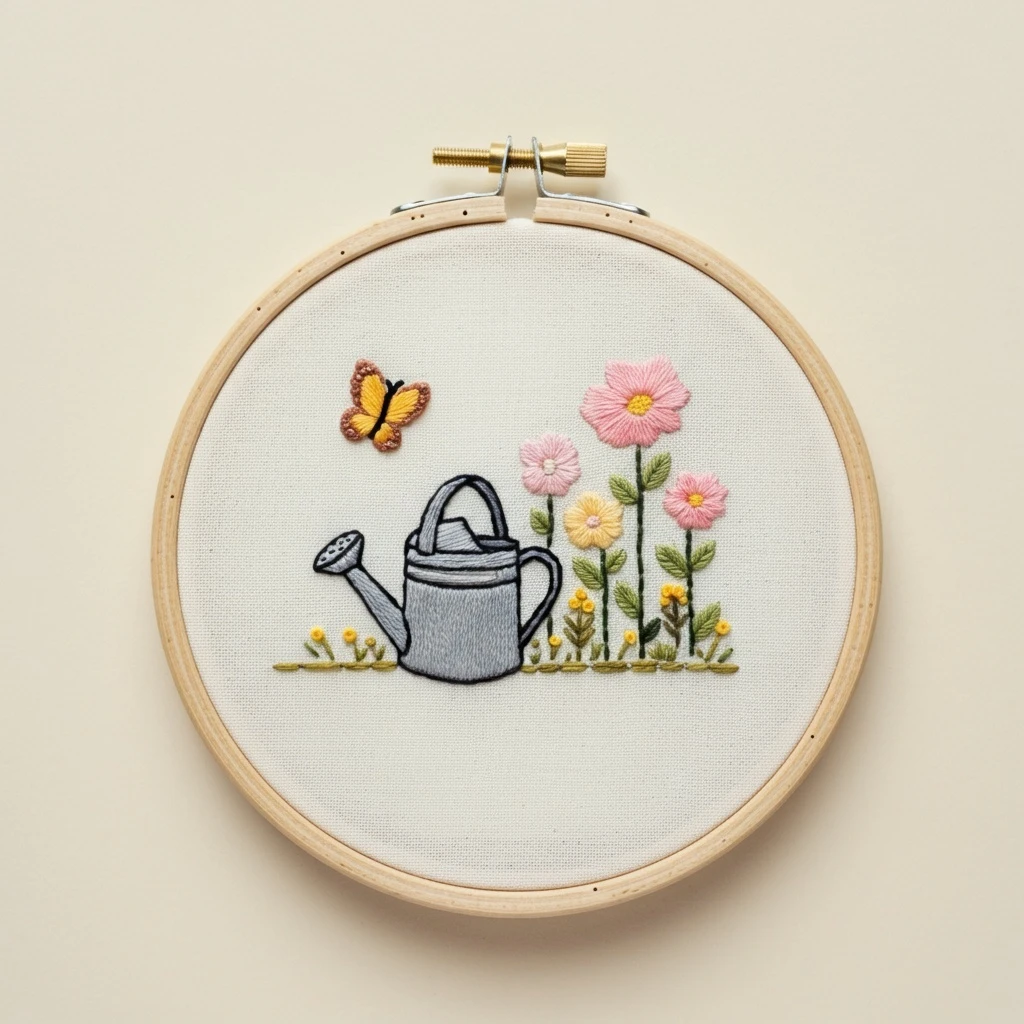
Design read
The reference shows a low, centered garden scene on natural linen. The watering can is the visual anchor: cool gray fill, black outline, curved handle, spout, and top rim. Flowers rise on the right in pink, blush, pale yellow, and golden centers.
Color mood
The palette is soft and springlike: dusty pink blossoms, butter-yellow flowers, muted olive foliage, warm yellow seed heads, silver-gray metal, and brown-gold butterfly details. Keep values gentle so the black outline stays crisp.
Stitch personality
Use smooth satin stitches for petals and can fill, stem stitch for graceful plant lines, detached chain for leaves, and French knots for tiny buds. The embroidery should feel simple, tidy, and handmade rather than densely shaded.
Polished DMC floss palette
These DMC selections match the visible stitched tones in the sample: pale linen, cool metal gray, sharp black outlines, rosy flower petals, creamy yellow blossoms, olive leaves, golden flower centers, and warm butterfly browns. The set is intentionally practical for a beginner pattern, with enough contrast for definition without overcomplicating the stitching.
Thread-count guidance
- Watering can outline: 1 strand of 310 for clean back stitch; use 2 strands only if your fabric weave is coarse.
- Watering can fill: 2 strands of 318, with 1 strand of 415 for highlights and 414 for narrow shadows.
- Flower petals: 2 strands for satin or long-and-short stitch; add 1-strand veins sparingly.
- Stems and leaves: 1-2 strands depending on size. Use 1 strand for delicate stalks and 2 strands for plump leaves.
- French knots: 2 strands wrapped once or twice for beginner-friendly yellow buds.
Best stitch choices
- Back stitch: crisp black contour lines around the can, spout, handle, and butterfly.
- Satin stitch: smooth fill for daisy petals, yellow blossoms, butterfly wings, and small leaves.
- Stem stitch: flexible stems and the ground line under the flowers.
- Detached chain: quick teardrop leaves on the tall wildflower stems.
- French knots: flower centers, small yellow buds, and dot clusters near the base.
Blending ideas
- Blend 318 + 415 by alternating vertical rows on the can for a light metal sheen.
- Blend 605 + 963 in pink petals for a soft daisy look.
- Add 776 only near flower centers so the petals stay beginner-friendly.
- Pair 471 + 469 in leaves for a simple shaded edge and center vein.
- Use 972 + 975 on the butterfly for warm contrast against the cool can.
Suggested stitching order
Area-by-area notes
| Area | Recommended colors | Technique notes |
|---|---|---|
| Watering can body | 310, 414, 318, 415 | Outline first in black, then fill with vertical satin stitches. Use small sections rather than one long span across the can so the surface stays smooth and beginner-friendly. |
| Spout and rose | 310, 414, 318, 415 | Keep the spout mostly outline-based. Use two or three gray stitches inside the spout and add black dots or tiny straight stitches to suggest the watering holes. |
| Pink daisies | 605, 963, 776, 743 | Stitch petals from the outer edge toward the yellow center. Place 776 at the base of every third or fourth petal for soft dimension without heavy shading. |
| Yellow flowers | 725, 743, 822 | Use short satin stitches for the pale petals and a compact French knot or padded satin dot for the center. Leave a little linen between petals for a light airy look. |
| Leaves and stems | 469, 471, 472 | Use stem stitch for stems and detached chain or fishbone stitch for leaves. Directional stitches make the foliage look lively even with just three greens. |
| Butterfly | 310, 972, 975, 407 | Outline the wing shapes first, satin stitch the yellow sections, then add warm brown edges. Keep the body black and narrow so the butterfly remains delicate. |
| Ground flowers and buds | 469, 471, 743, 972 | Use tiny straight stitches for greenery and one-wrap French knots for the yellow dots. Scatter them unevenly for a natural wildflower base. |
Beginner-friendly practical tips
Keep outlines light
One strand of black is enough for most of the can. Heavy outlines can overpower the soft flowers, especially on pale linen.
Shorten satin stitches
For large areas like the watering can, divide the fill into smaller vertical sections. Shorter stitches lie flatter and are easier to keep parallel.
Stitch flowers after stems
Complete the green stems first so the blossoms can sit neatly on top and cover any little joining points.
Do not crowd the garden
The charm comes from open linen around the scene. Keep knots small and leave breathing room between tiny buds.
Texture and finishing suggestions
For the watering can, keep the fill smooth and slightly directional: vertical stitches on the main body, angled stitches on the handle, and short horizontal stitches on the rim. This creates a subtle metal effect without complicated shading. The flowers can be more raised and cheerful, especially the French-knot centers and small yellow buds.
Use gentle padding only where it helps: one split-stitch base under the largest flower centers or butterfly wings is enough. Avoid padding the entire can, because a flatter can contrasts nicely with the plush petals and knots.
When finished, press from the back over a folded towel so the knots and raised petals do not flatten. If framing in the hoop, lace the fabric evenly behind the hoop and keep the front background clean, natural, and unstitched.