
DMC color palette & stitching guide
Summer Berries in Needlework
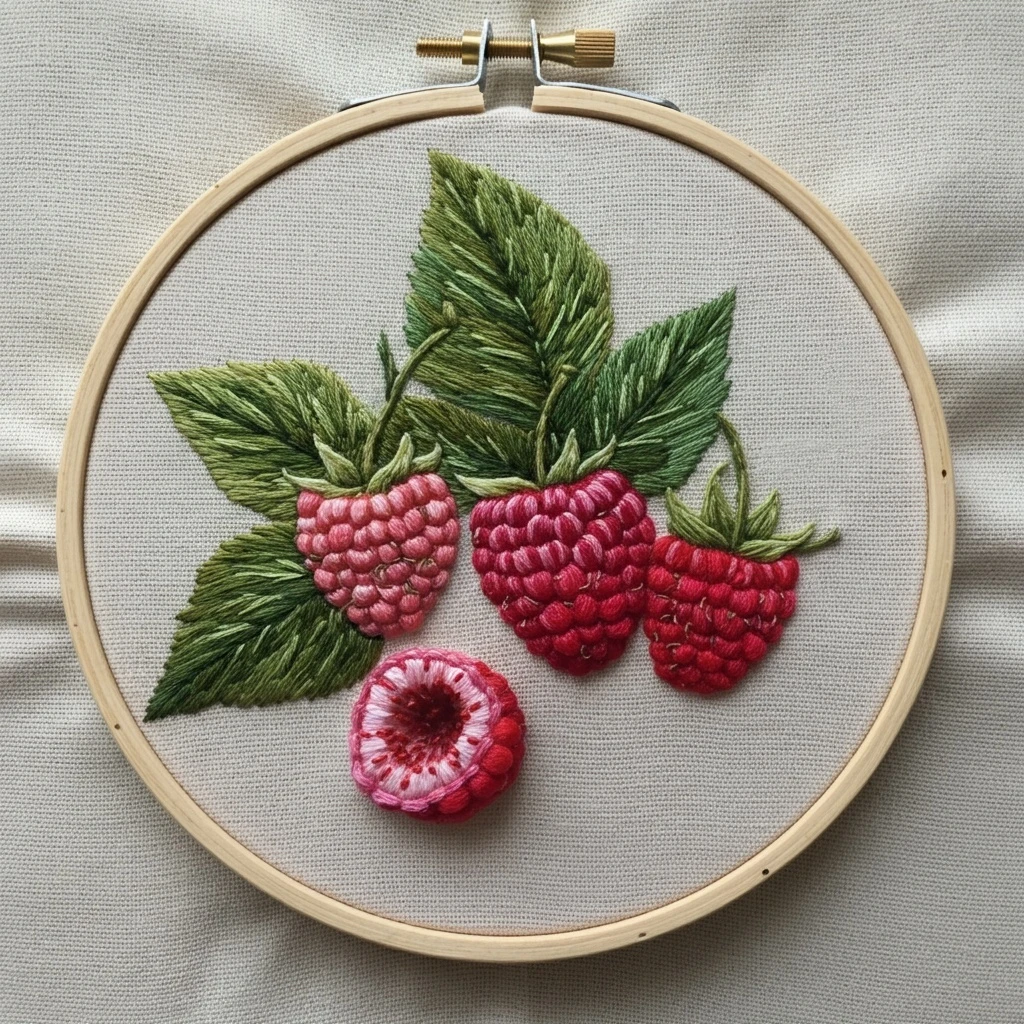
A polished embroidery planning page for the raspberry-and-leaf hoop: lush green foliage, plump summer berries, raised seed texture, and a sliced berry accent worked with practical beginner-friendly stitches.
Likely DMC Color Palette
Palette based on the deep raspberry clusters, pink highlights, dark leafy greens, pale leaf veins, berry calyxes, cut-fruit center, linen background, and warm wooden hoop shown in the preview. Coverage percentages are visual estimates, not exact thread usage.
Stitching Suggestions
| Element | Recommended stitch | Practical notes |
|---|---|---|
| Raspberry lobes | Satin stitch pads, padded satin, or compact woven wheel segments | Work each berry cell as a small oval. Use 2 strands for normal scale; add a tiny darker stitch at the lower edge to separate the lobes. |
| Berry highlights | Single straight stitch or tiny satin overlay | Place one pale pink stitch on the upper-left side of selected lobes rather than every lobe; uneven highlights look more natural. |
| Deep berry shadows | Backstitch, split stitch, or seed stitch | Use DMC 814 or 816 with 1 strand in the grooves between clusters. Keep these lines short so the fruit stays soft, not cartoonish. |
| Sliced berry center | French knots with radial straight stitches | Cluster dark knots in the center, then pull pale pink and red straight stitches outward like spokes for juicy flesh texture. |
| Leaf bodies | Fishbone stitch or long-and-short stitch | Stitch from the central vein toward the serrated edge, changing green shades every few stitches for a furry leaf surface. |
| Leaf veins | Stem stitch or split backstitch | Use 1 strand of dark green for the main vein first, then add lighter vein strokes over the fill for crisp definition. |
| Calyxes and stems | Detached chain, straight stitch, and stem stitch | Use olive greens for the star-like berry tops. Slightly curve stitches around the fruit so the calyx appears to grip the berry. |
| Final texture | Seed stitch and tiny couching | Add sparse dark seed stitches under berry rows and a few light stitches on leaf tips; stop before the surface feels crowded. |
Thread-Count Guidance
- 1 strand: fine leaf serrations, vein details, berry groove shadows, and tiny seed marks.
- 2 strands: most raspberry lobes, calyx points, stems, and the sliced berry flesh.
- 3 strands: optional padded berry cells when you want a more dimensional, bead-like surface.
- 6 strands: rarely needed; reserve for practice padding only, because it can overwhelm the small fruit details.
Blending Ideas
- Blend 1 strand DMC 321 + 1 strand DMC 3801 for lively mid-red raspberry cells.
- Blend 1 strand DMC 3716 + 1 strand DMC 962 for the left berry’s lighter pink blush.
- Blend 1 strand DMC 469 + 1 strand DMC 3012 for leaf areas that need soft, mossy highlights.
- Blend 1 strand DMC 816 + 1 strand DMC 814 only in the deepest berry recesses and cut-fruit center.
Shading, Outlining & Texture Strategy
Where to Start
Begin with the large background leaves because they establish the direction and give the berries a clean place to sit. Add the stems and calyxes next, then work the three whole raspberries from darker lower lobes to brighter upper highlights. Save the sliced berry, French knots, seed marks, and pale shine stitches for the final pass so they remain crisp and raised.
Helpful Practical Notes
- Keep the fabric drum-tight; berry lobes look rounder when satin stitches are evenly tensioned.
- Use shorter stitches on curves. Long satin stitches across a tiny berry cell can snag or look flat.
- Alternate reds within each berry instead of assigning one color per fruit. This keeps the clusters lively.
- For serrated leaves, let a few straight stitches extend just beyond the drawn edge to mimic tiny leaf teeth.
- Press from the back over a towel after stitching to protect raised knots and padded berry texture.