
Beginner Christmas Polar Bear
A soft, cheerful winter palette built for a beginner-friendly polar bear hoop: snowy whites, cool blue shadows, festive reds, pine greens, warm gold, and gentle charcoal details. The goal is clean shapes, cozy texture, and simple stitches that keep the design sweet rather than fussy.
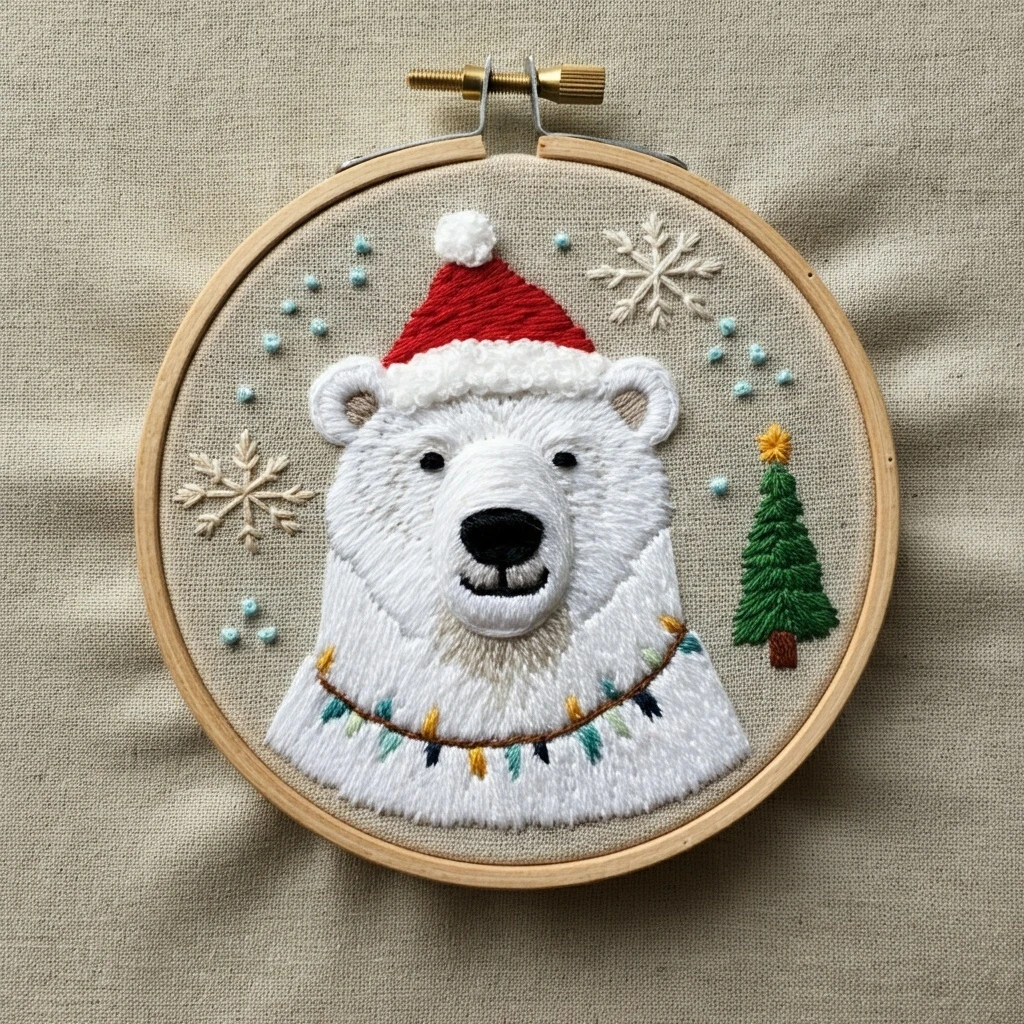
Suggested DMC Palette
Use these colors as practical matches for the main visual areas. Keep the bear mostly pale, then let the scarf, greenery, berries, and small holiday elements provide contrast.
Thread Count Guide
For a beginner pattern, reduce bulk by changing strand count instead of adding many complex stitches.
| Area | Strands | Why |
|---|---|---|
| Polar bear outline | 2 strands | Readable, smooth edges without overpowering the pale fur. |
| Fur fill/shading | 1–2 strands | Use 1 strand for soft blue shadows; 2 for larger white fills. |
| Scarf and red accents | 2–3 strands | Extra body makes the Christmas colors look plush and cozy. |
| Eyes/nose/tiny face | 1 strand | Prevents facial features from becoming too heavy. |
| Snow dots/stars | 2 strands | French knots or small straight stitches show clearly on fabric. |
Blending Ideas
Soft fur: combine one strand Blanc with one strand 747 for the lightest blue-white shadow along the belly, under the arms, and beside the scarf.
Festive scarf: blend 321 with 814 for folds, then switch back to solid 321 on the raised stripe areas.
Evergreen sprigs: alternate 935 and 469 in short strokes rather than blending them in the same needle. This keeps pine texture crisp.
Warm glow: pair 3821 with a few stitches of 977 where gold ornaments, stars, or candle-like details need depth.
Stitch Types by Design Element
Choose simple, forgiving stitches that suit a beginner Christmas hoop while still giving the bear softness and the accessories dimension.
Best for the bear silhouette, scarf edges, paws, and small facial contours. Keep stitch lengths short around curves.
Use for a softer outline around the head and body, especially where the white fur needs a plush edge.
Fill scarf blocks, tiny mittens, ornaments, or stars. Pad with a few straight stitches underneath if the area needs lift.
Optional for subtle fur shading; use loose, staggered stitches in Blanc, B5200, 747, and 3756.
Perfect for snowflakes, berry clusters, cheek dots, and festive texture around the bear.
Use for pine needles, small sparkle marks, whisker-like fur accents, and star rays.
Outlining & Shading Notes
Keep the polar bear outline gentle. Use DMC 414 for most contour lines and reserve 3799 for the eyes, nose, and the tiniest mouth line. A dark full outline around the whole bear can make the design look cartoon-heavy; instead, break the outline at highlight areas such as the top of the head and shoulders.
Place blue shading under the chin, below scarf folds, inside the ears, under the belly, and near the paws. Use very short 1-strand stitches so the cool color reads as shadow rather than blue fur.
Texture Suggestions
For a fluffy look, add a few tiny single-strand straight stitches extending from the bear outline inward. Work them irregularly, not in rows. For the scarf, stitch in the direction the fabric would wrap around the neck: horizontal stitches on the long band and vertical or diagonal stitches on the hanging ends.
Pine or holly can be worked with quick straight stitches radiating from a stem. Vary stitch length and alternate dark and light greens to avoid a flat block of color.