
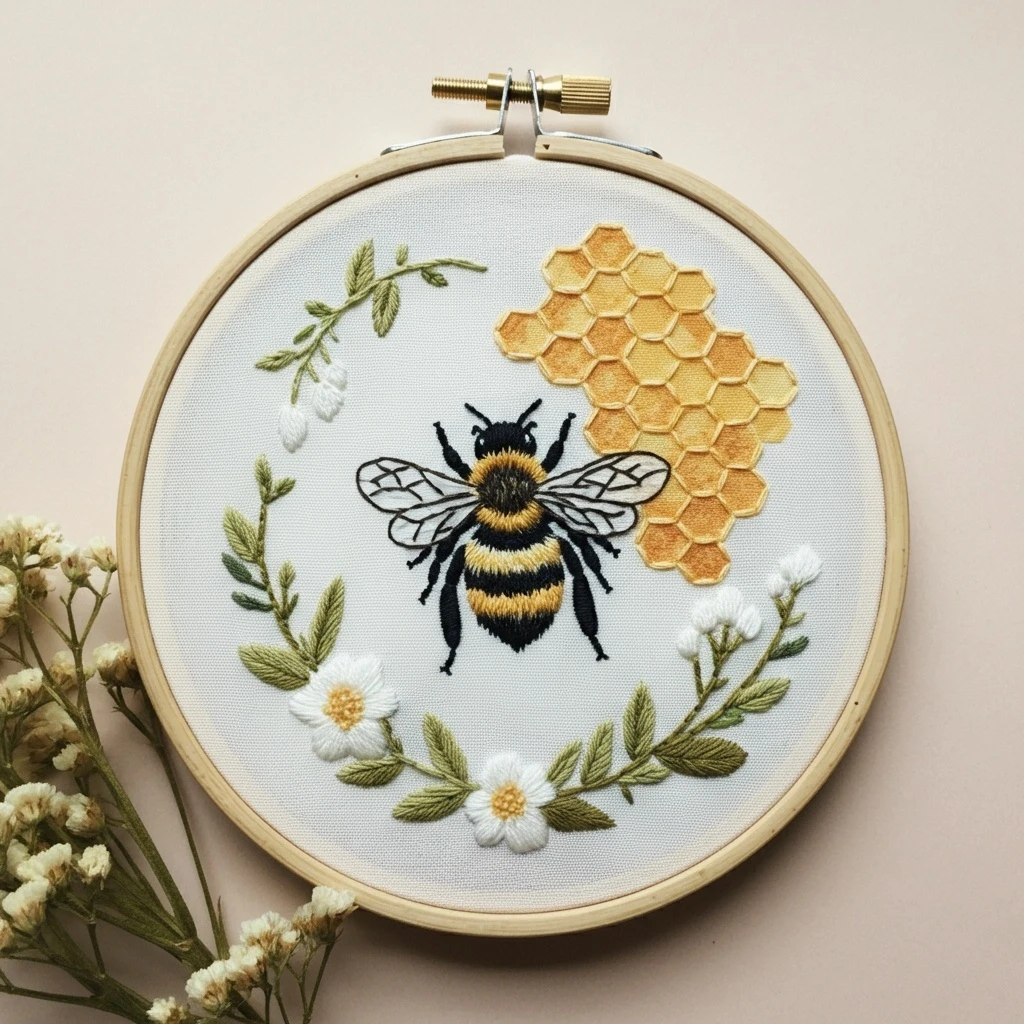
Busy Bee and Honeycomb
This lively bee-and-honeycomb hoop is all about warm golden geometry, a fuzzy striped bee, delicate translucent wings, tiny antennae and legs, and scattered pollen-like accents. The best stitched result combines crisp honeycomb edges with soft body texture so the bee feels active and dimensional.
Polished DMC Color Palette
This palette keeps the design sunny and readable: pale straw for highlights, topaz and amber for honeycomb depth, black and black-brown for the bee, cool pale gray-greens for wings, and muted greens for optional foliage or tiny botanical accents.
Stitch Map by Design Element
Thread Count & Blending Guide
Fine details
Use 1 strand for legs, antennae, wing veins, cell-corner corrections, tiny eye shine, and fine outlines. This keeps the small bee details sharp and delicate.
Main fills
Use 2 strands for bee body stripes, honeycomb walls, honey fills, and optional leaves. Two strands gives strong color without making the honeycomb too bulky.
Raised texture
Use 2–3 strands for pollen knots and extra fuzzy body accents. Three strands is best for a few focal knots; two strands is cleaner for small hoops.
Shading, Outlining & Texture Suggestions
Honeycomb dimension
- Use short stitches around hexagon corners so the shape stays crisp.
- Shade the lower or inner edge of each selected cell with amber tones.
- Add pale straw highlights on the upper edges for a glossy honey effect.
- Do not fill every cell; open cells keep the design light and modern.
Bee fuzz and stripes
- Use irregular long-and-short edges where black and yellow bands meet.
- Add a few one-strand 3371 strokes over black sections for soft fur direction.
- Place brighter yellow on the upper curve and darker topaz underneath for roundness.
- Keep legs and antennae very fine so the body remains the focal point.
Wing softness
- Let fabric show through the wings for a translucent look.
- Use only one or two main vein lines; too many lines can look heavy.
- Add a tiny 928 tint near the wing edge for cool contrast.
- Use 3865 only on the top ridge or shine point, not across the whole wing.
Outlining approach
- Use 310 for strongest bee details and 3371 for softer fuzzy edges.
- Use golden browns for honeycomb outlines instead of black.
- Outline after filling so lines sit neatly on top.
- If leaves appear, outline them with 3346 rather than a harsh dark thread.
Beginner-Friendly Stitching Order
- Transfer the geometry: mark the bee body, wings, honeycomb corners, antennae, legs, and a few pollen-dot positions. Use a ruler or hexagon template if the comb has many cells.
- Stitch honeycomb outlines first: establish the structure in 783 before adding darker and lighter edge accents.
- Add honey shading: fill selected cell corners with 3821, 782, 977, and 976, leaving some cells open.
- Work the bee body: stitch yellow sections first, then black sections, feathering stripe edges slightly.
- Add wings: stitch pale wing shapes after the body so they can overlap naturally.
- Finish with tiny details: legs, antennae, eyes, pollen knots, wing veins, and final honey highlights come last.
Practical Tips for a Clean Finish
Fabric & hoop
Warm cream cotton, linen, or cotton-linen makes golden honey tones glow and keeps pale wing stitches visible. Maintain firm hoop tension so hexagon lines stay straight and corners stay neat.
Needle choice
Use a sharp size 7–9 embroidery needle for one- and two-strand details. For three-strand pollen knots, choose a slightly larger needle so the knots pull through without distorting the fabric.
Keeping black floss tidy
Black floss can look fuzzy quickly. Use shorter lengths, strip and recombine strands, and avoid carrying black thread behind pale wings or bright honey areas.
Checking balance
After stitching the bee, step back before adding more pollen dots. A few well-placed knots create motion; too many can make the design feel crowded.