
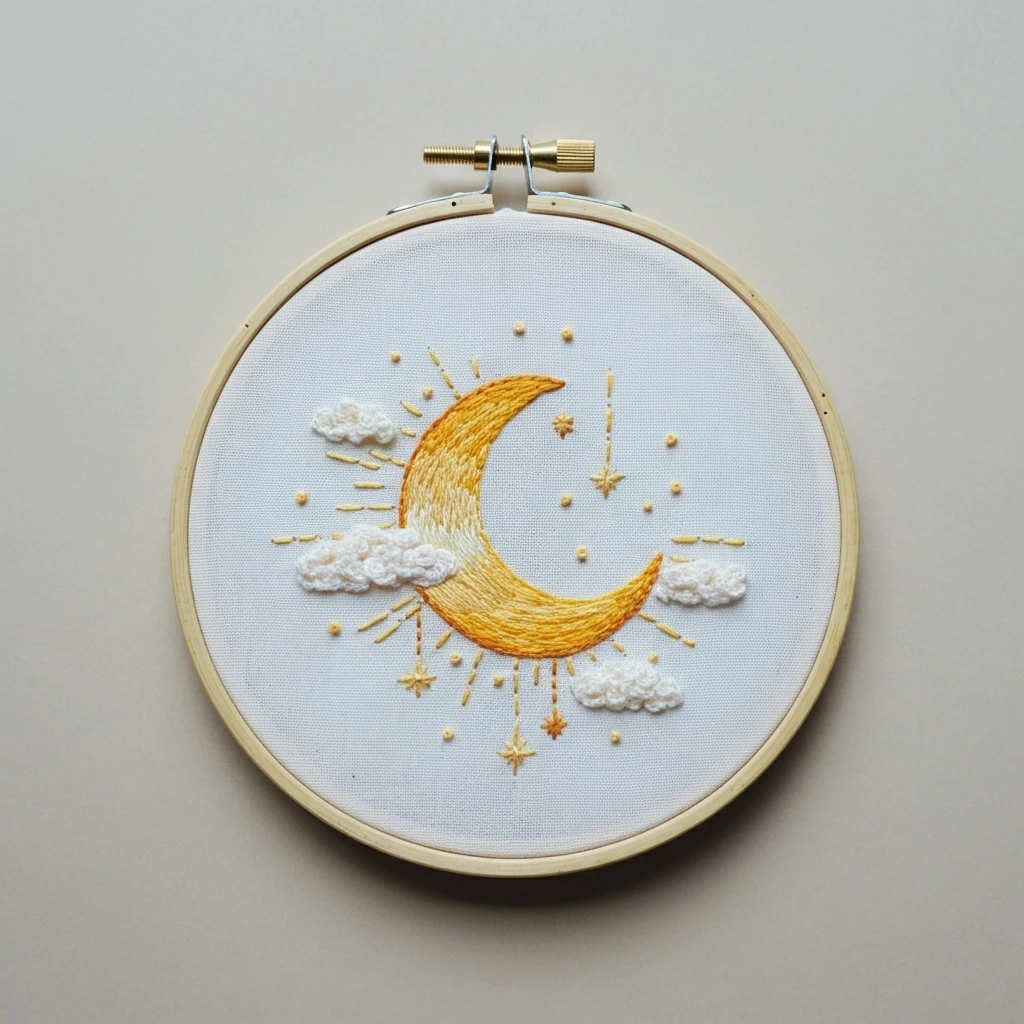
Celestial Crescent Moon and Clouds
This dreamy hoop centers on a soft crescent moon resting among rounded clouds, with small stars and moonlit accents floating around it. The stitched version should feel calm and luminous: smooth cream moon shading, fluffy cloud contours, pale blue-gray shadows, warm golden stars, and delicate linework that keeps the composition gentle and beginner-friendly.
Polished DMC Color Palette
The palette below emphasizes moonlit creams, cloud grays, cool blue shadows, and warm gold sparkle. Use the pale colors in layered values instead of one flat white so the moon and clouds remain visible and dimensional.
Stitch Map by Design Element
Thread Count & Blending Guide
Fine celestial detail
Use 1 strand for star rays, inner crescent lines, cloud edge corrections, tiny dots, and delicate outlines. This keeps the design light and polished.
Main fills
Use 2 strands for the crescent fill, cloud bodies, larger stars, and visible shadow stitches. Two strands give soft coverage without bulky clouds.
Raised sparkle
Use 2–3 strands for prominent French knots or golden dot accents. Use three strands only for focal stars near the moon.
Shading, Outlining & Texture Suggestions
Moon dimension
- Keep the outer crescent edge brightest and the inner curve slightly shaded.
- Use shorter satin stitches around tight points so the crescent remains smooth.
- Add the final 3865 highlight after the base fill is complete.
- Avoid heavy dark outlines; soft gray or beige-gray looks more moonlit.
Soft clouds
- Follow each scalloped cloud curve with your stitches to create roundness.
- Place cool blue-gray stitches only on undersides and overlaps.
- Use open filling rather than dense satin for a softer, fluffier cloud texture.
- Let a little fabric show between cloud layers for airiness.
Star sparkle
- Mix French knots, tiny straight stitches, and four-point stars.
- Cluster stars near the crescent and fade them outward.
- Use 3865 sparingly as the brightest pinpoint.
- Keep gold details small so they enhance rather than overpower the clouds.
Outlining approach
- Outline after filling so the crescent and clouds stay clean.
- Use split stitch for curves and back stitch for tiny star rays.
- Use 762 or 822 for gentle outlines; use 414 only for small deep shadows.
- Skip some cloud outlines if the shaded fill already defines the shape.
Beginner-Friendly Stitching Order
- Transfer lightly: mark the crescent, cloud scallops, largest stars, and a few dot clusters. Keep lines faint under pale moon and cloud areas.
- Stitch the crescent first: fill the moon body, then add inner shadow and outer highlights.
- Outline cloud layers: work the main scalloped cloud edges with stem stitch or split stitch.
- Add cloud shading: place pale fills and blue-gray shadows, working from back clouds to front clouds.
- Stitch larger stars: add straight-stitch stars and golden accents around the moon.
- Finish with dots and highlights: add French knots, tiny sparkles, final cloud corrections, and small 3865 highlights last.
Practical Tips for a Clean Finish
Fabric & hoop
Warm cream cotton, linen, or cotton-linen keeps the moon and clouds soft without losing contrast. Keep the hoop drum-tight so satin stitches and cloud curves do not pucker.
Needle choice
Use a sharp embroidery needle size 7–9 for one- and two-strand details. For three-strand knots, switch to a slightly larger needle so the wraps pull through smoothly.
Keeping pale floss clean
Use shorter lengths of cream and white floss, wash hands before stitching, and avoid carrying dark blue-gray threads behind pale cloud or moon areas.
Cloud balance
If the clouds look too flat, add just a few short 762 or 932 stitches under overlapping curves. If they look too heavy, add tiny 3865 highlights to the top curves.