
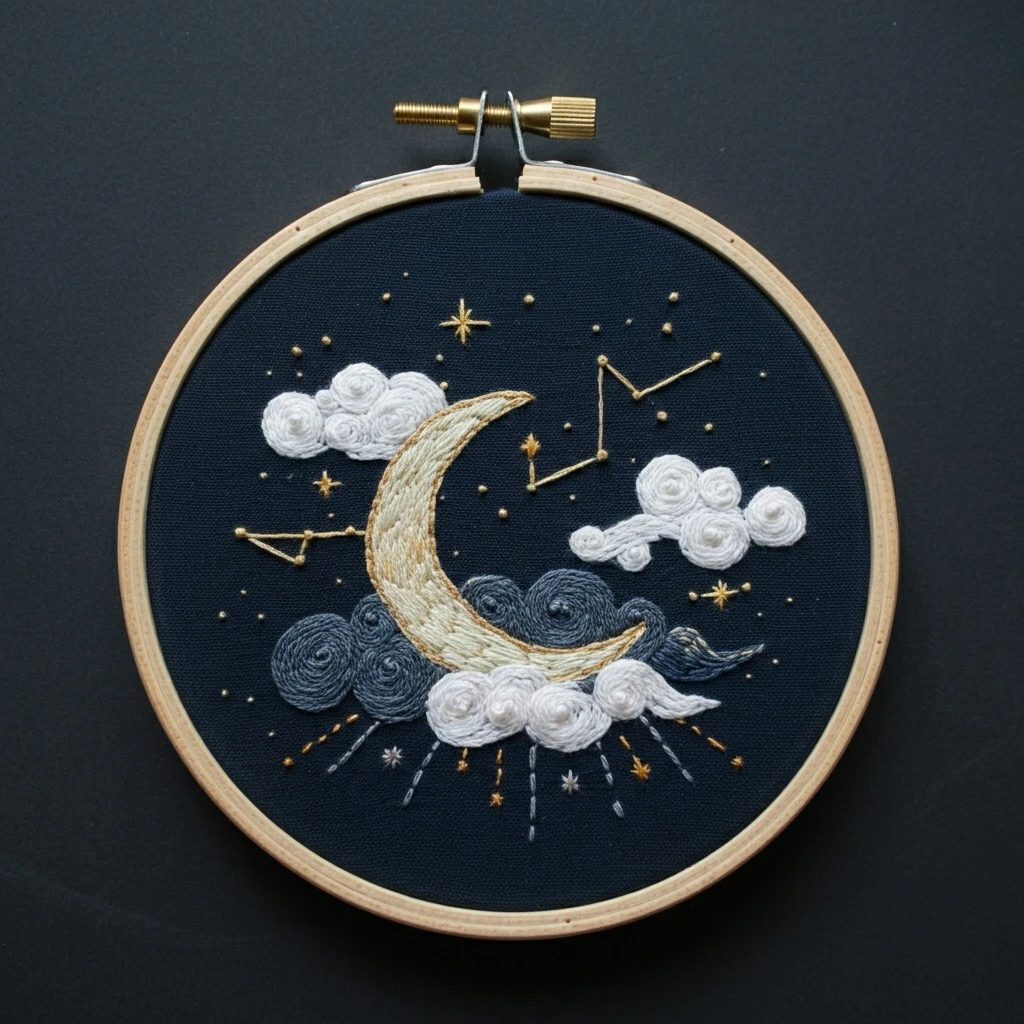
Celestial Night Sky
This celestial night-sky design is all about depth, sparkle, and delicate open space. The embroidery should feel calm and luminous: deep blue-violet sky tones, soft moonlit highlights, tiny gold and cream stars, faint constellation lines, and scattered cosmic dust that feels hand-placed rather than crowded.
Polished DMC Color Palette
This palette creates a gentle cosmic atmosphere: navy and blue for depth, lavender for twilight glow, cream for moonlight, and warm gold for stars. Use the darkest shades sparingly if the design is on light fabric; let tiny bright accents carry the sparkle.
Stitch Map by Design Element
Thread Count & Blending Guide
Fine details
Use 1 strand for constellation links, tiny star rays, moon contour, small dots, and final corrections. This keeps the sky delicate and not overly stitched.
Main fills
Use 2 strands for moon fills, large stars, stronger sky accents, and visible color patches. Two strands give polish without adding too much density.
Raised sparkle
Use 2–3 strands for French-knot stars. Reserve three strands for only a few focal stars; smaller background knots should stay one or two strands.
Shading, Outlining & Texture Suggestions
Atmospheric night sky
- Keep dark stitches denser in the deepest sky areas and lighter near the moon.
- Use broken stitches rather than solid fill if you want an airy beginner finish.
- Add lavender and pale blue sparingly to create glow without losing the night mood.
- Leave open fabric between star clusters so the sky feels expansive.
Star sparkle
- Mix French knots, seed stitches, tiny crosses, and straight-stitch stars.
- Use B5200 only for the brightest pinpoints so it feels special.
- Cluster more stars around focal motifs, then fade them outward.
- Use gold for warmth and cream-white for crisp moonlit sparkle.
Constellation clarity
- Stitch star nodes before connector lines so lines meet cleanly.
- Keep connector lines one strand only and avoid pulling too tight.
- Use short stitches around curves or angled constellation paths.
- Break or skip a line if it makes the design look crowded.
Moonlit highlights
- Place the brightest moon highlight on the outer rim or top-facing edge.
- Use 822 for soft shadow rather than harsh dark contouring.
- Outline with 414 only where pale areas need separation.
- Add final 3865 or B5200 highlights after all surrounding stitches are done.
Beginner-Friendly Stitching Order
- Transfer lightly: mark the largest moon or sky motifs, main star positions, and only key constellation lines. Add tiny filler stars freehand later.
- Stitch the moon or focal motif first: establish the brightest shape so the rest of the sky can be balanced around it.
- Add large stars: complete the major stars and nodes before tiny dots.
- Work constellation links: use one-strand back stitch or couching, connecting stars cleanly without over-tightening.
- Add sky color accents: place blue, navy, lavender, and pale haze stitches around the focal areas.
- Finish with sparkle: add French knots, tiny crosses, seed stitches, and final bright highlights last.
Practical Tips for a Clean Finish
Fabric & hoop
Warm cream, oatmeal, pale blue-gray, or deep navy fabric can all work. On light fabric, use darker blue accents sparingly; on dark fabric, increase the pale creams, golds, and lavender highlights for visibility.
Needle choice
Use a sharp embroidery needle size 7–9 for one- and two-strand work. For raised knot stars, switch to a slightly larger needle so wraps pull through smoothly.
Spacing control
Stop and step back after each round of stars. A celestial design often looks better with fewer, better-placed sparkles than with every open area filled.
Thread management
Use shorter lengths for metallic-looking gold and pale floss, even when using standard cotton DMC. It keeps the thread cleaner and prevents fuzzy-looking star points.