
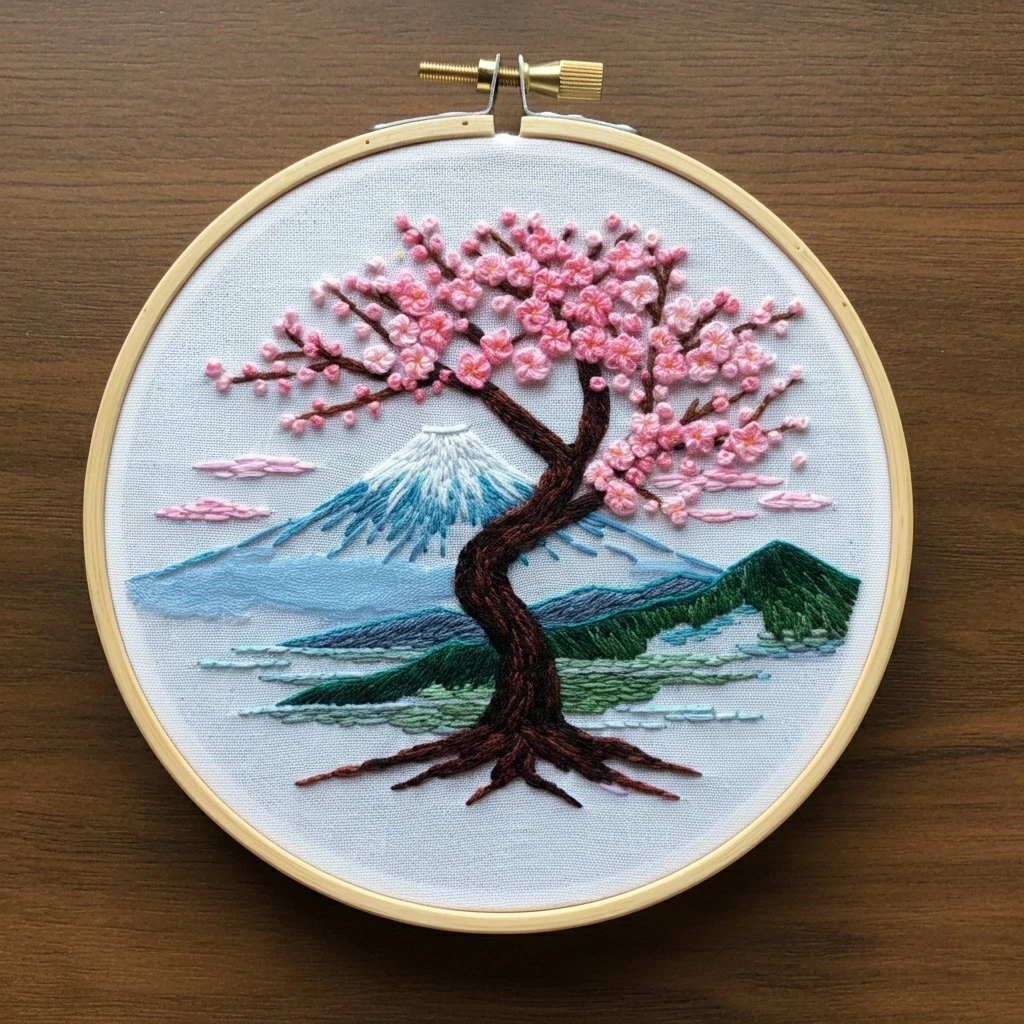
Cherry Blossom Tree and Mount Fuji
This scenic embroidery pairs a graceful cherry blossom tree with the calm silhouette of Mount Fuji. The finished piece should feel peaceful and airy: soft pink blossom clusters in the foreground, warm brown branch texture, cool blue-gray mountain planes, a crisp snowy summit, and gentle sky or horizon accents that add depth without competing with the tree.
Polished DMC Color Palette
This palette balances spring blossom pinks with calm Fuji blues and earthy bark tones. Use the lightest whites and creams for the snowcap and petal tips, deeper rose at blossom centers, and blue-gray values to create the mountain’s quiet distance.
Stitch Map by Design Element
Thread Count & Blending Guide
Fine detail
Use 1 strand for twig tips, blossom centers, petal veins, mountain ridge lines, snowcap edges, and tiny pollen dots. One strand keeps the landscape delicate and readable.
Main fills
Use 2 strands for Mount Fuji planes, snowcap fill, trunk texture, larger branches, and open blossom petals. Two strands give smooth coverage without overwhelming the scenic details.
Raised blossoms
Use 2–3 strands for selected French-knot blossom clusters and focal flower centers. Use three strands sparingly on foreground blossoms only.
Shading, Outlining & Texture Suggestions
Mountain depth
- Follow Mount Fuji’s slope with stitch direction to create clean triangular planes.
- Keep the snowcap crisp but not perfectly straight; slight irregularity looks natural.
- Use the darkest blue only on the shadowed mountain side and ridge accents.
- Soften the lower mountain with 932 or 928 so it recedes behind the blossoms.
Cherry blossom softness
- Place darker rose stitches near centers and keep outer petal edges pale.
- Mix full blossoms with tiny knot clusters and buds for a natural branch.
- Do not cover every branch with flowers; visible bark gives structure.
- Use small white or cream stitches as final petal glints.
Bark and branch texture
- Use dark brown at branch forks and the underside of the trunk.
- Add short broken highlights instead of long continuous lines.
- Taper small branches with one strand so the blossoms feel delicate.
- Keep the trunk stronger than the twigs to anchor the composition.
Outlining approach
- Outline the mountain lightly with blue-gray, not black.
- Use brown outlines for branches and rose or pink outlines only where petals overlap.
- Place outlines after fills so forms stay crisp.
- Avoid outlining every blossom; clustered stitches look more natural.
Beginner-Friendly Stitching Order
- Transfer main shapes: mark Mount Fuji, snowcap, tree trunk, main branches, blossom clusters, and key horizon or sky lines. Keep blossom details light.
- Stitch Mount Fuji first: complete the mountain planes and snowcap so the background depth is established.
- Add trunk and branches: stitch the tree structure over the background, tapering branch tips before adding blossoms.
- Place large blossoms: stitch open flowers and bigger blossom clusters along the main branches.
- Add buds and tiny clusters: use knots, seed stitches, and small detached stitches to fill the canopy lightly.
- Finish with highlights: add petal glints, snowcap highlights, pollen dots, small leaves, and final outline corrections last.
Practical Tips for a Clean Finish
Fabric & hoop
Warm cream, natural linen, or pale sky-blue cotton-linen works beautifully with the sakura and Fuji palette. Keep the hoop drum-tight so snowcap edges and branch curves stay clean.
Needle choice
Use a sharp embroidery needle size 7–9 for one- and two-strand stitching. For raised blossom knots, switch to a slightly larger needle only when needed.
Foreground versus background
Use softer, flatter stitches on Mount Fuji and more textured knots on the cherry blossoms. This contrast helps the tree sit forward in the scene.
Preventing pink overload
Balance dense blossom areas with visible branches and open fabric. If the canopy feels too solid, add pale highlights and stop before adding more rose centers.