
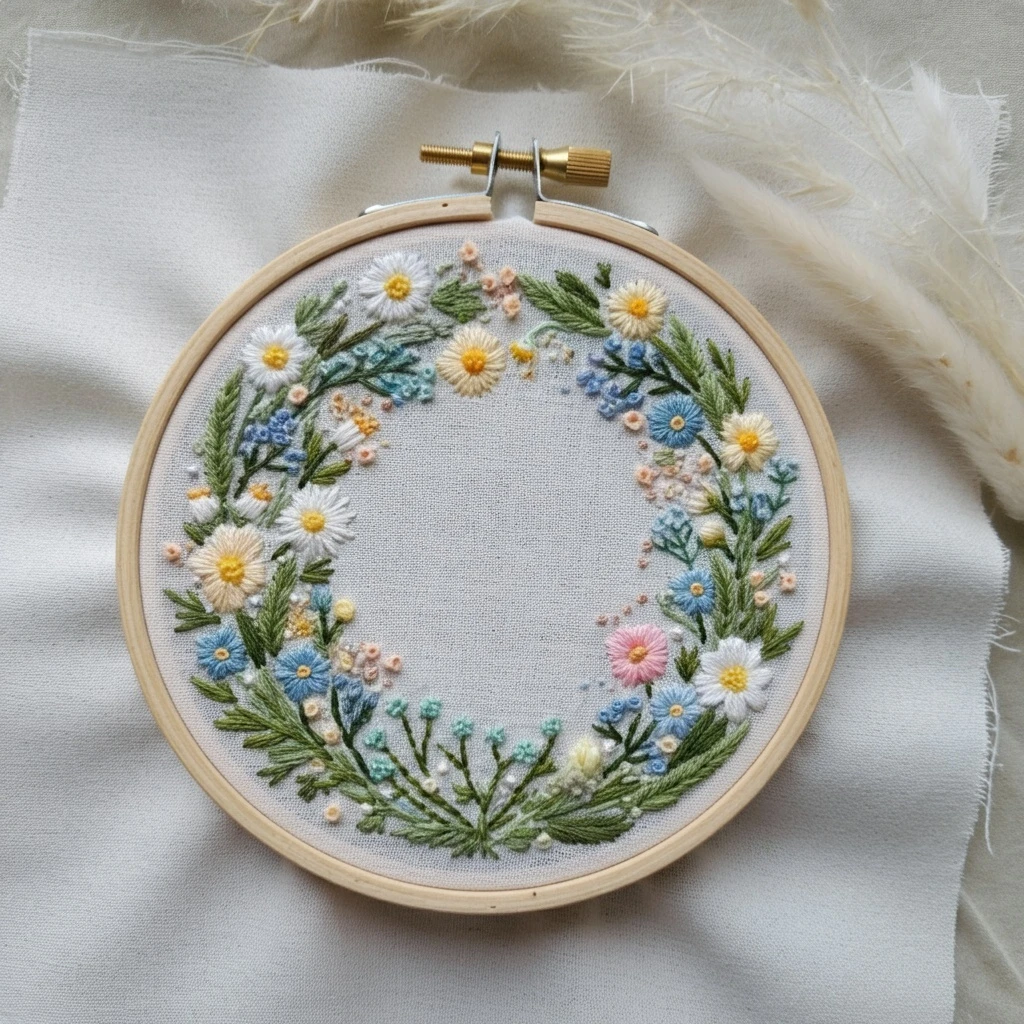
Classic Floral Wreath with Layered Detailing
This refined floral wreath design uses a classic circular structure with extra depth from layered petals, overlapping leaves, small buds, and delicate filler sprigs. The stitched version should feel dimensional but graceful: focal blossoms with darker centers and pale petal tips, greenery layered behind and in front of blooms, tiny accent flowers to soften gaps, and a clean open center that keeps the wreath elegant.
Polished DMC Color Palette
This palette supports a traditional floral wreath with extra layered detailing: pale blush and cream for lifted petals, rose and mauve for inner petal depth, coral for warm accents, yellow-gold for textured centers, and green-gray foliage for the circular structure.
Stitch Map by Design Element
Thread Count & Blending Guide
Fine details
Use 1 strand for petal-edge details, tiny stems, filler sprigs, leaf veins, buds, and final correction stitches. One strand is especially useful for the layered outlines.
Main layers
Use 2 strands for focal petals, leaf fills, the wreath framework, and most buds. Two strands provides smooth coverage while allowing visible layering.
Raised texture
Use 2–3 strands for flower centers, berry knots, and foreground filler dots. Reserve three strands for only the largest focal centers so the wreath stays refined.
Shading, Outlining & Texture Suggestions
Layered floral depth
- Work back petals first, then stitch front petals slightly over them.
- Keep the darkest rose or mauve at the flower center and under petal overlaps.
- Use pale tips only on the front-most petals for a raised effect.
- Add petal-edge lines selectively; too many outlines can flatten the layering.
Dimensional greenery
- Use darker leaves behind flowers and lighter leaves along the outside edge.
- Angle leaves in the direction of the circular wreath flow.
- Let some leaves tuck under petals and some sit in front for real depth.
- Use one-strand veins only on the most visible leaves.
Balanced wreath shape
- Lightly mark the circle and place focal flowers at balanced intervals before filling gaps.
- Use buds and small sprigs to correct the silhouette without adding bulky flowers.
- Keep the center open and clean so the wreath shape remains elegant.
- Repeat color groups around the circle for a polished, intentional look.
Soft outlines
- Use matching darker shades for outlines instead of black.
- Use split stitch for petal curves and stem stitch for vine-like wreath lines.
- Break outlines where flowers overlap naturally.
- Add final outlines after base fills but before the brightest knots and highlights.
Beginner-Friendly Stitching Order
- Mark the circle: lightly draw the wreath guide, then mark focal flower groups, main leaves, and a few large filler clusters. Leave tiny buds and dots for later placement.
- Stitch back greenery: work the darker inner stems and leaves first so the flowers can sit visually on top.
- Build focal flowers: stitch back petals, then mid petals, then front pale highlights for layered dimension.
- Add mid-layer leaves: place sage leaves between flower groups and let some overlap the flower bases.
- Add filler details: stitch small blossoms, buds, berries, and twigs to smooth the circle and fill light gaps.
- Finish with highlights: add flower centers, petal-edge accents, leaf veins, tiny white glints, and final outline corrections last.
Practical Tips for a Clean Finish
Fabric & hoop
Warm cream, natural linen, or pale oatmeal cotton-linen suits the classic palette and keeps layered details visible. Keep the hoop drum-tight so dense flower centers and overlapping petals do not pucker.
Needle choice
Use a sharp embroidery needle size 7–9 for one- and two-strand work. For raised centers or berry knots with three strands, switch to a slightly larger needle for easier pull-through.
Keeping layers readable
Do not use every shade in every flower. Choose one shadow shade, one main shade, and one highlight shade per bloom so each layered detail stays clear.
Avoiding clutter
Stop adding filler before the wreath becomes a solid ring. Layered designs look most polished when the blooms, leaves, and buds have small breathing spaces between them.