
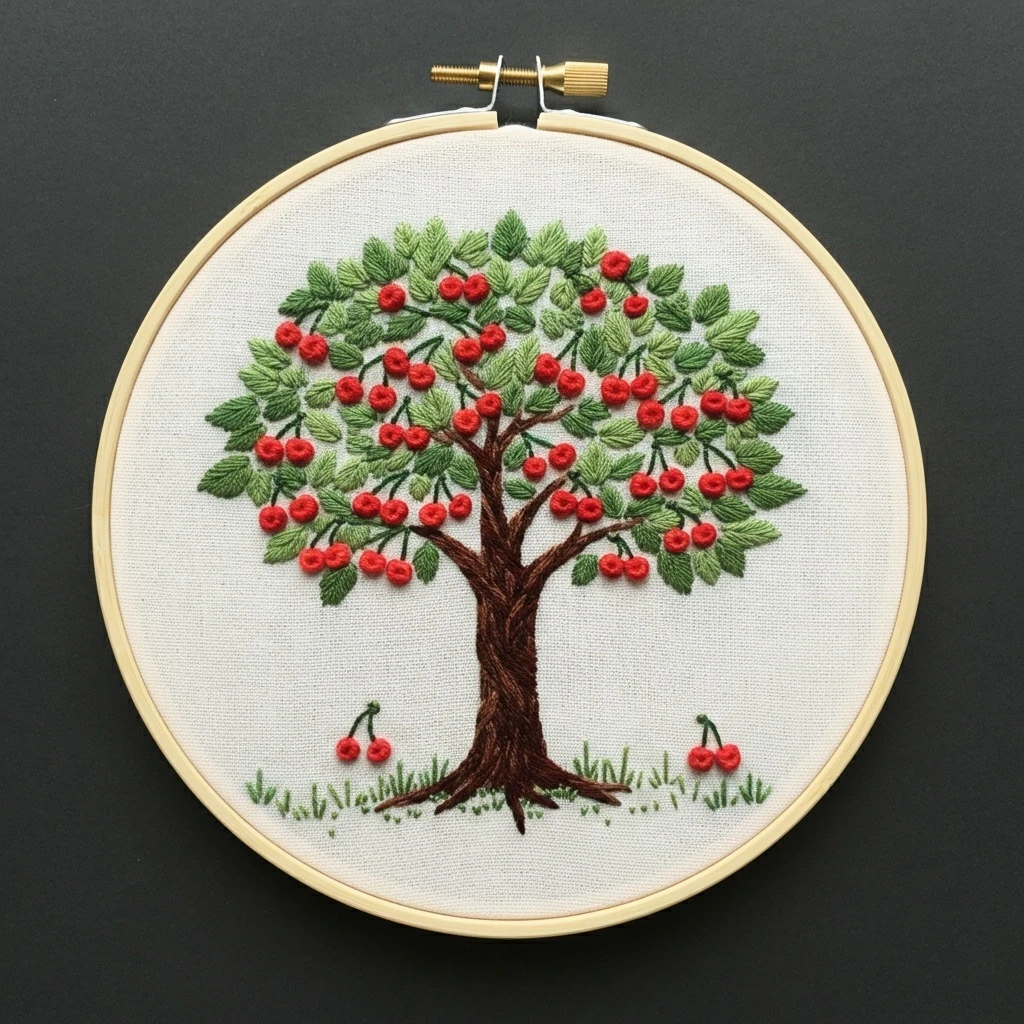
Embroidered Cherry Tree In Hoop
A charming fruiting cherry tree on natural linen, with a textured brown trunk, layered green leaf canopy, bright red cherry clusters, small foreground grass, and fallen fruit pairs. These DMC matches are estimated from the visible hoop preview and chosen for a clean, dimensional hand-embroidered finish.
Likely DMC Color Palette
Matched to the dark bark, warm trunk highlights, green leaf canopy, cherry stems, bright fruit clusters, foreground grass, and small shine accents.
Stitching Suggestions
Build the tree from the trunk outward, then layer leaves, stems, cherries, grass, and final highlight details.
| Element | Stitch Type | Practical Notes |
|---|---|---|
| Tree trunk | Long and short stitch | Build the trunk with 898 and 801 in vertical strokes, then add 3371 in narrow grooves and 975 on raised ridges. |
| Bark ridges | Split stitch and straight stitch | Use one strand of 3031 or 3371 for irregular bark cracks. Let the lines curve with the trunk rather than running perfectly straight. |
| Roots | Stem stitch and long straight stitch | Work roots outward from the trunk base using 898 and 801, then add small 975 highlights on the upper edges. |
| Large branches | Stem stitch or whipped backstitch | Use two strands for the main limbs, tapering to one strand as branches reach the outer canopy. |
| Fine twigs | Single-strand backstitch | Use 3031 or 3362 for slim twig lines connecting leaf clusters and cherries. Keep these delicate so the fruit remains the focus. |
| Individual leaves | Fishbone stitch | Use 3363 at the leaf base, 3347 through the middle, and 3052 or 3053 toward the tip for dimensional leaf texture. |
| Small leaves | Lazy daisy stitch | Detached-chain leaves are ideal for the outer canopy. Mix directions and green tones so the crown looks natural. |
| Canopy filler | Seed stitch and short straight stitch | Add tiny green stitches between defined leaves with 367 and 368 to make the canopy feel full without turning into a solid block. |
| Cherry fruit | Padded satin stitch or woven wheel | Use 817 at the lower edge, fill with 321 or 349, and touch the top with 666 or 350 for rounded shine. |
| Cherry clusters | French knots or colonial knots | For small distant cherries, use one or two-wrap knots in 321 and 666, adding a tiny 814 stitch where depth is needed. |
| Cherry stems | Stem stitch or straight stitch | Use one strand of 3362. Stitch stems after the leaves but before the final cherry highlights so they tuck naturally behind the fruit. |
| Ground grass | Straight stitch and fly stitch | Use 3347 and 3052 for upright blades, 3363 for darker clumps, and 3053 for small bright tips. |
| Fallen cherry pairs | Padded satin stitch | Use the same red shading as the tree fruit, but keep the ground cherries slightly larger and rounder for a playful foreground detail. |
| Tiny ground dots | Seed stitch or French knots | Scatter 3363 and 3053 around the roots for texture. Keep the dots low and irregular so they do not compete with the canopy. |
| Final highlights | Single straight stitch | Place tiny 3865 highlights only on the closest cherries. A few bright stitches give fruit shine without making every cherry look identical. |
Thread Count, Blending & Texture
Use strand weight to make the bark rugged, leaves crisp, cherries raised, and grass light and playful.
Rugged bark
Use 2 strands for trunk fill and 1 strand for the darkest cracks. Layer short vertical strokes in several browns to avoid a flat trunk.
Leaf variation
Do not stitch every leaf in the same green. Use darker greens underneath and lighter greens on outer leaf tips to create a rounded canopy.
Raised cherries
Pad the largest cherries with a tiny base stitch before satin stitching, or use two-wrap French knots for small clustered fruit.
Stem placement
Stitch cherry stems before the final fruit highlight. This lets red cherries sit visually on top while stems tuck behind them.
Ground texture
Use scattered straight stitches and fly stitches for grass. Keep the center near the roots sparse so the trunk remains grounded and visible.
Beginner control
Complete the trunk and main branches first. Then fill leaves in small sections so the canopy stays balanced from left to right.
Recommended Stitching Order
This order keeps the tree structure strong and protects raised fruit details from snagging.
Helpful Notes for a Polished Finish
Small finishing choices help the cherry tree look full, bright, and neatly handmade.
- Use firm hoop tension; dense trunk stitches and padded cherries can pucker loose linen.
- Keep branch lines visible between leaves so the canopy feels connected to the trunk.
- Vary cherry sizes slightly. Perfectly identical fruit can look dotted on rather than naturally clustered.
- Use only a few white highlights on foreground cherries; too many can make the fruit look speckled.
- Avoid carrying dark brown thread behind pale open fabric areas where it may shadow through the linen.
- Press the finished hoop face-down on a towel to protect raised cherries, knots, and textured bark ridges.