
Embroidered Geisha with Cherry Blossoms and Pagoda
A refined stitching plan for a richly detailed hoop: glossy black hair, a red patterned kimono, soft blossom branches, a pale fan, gold hair ornaments, and a misty pink pagoda in the distance.
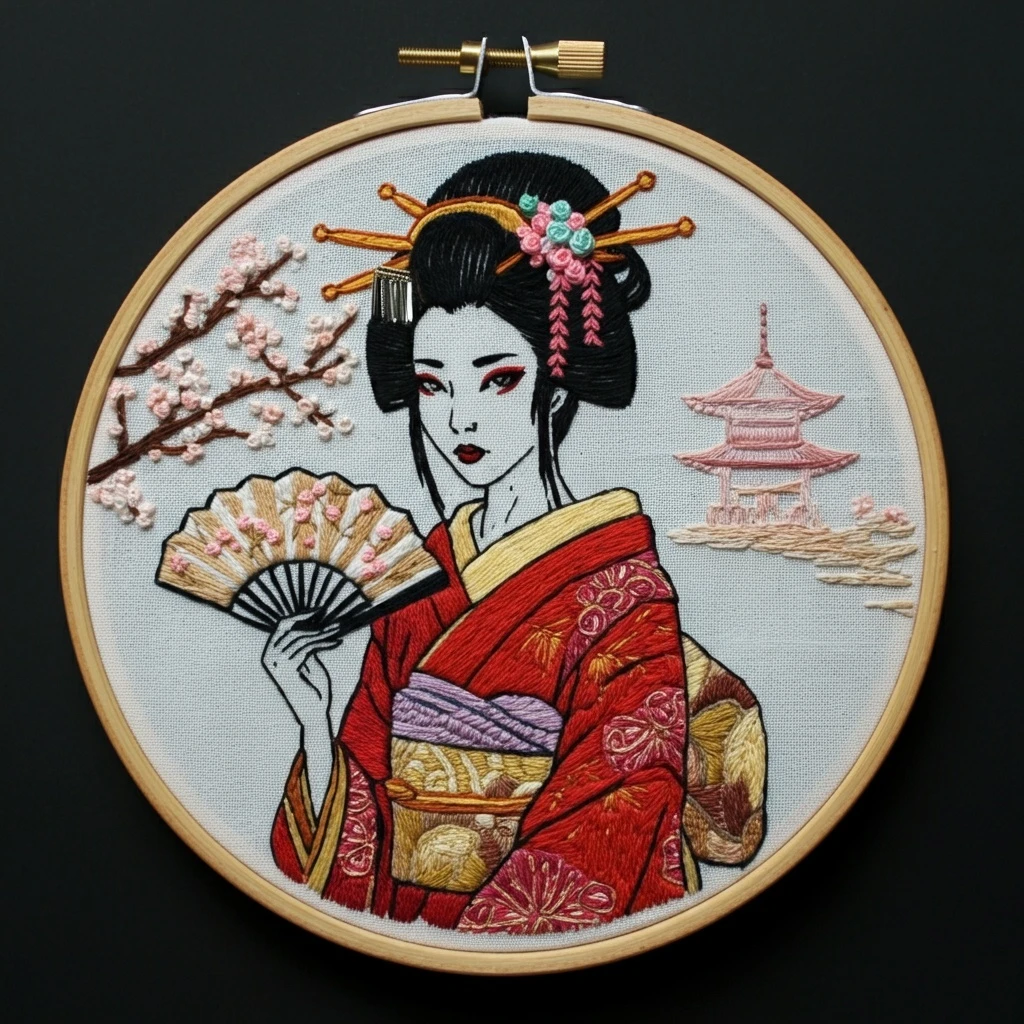
Preview impression based on the visible hoop design: dramatic red kimono, black linework, gold accents, pale blossoms, and delicate architectural background.
Design Read
This design depends on contrast: crisp black outlines and hair against a soft linen ground, saturated reds for the kimono, warm metallic-looking golds for ornaments and fan ribs, and gentle pinks for cherry blossoms and the pagoda. Keep the face and hands smooth and minimal, then let texture build in the florals, sleeve motifs, and hair accessories.
Likely DMC Color Palette
Colors are estimated from the reference image and matched to close DMC embroidery floss shades. Use the palette flexibly: the goal is a balanced red, black, gold, blossom-pink, and muted-lilac story rather than exact pixel matching.
Stitching Suggestions
| Element | Stitch Type | Practical Notes |
|---|---|---|
| Hair mass | Long and short stitch, split stitch outlines | Use 2 strands of 310 for filled areas, then add 1-strand curved highlight lines in 3371 or a single separated strand of black so the hair looks glossy rather than flat. |
| Face and hands | Fine backstitch, tiny satin stitches | Keep the face elegant and sparse. Use 1 strand for eyes, nose, jaw, and fingers. Add only a few pale gray stitches under the chin and hand folds. |
| Red kimono | Long and short stitch, directional satin stitch | Work robe sections in the direction of the fabric folds. Blend 321 and 498 in alternating stitches; reserve 814 for deepest crease lines. |
| Kimono floral motifs | Detached chain, stem stitch, French knots | Stitch motifs after the red fill is complete. Use gold and dusty pink in 1 strand so the decoration sits delicately on top. |
| Obi sash | Satin stitch, couching, whipped backstitch | Use lavender tones for the central wrap and golds for patterned sections. Couch long gold lines to avoid snagging and keep curves clean. |
| Fan | Straight stitch, backstitch, seed stitch | Radiate stitches outward from the fan base. Use 1 strand black for ribs, pale gold for panels, and tiny pink knots or lazy daisies for blossoms. |
| Cherry branches | Stem stitch, whipped stem stitch | Use 3371 or dark brown with 2 strands for main branches; taper to 1 strand at twig ends before adding blossom knots. |
| Cherry blossoms | French knots, colonial knots, lazy daisy | Cluster 3716, 899, and 3865 knots with varied wrap counts. Keep some blossoms pale so the branch feels airy. |
| Pagoda | Fine backstitch, straight stitch, running stitch | Use 1 strand dusty rose and light gray. Keep the background lighter and less dense than the figure so it recedes. |
| Hair ornaments | Satin stitch, straight stitch, French knots | Use golds for sticks, pinks for hanging blossoms, and small aqua knots as cool highlights at the crown. |
Thread-count guidance
Use 2 strands for most robe, hair, fan, and branch work. Switch to 1 strand for face details, pagoda lines, kimono motifs, fan ribs, and fine outlines. Use 3 strands only for raised blossom knots or bold collar edges.
Blending ideas
For the kimono, blend one strand 321 with one strand 498 in transitional folds. For gold areas, alternate 783 and 676 rather than mixing them everywhere; this creates readable shimmer without metallic thread.
Outlining details
Outline the face, hair, fan ribs, and robe edges last with a single strand of black or dark brown. Keep outlines continuous but not heavy; tiny gaps around the face can make the expression softer.
Shading guidance
Place the darkest reds under sleeve overlaps, along the inner collar, and where the arm crosses the body. Keep the outer shoulder brighter so the figure stays dimensional inside the hoop.
Texture suggestions
Contrast smooth satin hair with raised blossom knots and slightly uneven branch stitches. The robe should look smooth, while blossoms and accessories can be more tactile and dimensional.
Beginner-friendly tip
Do not try to finish every motif before moving on. Complete large shapes first, then add decorative stitches in layers. This prevents the small pink and gold details from disappearing under later fill stitches.
Recommended Stitching Order
Trace the figure, fan ribs, branch lines, and pagoda lightly. Use a taut hoop and consider a thin backing fabric if the ground fabric is loose or pale.
Work the main silhouette, fan ribs, hairline, branch trunks, and kimono boundaries in 1 strand. This gives you clean borders for later filling.
Complete the black hair first, then the large red kimono areas. Follow the curve of the hair and the fall of the sleeves with directional stitches.
Keep skin details delicate. Finish the lavender and gold sash, then fill the fan with pale radiating stitches.
Add kimono motifs, branch blossoms, hair ornaments, and the distant pagoda. Save raised knots and bright highlights for the final pass.
Helpful Notes for a Polished Finish
- Use shorter satin stitches on curved robe edges to avoid loose floats.
- Keep pagoda stitches thinner and lighter than the geisha so the background stays atmospheric.
- For cherry blossoms, vary knot size: one wrap for distant blooms, two wraps for foreground clusters.
- Stitch gold hair sticks with long straight stitches, then couch them down at the center for security.
- Press from the back on a padded towel after finishing so raised knots are not flattened.