

Embroidered Wildflower Bouquet In Hoop
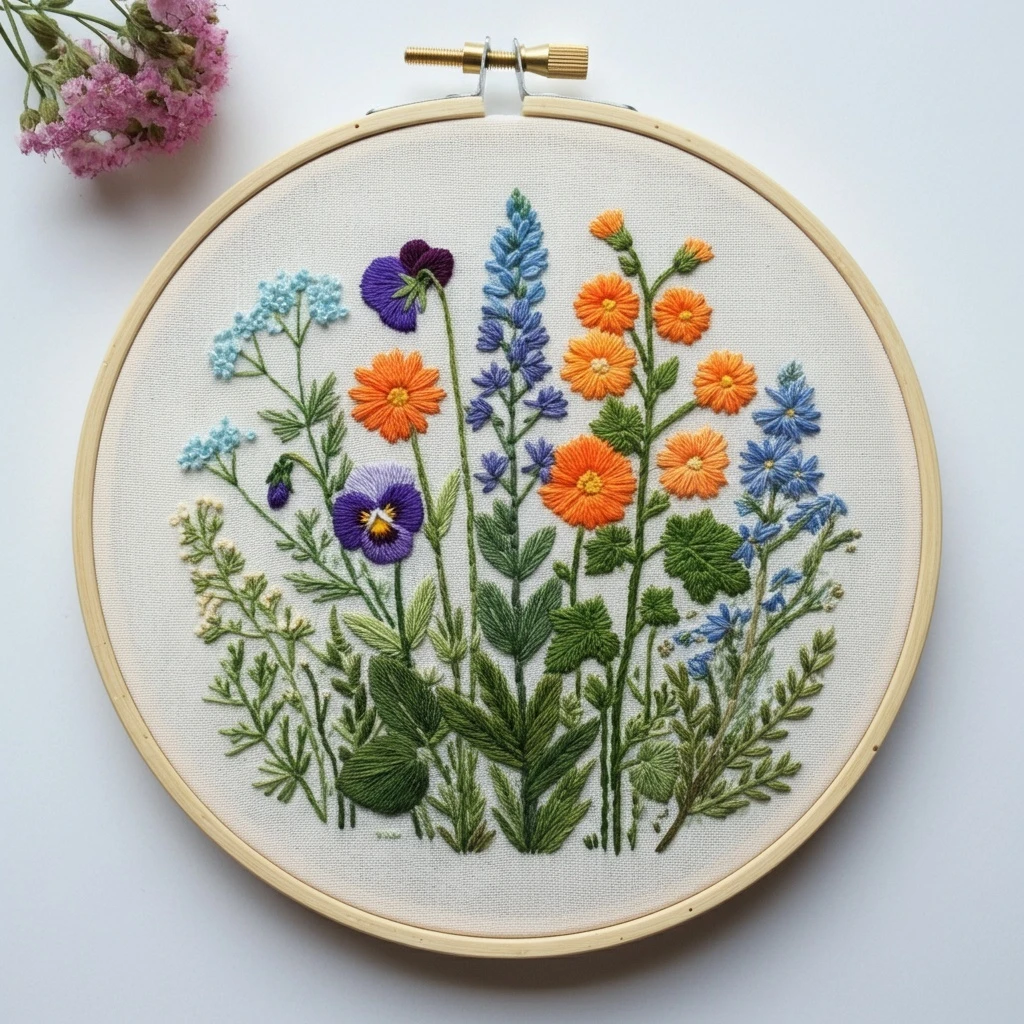
This design reads as a cheerful wildflower posy gathered into a soft pink bow, with scarlet poppy-like flowers, crisp white daisies, airy lavender spikes, and layered green foliage. The overall effect is fresh, romantic, and beginner-friendly while still offering enough shading and texture for a beautifully polished finish.
Design Analysis
The bouquet is built around three strong color families: vivid red statement flowers, cool purple spikes, and white daisy blooms with golden centers. These are balanced by a generous amount of muted greenery and a dusty pink bow that softens the composition. Because the flowers sit close together, clean stitch direction and carefully placed shadows will make the bouquet feel full without becoming visually heavy.
- Red focal flowers: satin or long-and-short stitching works best to show the rounded, slightly cupped petal shapes.
- White daisies: keep petals airy with split stitch, fishbone, or short satin stitches radiating outward from a knotted center.
- Purple wildflower spikes: detached chain, straight stitch clusters, or tiny satin stitches create the layered lavender look.
- Greens: use mixed values so the bouquet reads as dense and natural rather than flat.
- Pink bow: soft blending and smooth stitch direction are the key to the plush ribbon effect.
Thread Count Guidance
1 strand
Best for outlining, fine leaf veins, tiny flower centers, subtle shading transitions, and delicate background filler stitches.
2 strands
Your default choice for most of the bouquet: leaves, stems, daisy petals, and lavender spikes all look neat and balanced at this thickness.
3 strands
Ideal for bold satin stitching on the red petals or for areas where you want a richer, more raised texture with faster coverage.
Blending pairs
Blend one strand each of 666 + 321 in shadowed red petals, 552 + 210 in lighter purple tips, and 3716 + 3726 across the ribbon highlights.
Suggested DMC Color Palette
These shades closely match the visible tones in the reference design and are selected to give enough range for shading, highlighting, and textural detail.
Recommended Stitch Types
Long & Short Stitch
Use for the red poppy petals and the pink bow if you want smooth color transitions and a softly sculpted, painterly finish.
Satin Stitch
Excellent for bold petal fills, compact flower centers, and small ribbon sections where you want a glossy surface.
Stem Stitch
Perfect for flower stems, bouquet binding lines, and graceful curving outlines around leaves and floral forms.
Fishbone Stitch
Ideal for medium leaves because it naturally builds a central vein and a realistic leaf shape.
Detached Chain / Lazy Daisy
Great for small petals, tiny filler florets, and clustered lavender-like buds when worked in layered groups.
French Knots
Use sparingly for daisy centers, tiny pollen dots, and a slightly raised texture in the bouquet’s small accents.
Outlining, Shading & Texture Suggestions
- Outlining: Use 1 strand of DMC 310 or 3347 for selective outlines only. Outline the inner poppy centers, a few petal separations, and the ribbon knot, but avoid outlining every edge or the bouquet may look stiff.
- Red petal shading: Start with 666 for most of the petal, tuck 321 into the lower folds and near the flower center, then add one or two tiny highlight stitches of the brighter red on upper curves.
- Purple spikes: Place 550 at the base or underside of each floret cluster, 552 through the middle, and 210 at the sunlit tips to keep the spikes lively and dimensional.
- Daisy petals: Keep petals mostly B5200, but add the faintest touch of 3726 or one blending strand of B5200 + 3726 near the petal base if you want a soft natural shadow.
- Green texture: Mix straight stitch, fishbone stitch, and tiny fly-stitch leaves. Alternating stitch direction helps the bouquet look leafy rather than matted.
- Bow texture: Work the ribbon in long directional stitches that follow the curve of each loop and tail. Add a few highlight stitches of 3726 over 3716 to create a silky finish.
Beginner-Friendly Practical Tips
1) Keep the bouquet centered
Before stitching, lightly mark the bouquet’s top, bottom, and side boundaries. This prevents the flowers from drifting outward and losing the neat hoop-centered shape.
2) Work large to small
Finish the large red flowers and the bow first if you need confidence anchors. Then fill around them with daisies, purple stems, and leafy sprigs.
3) Limit strand twisting
Let the needle dangle every so often so the floss untwists. This is especially helpful for smooth satin stitching on petals and ribbon.
4) Build depth with overlap
Allow a few leaves and flower tips to tuck behind others. Even small overlaps make the bouquet look fuller and more natural.
5) Use short stitches on curves
Petal edges and bow loops look cleaner when stitch lengths shorten around tight curves. This keeps outlines smooth and prevents bulky corners.
6) Finish with tiny accents
Once the main embroidery is done, add a few French knots, leaf veins, and selective dark accents. These last details sharpen the design without overwhelming it.