
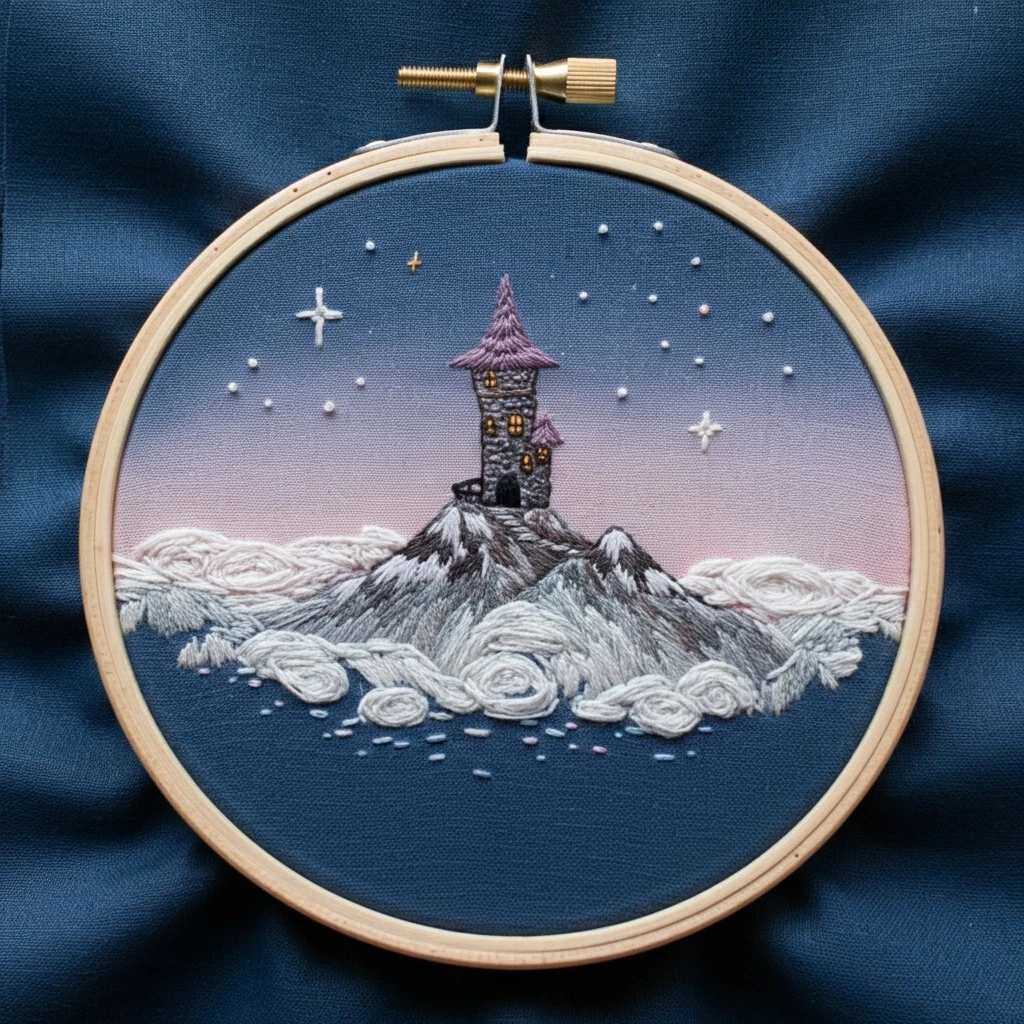
Enchanted Tower On A Starry Peak
A moonlit mountain scene with a tiny stone tower, plum fairy-tale roofs, glowing amber windows, misty white cloud swirls, snow-streaked peaks, and scattered stars over a deep blue-to-lavender twilight sky. The palette below emphasizes crisp value contrast: dark mountain crevices, luminous snow, soft mauve roofs, and warm pinpoints of light.
Polished DMC color palette
This design works best when the background stays quiet and the foreground stitching carries the drama. Use the darkest blues and grays as small anchoring shadows, reserve bright whites for the final snow and star accents, and let mauve roof tones soften the center of the composition.
Stitch map by design area
Thread-count and blending guidance
| Area | Strands | Recommended blend | How to use it |
|---|---|---|---|
| Sky gradient | 1 strand | 823 → 3750 → 160 → 161 → 778/225 | Work in loose horizontal rows. Stagger stitch lengths so the sky fades softly instead of forming bands. |
| Stars and sparkle | 1–2 strands | B5200, 762, 3823, 225 | Use one strand for tiny points and two strands only for the largest cross-stars. Add gold after all sky stitching is complete. |
| Tower stone | 1 strand | 3799 + 413 + 414 + 415 | Outline the silhouette lightly, then add irregular stone dashes. Avoid filling the whole tower solid gray; gaps help it look hand-built. |
| Roof texture | 1–2 strands | 3834 + 3041 + 3042 | Keep roof stitches angled downward from the peak. A few lighter stitches on the upper left make the roof read as pointed and dimensional. |
| Windows | 1 strand | 783 base, 742 middle, 3823 highlight | Satin stitch the tiny panes, then add a darker lower edge and a pale top-center glint. Keep black outlines extremely thin. |
| Snowy mountain | 1 strand, 2 for foreground snow | 3799/413 cracks, 414/415 mids, 762/B5200 snow | Lay dark crevice lines first, then pull pale strokes over them. Let the white strokes follow the actual slope direction. |
| Cloud bank | 2–4 strands for raised areas | 762 + B5200 + touches of 415/778 | Use thicker couching or whipped spirals for the foreground clouds, with gray tucked underneath for depth. |
Practical stitching order
1. Choose a night-blue ground
A deep navy or teal-blue fabric instantly gives the piece its enchanted night mood. Transfer only the tower silhouette, peak ridges, major cloud spirals, and large star positions so the sky remains clean.
2. Build the background first
Stitch the sky gradient and distant star field before the tower and mountain. This prevents pale snow and stone stitches from catching dark sky fibers later.
3. Add mountain structure
Place the darkest gullies in 3799 and 413, then layer 414 and 415 along the slopes. Finish with irregular B5200 and 762 snow strokes, keeping the brightest white on the ridges.
4. Finish the tower last
Work stone texture, plum roof ribbing, window glow, and the black doorway near the end. The tower is the focal point, so its outlines should be crisp but not heavy.
Shading, outlining, and texture suggestions
- Sky: keep thread tension light and stitch direction horizontal. A few single-strand stitches in 160 over 3750 will soften the blue transition.
- Large stars: make a vertical stitch, then a shorter horizontal stitch, then two tiny diagonals. Use B5200 for the cross and 762 for a pale halo.
- Small stars: use scattered French knots in one strand. Mix white, pale gray, and rare yellow so the star field feels natural rather than dotted.
- Tower edges: outline the shadow side with 3799 or 413, and the lit side with 415. This keeps the stone readable against both sky and mountain.
- Windows: place 783 at the bottom, 742 in the center, and 3823 at the top. One tiny straight stitch of 3823 can make each window glow.
- Roof cap: stitch upward toward the point, then add a few darker 3834 lines under the eaves to separate the roof from the stone wall.
- Mountain snow: use broken, slightly curved stitches instead of solid satin fill. Let dark crevices peek through for height and rugged texture.
- Cloud rolls: couch thicker white strands into spirals, then add 415 underneath the lower curves for shadows. Keep the front rolls brighter than the far clouds.
- Ground dots: stitch the tiny lavender and white marks beneath the clouds last with one strand so they look like fallen starlight.
- Doorway: use 939 or 3799 and leave it matte. A dark doorway increases the contrast with the glowing windows above.
Beginner-friendly finishing tips
Control the white
Use 762 for most pale snow and B5200 only for final highlights. If everything is pure white, the mountain loses its form and the stars become less special.
Keep the tower tiny but crisp
Use one strand for stone blocks, windows, and roof ridges. Two strands can make the tower bulky, especially around the windows and doorway.
Vary cloud thickness
Use 3–4 strands or gently couched bundles for the biggest foreground cloud rolls, but drop to 1–2 strands for distant clouds at the horizon.
Save sparkle for the end
Add star knots, window highlights, snow glints, and scattered lavender ground dots only after all major shapes are finished. These final stitches create the enchanted finish.