
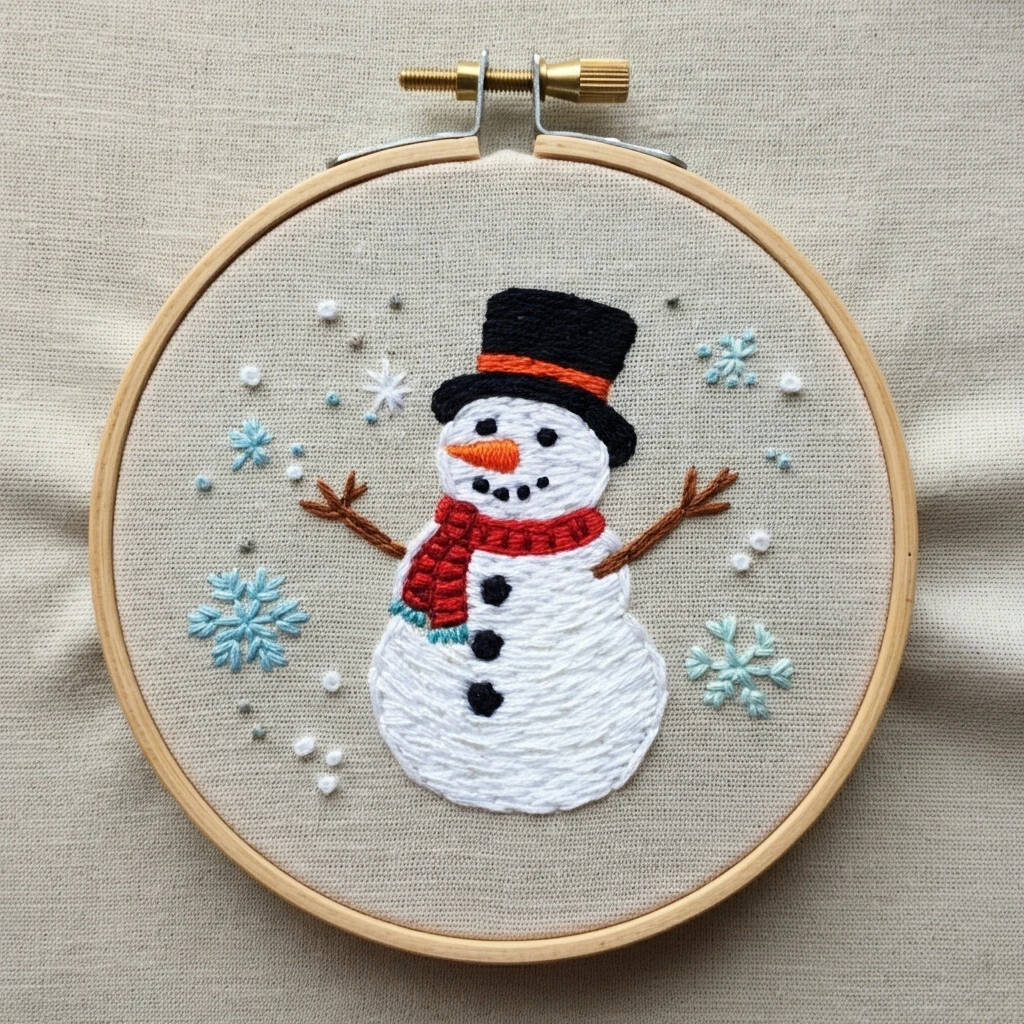
Festive Snowman
This cheerful winter hoop centers on a friendly snowman with a bright scarf, festive trim, greenery, and seasonal accents. The design shines when the snowman body stays soft and dimensional, the red details are crisp and merry, and the surrounding evergreen foliage and tiny decorative elements feel layered rather than flat.
Matched DMC Color Palette
Use this palette as a practical working set for the snowman body, hat, scarf, berries, greenery, carrot nose, and small winter accents. Where you want smoother transitions, blend one strand each of neighboring shades in the final layer of long-and-short or satin stitching.
Stitch Map by Design Area
Snowman body
- Long-and-short stitch: ideal for softly shaded snowman circles and cheek-like curves.
- Padded satin stitch: excellent for rounded sections if you prefer a smoother, fuller finish.
- Split stitch edging: adds a clean perimeter before filling and helps preserve the shape.
Hat, scarf & festive accessories
- Satin stitch: best for scarf bands, ribbon loops, and smooth hat elements.
- Stem stitch: useful for scarf outlines and curved decorative lines.
- Back stitch or whipped back stitch: gives narrow trim lines extra polish without using many strands.
Greenery, berries & accents
- Fly stitch: perfect for pine sprays and loose festive foliage.
- Fishbone stitch: works beautifully for larger leaves or holly-style greenery.
- French knots: use for berries, snow dots, and tiny sparkle points.
Thread Count Guidance
| Area | Recommended strands | Why it works |
|---|---|---|
| Facial features, fine outlines, tiny decorative dots | 1 strand | Keeps the expression neat and prevents the face from looking heavy. |
| Scarf, hat, carrot nose, medium accents | 2 strands | Provides solid color coverage with enough control for clean edges. |
| Snowman body fill | 2 strands, occasionally 3 | Gives smooth coverage while still allowing subtle shading transitions. |
| Greenery and layered foliage | 2 strands | Enough body for texture, especially when layering dark and light greens. |
| Raised snow texture or extra fluffy highlights | 3 strands | Useful for padded areas, knot clusters, or couching where you want plush dimension. |
Blending, Shading & Texture Suggestions
Rounded snowman shading
Blend 1 strand B5200 + 1 strand 762 around the sides of each snowball section, then fade to pure B5200 at the center. Add a whisper of 415 under the scarf and lower body overlap to create believable dimension.
Bright red scarf depth
Start folds in DMC 816 and transition to DMC 666 on the top-facing ridges. Satin stitches worked along the scarf direction make the fabric look soft and slightly wrapped.
Evergreen layering
Use DMC 890 for the shadow layer, add DMC 699 for the body of the foliage, and finish with a few DMC 702 tip stitches. This creates a much more natural holiday green than using one color alone.
Carrot nose shaping
Work the carrot in satin stitch from the base outward. Place DMC 947 at the lower base and along one edge, then fill most of the nose with DMC 971 so it remains bright and cheerful.
Snow sparkle texture
Scatter tiny French knots in B5200 and a few subtle dots of DMC 3756 near the outer snow edges. This adds a crisp frosty finish without turning the design blue.
Rustic trim & twig details
Use split stitch or stem stitch in DMC 838 for twig arms, rustic trim, or natural brown accents. Add short highlight stitches in DMC 437 if the brown areas need extra definition.
Outlining & Practical Stitching Tips
Outlining details
Outline the scarf, hat edge, and greenery selectively rather than outlining everything. Use DMC 3799 instead of black for a softer finish, reserving DMC 310 only for the tiniest dark punctuation marks.
Keep the face friendly
Place the eyes and smile with 1 strand and small stitches only. If the smile line feels too bold, switch from back stitch to tiny split or seed stitches so it looks sweet instead of harsh.
Texture without bulk
For a cozy scarf look, mix satin stitch with a few short directional straight stitches. For foliage, layer fly stitches rather than heavily filling the area with satin stitch, which can become stiff.
Beginner-Friendly Stitching Plan
- Transfer the main shapes first: mark the snowman outline, hat, scarf, greenery clusters, and the key facial placement points.
- Fill the snowman body: complete the white and pale gray shading before adding overlapping accessories.
- Stitch the hat and scarf: this helps define the personality of the design and locks in the festive color story early.
- Add the carrot nose and face: keep these details light and precise, using only 1 strand for the face.
- Layer greenery and berries: start dark, then add brighter green highlights and red knot berries on top.
- Finish with sparkle and fluff: add white knots, tiny golden accents, and final outline touches only after all larger areas are complete.
Quick Reference: Best Stitches for This Design
| Design element | Best stitch choices | Practical note |
|---|---|---|
| Snowman body | Long-and-short, padded satin, split stitch | Use pale gray only at the edges and overlaps; keep the center mostly bright white. |
| Scarf and ribbon accents | Satin stitch, stem stitch, whipped back stitch | Follow the curve of the fabric so it looks wrapped and slightly soft. |
| Face and buttons | Back stitch, seed stitch, French knots | Keep to 1 strand to preserve a delicate, friendly expression. |
| Carrot nose | Satin stitch | Shade with darker orange at the base for a rounded nose rather than a flat triangle. |
| Pine and leafy greenery | Fly stitch, fishbone stitch, detached chain | Layer dark green under brighter tips for natural depth. |
| Berries and snow sparkle | French knots, straight stitch | Scatter in small groups so the design feels festive but not crowded. |