
DMC Palette & Practical Stitching Notes
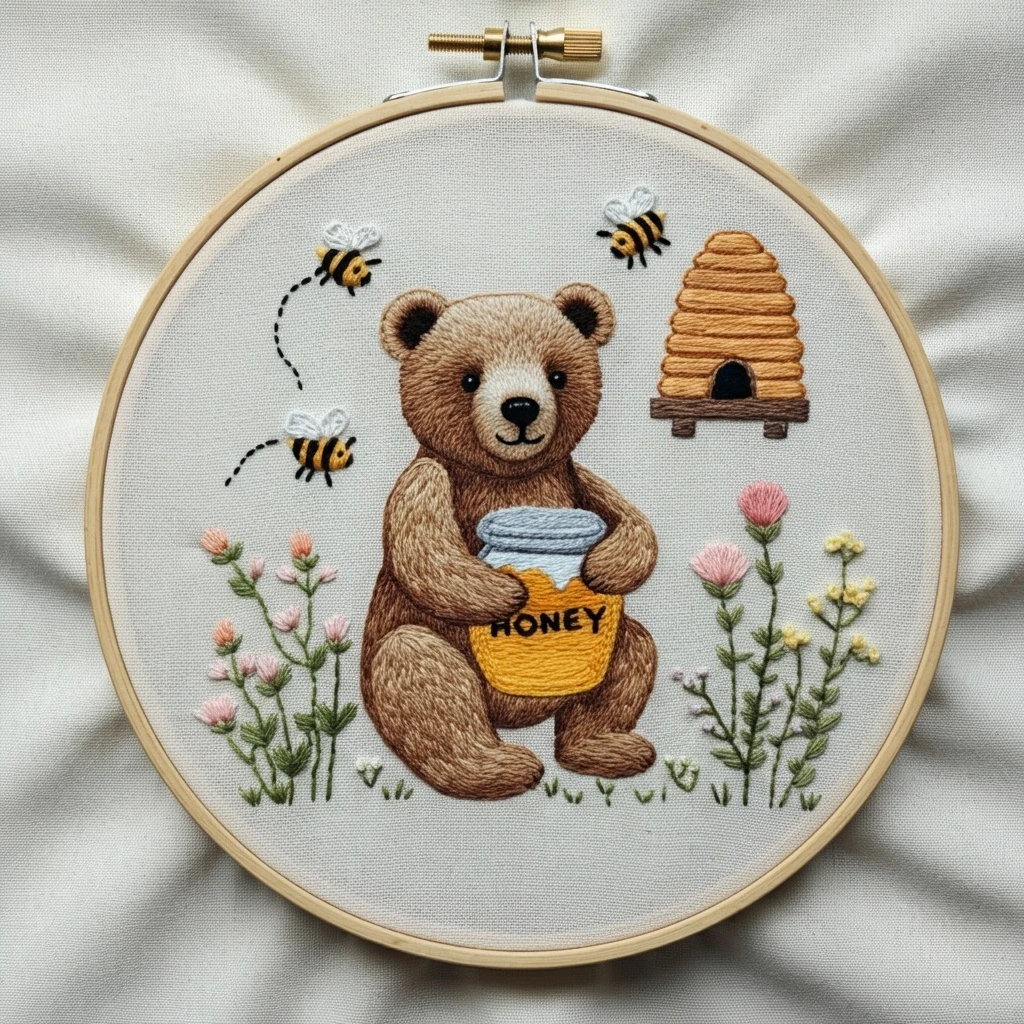
Hand Embroidered Bear with Honey Pot and Beehive
A warm woodland motif built around a soft brown bear, glowing honey golds, straw beehive curves, tiny bees, and cozy natural accents. The palette below keeps the design friendly and storybook-like while still giving enough contrast for fur, honey shine, and small details.
Design Color Read
This design is led by caramel, golden yellow, and chestnut brown tones. The bear needs soft layered browns rather than a flat fill; the honey pot and beehive benefit from rounded bands of yellow ochre, amber, and pale highlight. Small bees and outlines need crisp dark accents, while any leaves, grass, or floral sprigs should stay muted so the honey elements remain the focus.
Best fabric choice: natural linen, oatmeal cotton, or warm cream fabric. Avoid very dark cloth unless you brighten the yellow palette one step, because the honey and bee details can disappear.
Thread Count Snapshot
Suggested DMC Palette
Stitch Plan by Area
Bear fur
Use long-and-short stitch in 2 strands for the face and 3 strands for the body. Change stitch direction around cheeks, belly, and ears to suggest soft rounded fur.
Honey pot
Satin stitch the pot body in horizontal sections, then add curved backstitch lines in 3826 and tiny 744 highlights along the rim and honey drips.
Beehive
Work curved rows of split stitch or stem stitch. Alternate 726 and 783, then place 3826 along lower arcs to make the hive feel dimensional.
Bees
Use 1 strand for the smallest bees: straight stitches for wings, tiny satin stitches for yellow bodies, and one dark backstitch for the stripe.
Leaves and ground sprigs
Fishbone stitch gives leaves quick shape. For tiny stems, use stem stitch in 3012 and add one-strand 3013 highlights on the light-facing side.
Blending & Shading Ideas
- Bear transition: blend one strand 3862 with one strand 3864 for mid-fur, then switch to two strands 3864 around the muzzle.
- Honey glow: blend 726 + 783 for the main honey pool; add isolated 744 straight stitches only where light would catch.
- Hive depth: keep the top of each hive band lighter and the underside darker. This simple rule makes the hive read as rounded.
- Soft outlines: use 3371 sparingly. Outline only the nose, eyes, bee bodies, hive opening, and a few underside edges.
Texture Suggestions
- Fur: stagger short stitches at the edge of the bear instead of making a hard satin border.
- Honey: add a few raised French knots in 726 or 744 at drip tips for glossy droplets.
- Beehive: couch one strand of 783 along the hive curves for a neat rope-like straw texture.
- Wings: use 822 with open fly stitch or two detached chain stitches; leave fabric showing through for transparency.
Outlining Details
Use backstitch for clear cartoon-style edges, but keep the line weight varied. A single strand is enough for facial features and bee wings; two strands suit the honey pot, hive opening, and paw curves. For a softer handmade look, replace some outer backstitch with split stitch so the bear remains plush instead of graphic.
Beginner-Friendly Tips
- Stitch the large bear shapes first, then add the pot, hive, bees, and tiny greenery last.
- Keep all satin stitches short; split big fills into smaller sections to prevent snagging.
- Use a washable guide line for the hive curves so the bands stay even.
- Test the darkest brown on scrap fabric before outlining; one strand often looks cleaner than two.
- Press from the back on a towel so French knots and honey texture are not flattened.